Adobe, Alien Skin, On1, and DxO have all released new versions of their photo editing applications in the past month or so. They all have features that will appeal to some photographers, but not to others. I've already reviewed the new features in Lightroom Classic, Exposure X4, and Photo Raw. Now it's time for PhotoLab 2.
Based in France, DxO boasts about its engineering prowess and that's quite visible in the second version of PhotoLab: The capabilities are uncommonly powerful, but the interface is somewhat cluttered and more confusing than in competing applications. Don't allow that to deter you from taking a look. All of the photo editing applications have trial periods, so I recommend downloading some or all of the trials and working with each one for a week or two. You may find that you'll want more than one of the applications to take advantages of each application's strengths.
Click any of the smaller images for a full-size view. To dismiss the larger image, press ESC or tap outside the image.
One of the most remarkable new tools is called ClearView and it can be used to cut through atmospheric haze to produce a clear image, but it can also be used to enhance contrast and detail without introducing a color shift.
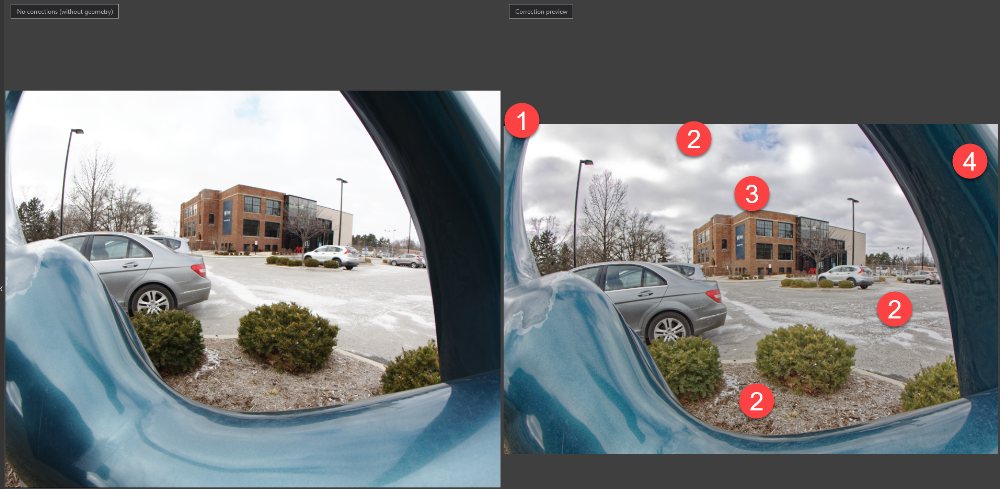 PhotoLab 2 can dramatically improve an image. Here's an example. I started with an extreme wide angle image from the McConnell Arts Center in Worthington, Ohio. The view is through a piece of art that is near the parking lot. The image needed to be cropped (1) and straightened (3). Several areas (2) had only minimal detail and a shadowed area in the artwork (4) was so dark that there was no detail. After applying several of DxO PhotoLab 2's adjustments, I had a much better image.
 When you open the application, you'll see the Photo Library view. Select a directory and you'll see thumbnail images of all the photographs in that directory. Selecting an image shows a larger view.
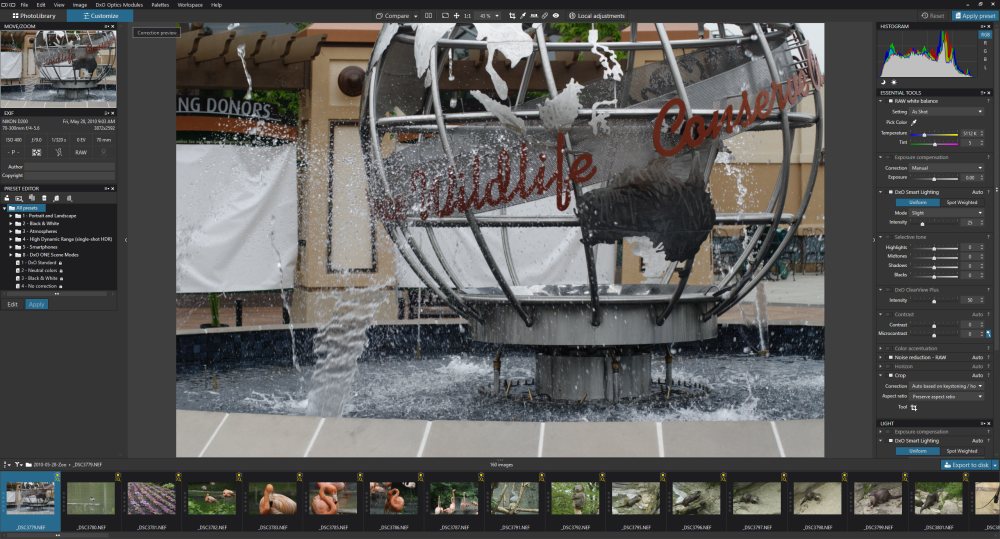 Double clicking an image opens it in Customize mode. The Move/Zoom view is on the left, along with EXIF information and the presets editor. Although it was created on a day with bright sunshine, this image is dull. The keys to adjusting the image are at the right. At first glance, the number of options might seem overwhelming. And at second glance. And third glance. If an adjustment is active, it will be highlighted and the small box at the left of the description will be bright. Each adjustment also has a disclosure triangle that can reveal specific associated adjustments.
As with most applications, the key to learning how these settings work involves working with them. The changes you make are non-destructive, so change anything you want.
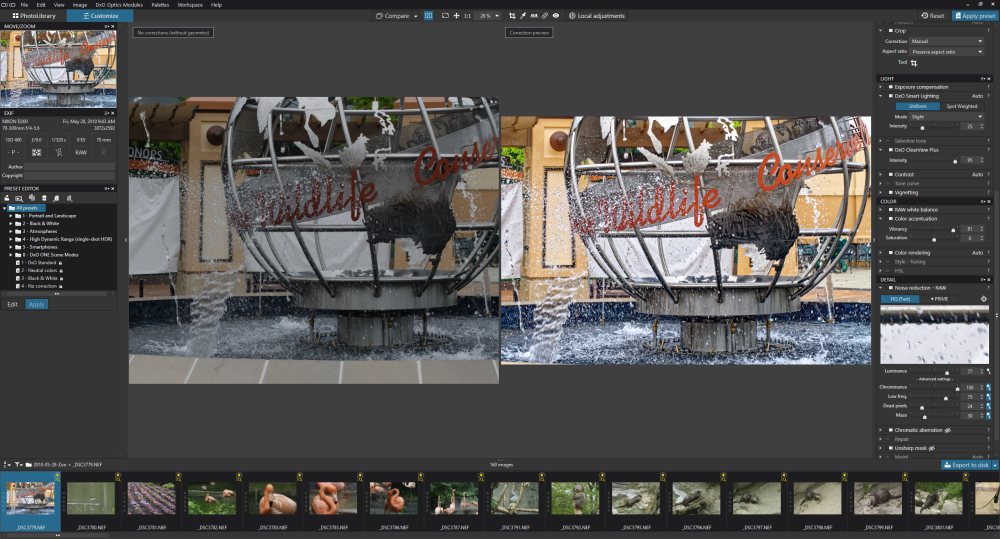 I felt that an image of a combined globe and fountain at the Columbus Zoo needed a bit of cropping, but primarily it needed to be more vibrant. The image on the left is the starting point and the image on the right shows the enhancements. The adjustments create a photograph that's more like what I remembered from the day I took the picture.
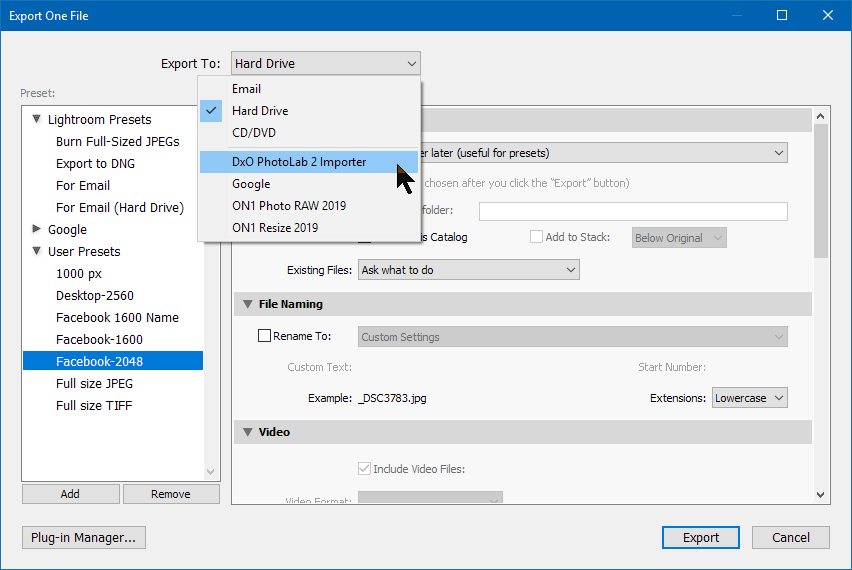 If your primary application is Lightroom, you will want to be able to include changes made to images in PhotoLab. If you've made changes in Lightroom, you could export the image to the DxO PhotoLab 2 importer and then open it in PhotoLab.
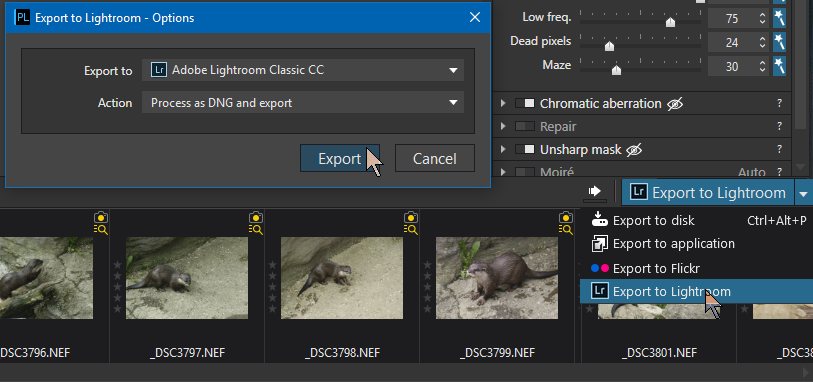 If you haven't made changes in Lightroom, then just opening the image in PhotoLab, editing it, and exporting the changes to Lightroom is the way to go.
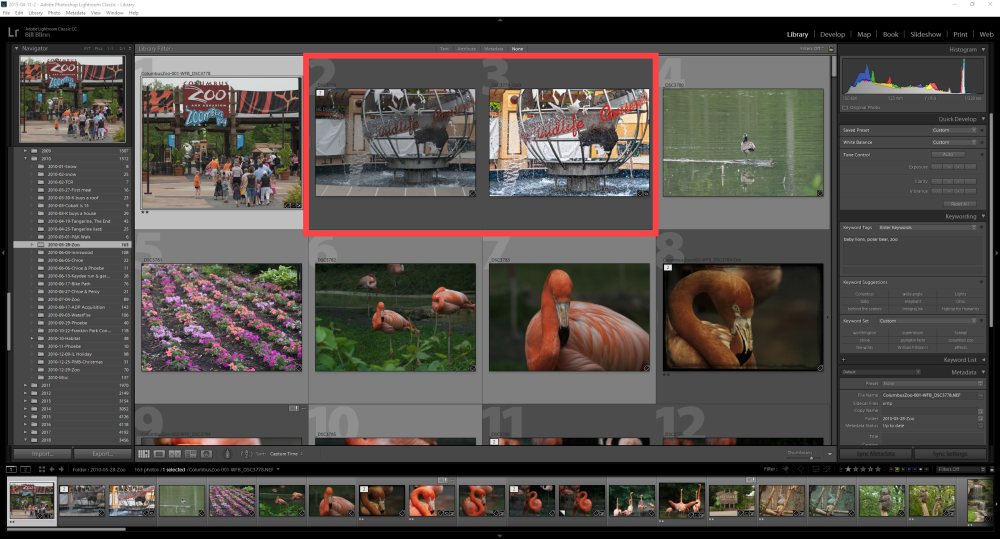 When PhotoLab exports the image to Lightroom, it will create an entry in the Lightroom catalog and the image will appear in Lightroom's library view.
 To see how much difference ClearView can make, I selected an image from September 2000 -- 18 years ago, when digital cameras were far less capable than they are today. The image from the Olympus OC2500L was only 1712x1368 pixels and, making the situation even worse, it was a jpg image that had been processed in the camera. The photo was taken from the window of a hotel in San Diego and there's a substantial amount of haze throughout.
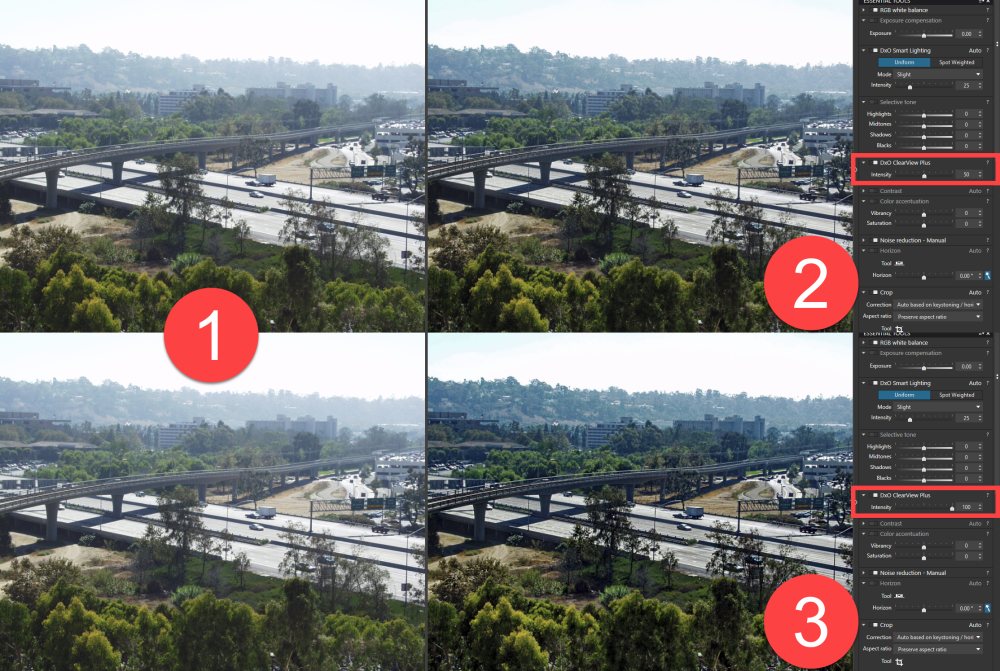
ClearView Plus has intensity settings from 0 to 100. When removing haze, the resulting image often suffers from lines along horizons and around trees and buildings. DxO's software engineers seem to have eliminated that problem along with the unwelcome color shift that also seems to accompany haze removal.
Both of the images on the left (1) are as the photo came out of the camera. On the right you'll see (2) one modified photo with ClearView at 50 and (3) a modified photo with ClearView at 100.
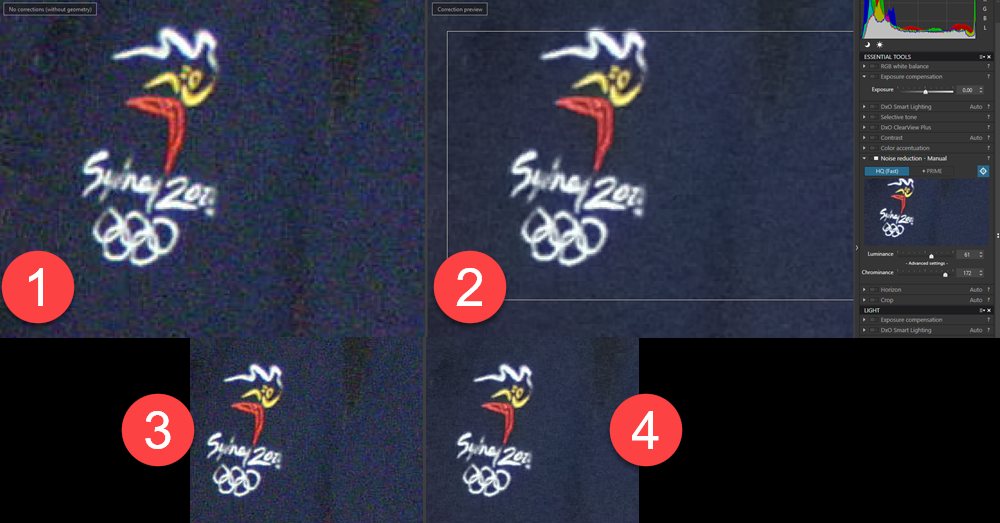 Another significant improvement is PhotoLab 2's noise reduction capabilities. Noise comes in two varieties: chrominance (random areas of color) and luminance (random white spots). Luminance noise is similar to grain found in film images and it's less objectionable than chrominance noise, which adds color that wasn't present.
Correcting noise should be done at 100% magnification or more. This is another image from San Diego in 2000. The (1) blue shirt shows a lot of chrominance noise, which has been reduced considerably (2) on the corrected version at the right. Removing noise always softens the image slightly, but at a 100% view (3 and 4, uncorrected on the left and corrected on the right), the sharpness holds up remarkably well.
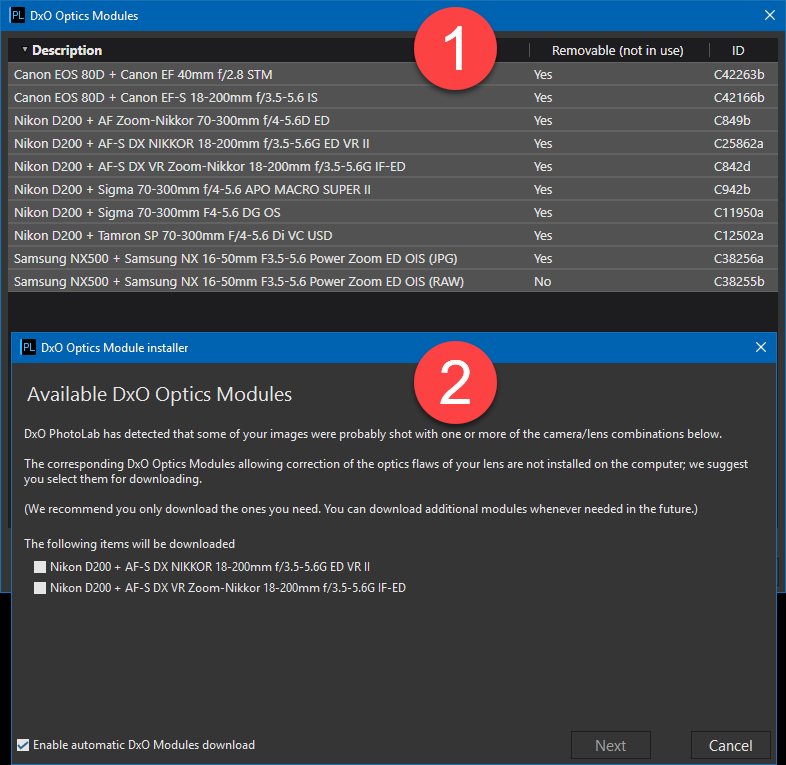 PhotoLab2 automatically corrects the optical aspects of known lenses and it seems to know about most lenses. The program doesn't come with specifications for every possible lens and this is an intelligent choice because no photographer has every lens from every manufacturer.
You can (1) examine a list of installed lens specifications, but there's really no need to do this because when PhotoLab detects photographs that use a lens that doesn't have an installed optics module, it (2) simply offers to download and install the needed modules. This takes just a few seconds.
PhotoLab 2 includes a search engine, but users might be puzzled if they type a search term before indexing one or more directories. Until an index has been built, the search function will return no results. Creating the index can take quite a while if you have a large collection of photos, but it's quite an index. The user types a number or word into the search box. It takes a little getting used to, but then you wait for the results. Pressing Enter cancels the search. PhotoLab shows how many images have a matching ISO, shutter speed, focal length, camera type, file name, rating, subject name, and doubtless some that I haven't thought of.
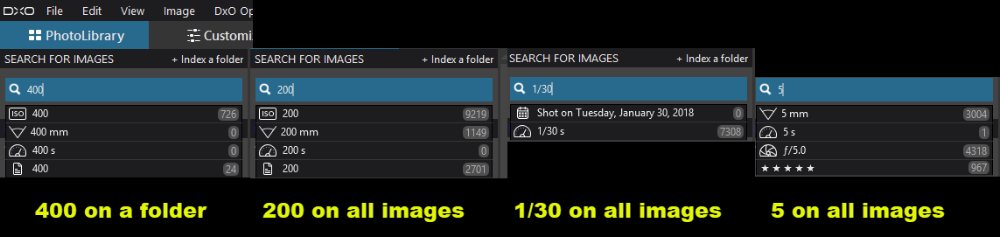 I selected a single annual folder and typed "400". The search showed 726 images made at ISO 400 or 24 images that contained 400 in the file name. Searching all images for "200" returned 9219 images shot at ISO 200, 1149 images made with a 200mm lens, and 2701 with 200 in the name. When I tried "1/30", I got 7308 images taken with a shutter speed of 1/30th and 0 images made on January 30, 2018. Searching for "5", I got 3004 images taken with a 5mm lens, 1 with a 5-second exposure, 4318 taken with a lens aperture of f/5, and 967 images with a 5-star rating.
There might be a way to combine search terms, but I wasn't able to find it. The search function, as impressive as it is, needs some improvements. By default the database files are placed on drive C in AppData > Roaming > DxO > DxO PhotoLab 2 > Database. That's appropriate for people who have only a single disk drive, but most serious photographers have more than one and may not want to clutter the computer's boot drive with those files, particularly if the boot drive is a relatively small solid-state device. I changed the location in the Preferences dialog and moved the files to another drive.
It will be interesting to see how this application develops over the next few months. Some artificial intelligence functions are planned and that could allow the search function to be upgraded substantially.
Despite the somewhat unusual interface that may seem complicated at first, PhotoLab is well worth looking at and taking the needed time to understand how it works.
PhotoLab 2 is offered in 2 versions: Essential at $130 (introductory price $100) and Elite at $200 (introductory price $150). The introductory prices end on 18 November. The Essential version allows for activations on 2 computers, and includes local adjustments, repair tool, lens sharpness, raw conversions, high-quality noise reduction, optical corrections, smart lighting, spot weighted mode, selective tone, image editing tools, red eye correction, batch processing, a customizable workspace, full screen mode, integrated export, a connection to Adobe Lightroom and more. The Elite edition allows for activation on a third computer and adds prime noise reduction, ClearView, anti-moiré tools, ICC profiles, DCP profiles, color rendering profiles, multiple exports, preset editing, partial preset creation, and customized palettes.

 New features make PhotoLab 2 a contender
Powerful photo manipulation tools advance DxO's PhotoLab 2 far from the original PhotoLab.
Although ClearView and noise reduction are remarkable, there are many other worthwhile features. PhotoLab applies the settings it feels are appropriate automatically, but it's easy to override the automatic settings or to turn them off. If you're trying a variety of applications, make sure you include PhotoLab 2 on your short list.
Additional details are available on the DxO website.
I still miss the big cat names Apple once used for its operating system versions even though the last big cat was 10.8 (Mountain Lion) and the just-released Mojave is version 10.14. So the last of the cats expired 5 years ago. Mojave adds some features that will be popular.
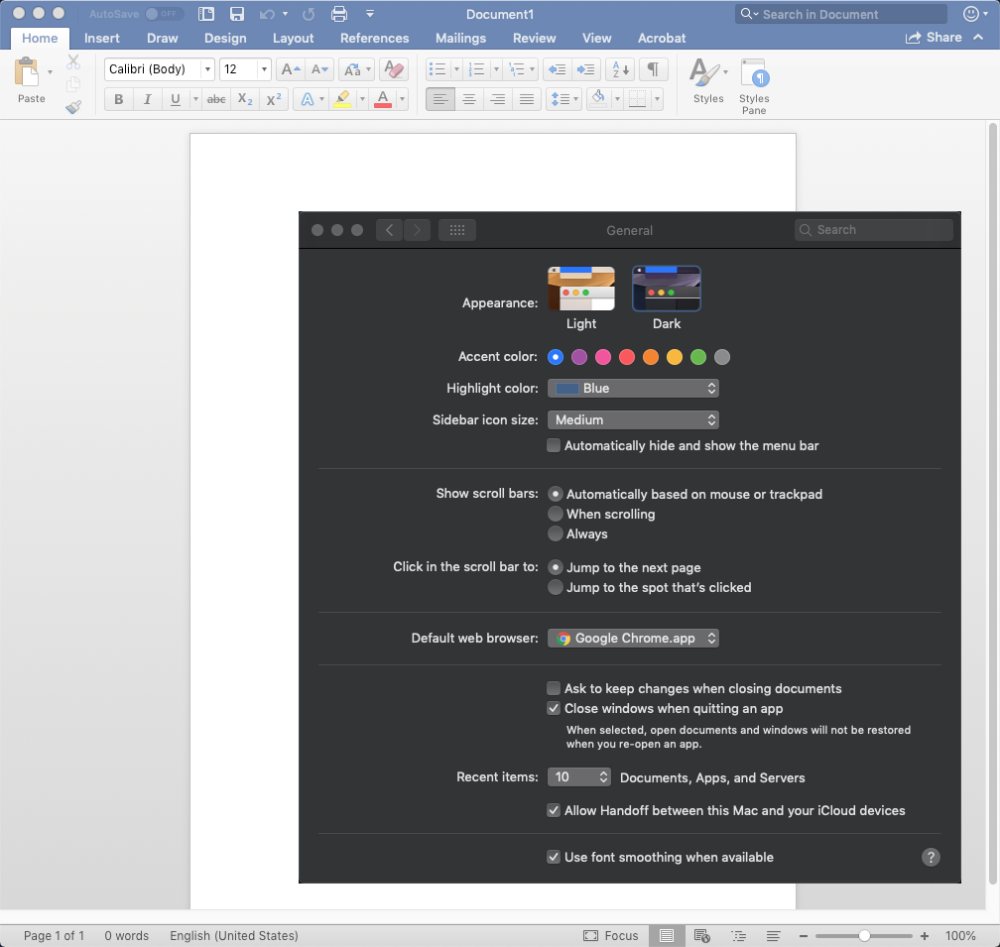 Go over to the dark side: The MacOS has been bright since the beginning, but now a Dark mode has been added. Those who spend a lot of time staring at the computer screen will probably appreciate this, as will those who use their computers in areas without a lot of ambient light. Although the display mode is honored by the operating system and apps from Apple, most third-party apps (including Microsoft Office) don't yet support it.
Built-in better screen shots: Those who need to create a lot of screen shots will almost certainly still want to use SnagIt, but Mojave improves the built-in capability for those who need just an occasional screen shot. Press Shift-Cmd-5 (yeah, that's memorable) and a floating dialo box appears. You'll have more control over screen shots and video recording, but it's still not SnagIt.
Be more secure: Apple is trying to improve privacy and security by adding app-specific settings so that users can control which applications have access to various services and functions. Analytical data that's sent to Apple following a crash can contain a lot of personal information. Users can now limit what's sent.
Stack those icons: You've doubtless seen screen shots of Macs with what appears to be hundreds of icons on the Desktop. Maybe your Desktop suffers from that kind of disorganization. Mojave offers Stacks. Right click the desktop and enable stacks. This will collect files into groups depending on the file type.
For big-time Apple fans: For those who have bought in to the entire Mac ecosystem, it's possible to use the Iphone's camera to scan a document and send it to a desktop Mac. Those who use FaceTime will be able to set up group chats with up to 32 devices. Mobile devices need to be running IOS 12. If you're a fan of Stocks on an IOS device, the app will be a welcome addition to the desktop.
News and Home: News is one of two new apps that collect stories based on your interests and Home interacts with various smart devices so you can turn on the lights upstairs on or off without actually having to go there.
Libraries do far more than lend books these days. Many offer access to educational sites such as Lynda.com and provide on-line access from your home to reference and research services. Patrons can also read ebooks, listen to audio books, and read magazines on-line using Libby, a new service from Overdrive.
 I didn't check every library in the world, but I did confirm that Libby is available from any member library in the consortium of 17 central Ohio libraries, the NY Public Library, my home town's Logan County Libraries, and public libraries in Chicago, Seattle, Los Angeles, San Diego, Omaha, Salt Lake City, Nome, Toronto, Vancouver, London, and Berlin, but apparently not Moscow or Beijing. So based on that spot check, it's probably safe to assume that a library near you offers access.
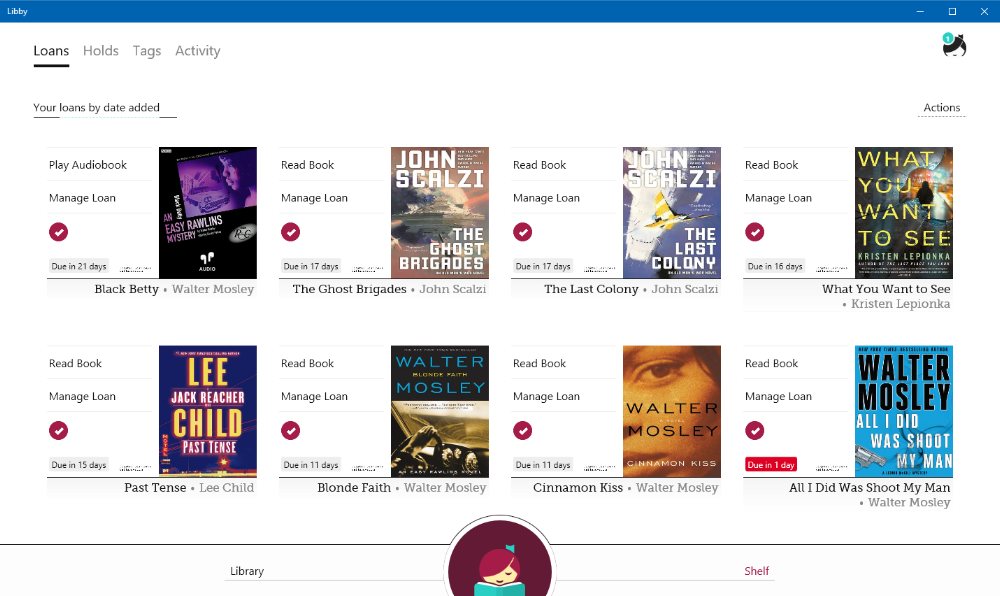
Libby displays books you've checked out (right) and available books (left).
 OverDrive began providing digital content for library patrons in 2002. Two years later, DRM-protected audio-books were added. Starting in 2005, OverDrive installed download stations at some public libraries and added music to its offerings. A year after that, videos were added and in 2007, the service was expanded to some schools.
 Electronic book offerings include fiction, nonfiction, reference, and technical books. Fiction, self-help, motivational titles, and classical music comprise the audio offerings. OverDrive videos include travel, instructional, concerts, and classic feature films. Depending on licensing, some audio-books and classical music can be burned to CD.
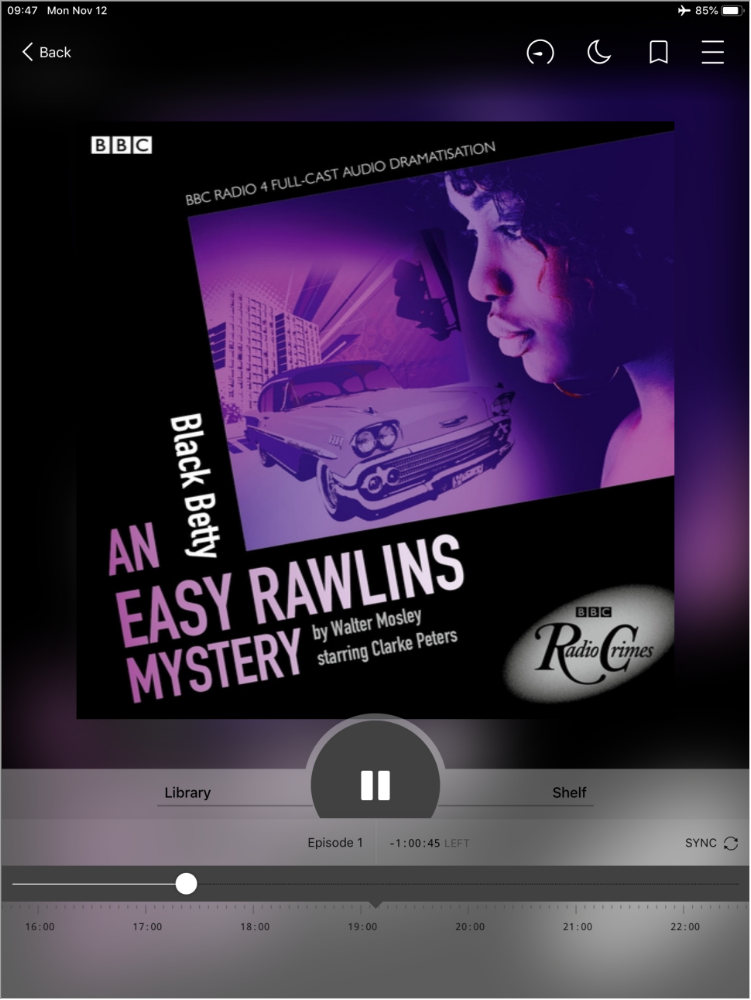
The image at the right shows an audio book playing on an Apple Ipad.
The new Libby app is available for Apple and Android devices, as well as Windows and MacOS desktop systems. If you prefer another reader, materials may not work with them. Books can be downloaded to Adobe Digital Editions, for example, because that application understands digital rights management. Likewise, some titles can be downloaded to Kindle devices, but not always to Kindle readers on computers, phones, or tablets. The Libby app is a good choice for those who might want to read or listen to materials on multiple devices.
To obtain Libby, which is free for any device, you can start at your library's website or the Overdrive website, which will direct you to the appropriate file. To use the app, you'll need to associate it with one or more library cards.
Some Windows 10 users have reported receiving a faulty message from Microsoft that tells them they must downgrade from Windows 10 Pro to Windows 10 Home. The key term in that sentence is "faulty message".
Microsoft says that there was a problem with activations for what they termed "limited number of affected Windows 10 Pro customers". That could be 15 users or 15 thousand. The problem appears to have been in Microsoft's activation servers and the company says that it has been resolved.
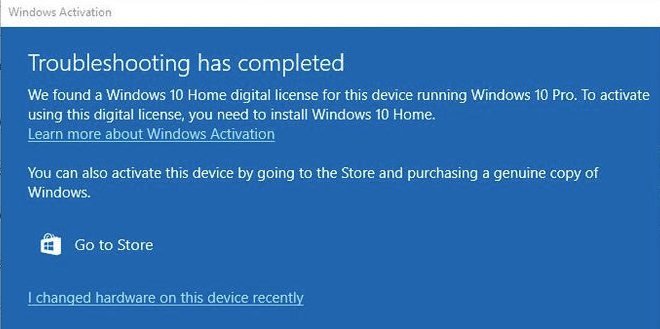 Users saw a warning that said the license key was invalid for the Pro edition and that they should download and install the more limited Home version instead. Users were also offered the option to purchase a key for the Pro version even if they already had a legitimate, genuine key.
The problem affected users who had upgraded Windows 7 or 8.1 systems as well as people with computer that had been sold with Windows 10 Pro installed. Users in North America, Europe, and Asia were affected.
Overall, October was not one of Microsoft's better months. Problems early in the month caused the company to halt the roll-out of the October Update because the update had the unwelcome propensity to delete files and folders. When the company fixed that problem, users of some HP systems reported that their computers repeatedly crashed.
Maybe November will be better.