Few people use film these days. But many of us still have old negatives and color slides around the house. Maybe you've looked in to having the images digitized, but didn't like the price or the quality. Or both. This week, let's explore how you can do the work at home.
I used a well known and highly recommended service to have some slides digitized. They did an OK job and they scanned at high resolution, but there were several things I didn't like about the service:
I didn't want to send color negatives to the service, so I decided to do it myself when I had time. I now have time.
Determining which slides to send for scanning is fairly easy: Just put them on a light table and select the good ones. Negatives are another story entirely and I have far more negatives than slides. At half a dollar or more per image, having a service do them all so that I can sort through them and toss out probably 80% of them wasn't feasible. That's yet another reason that I decided to see what I could do at home.
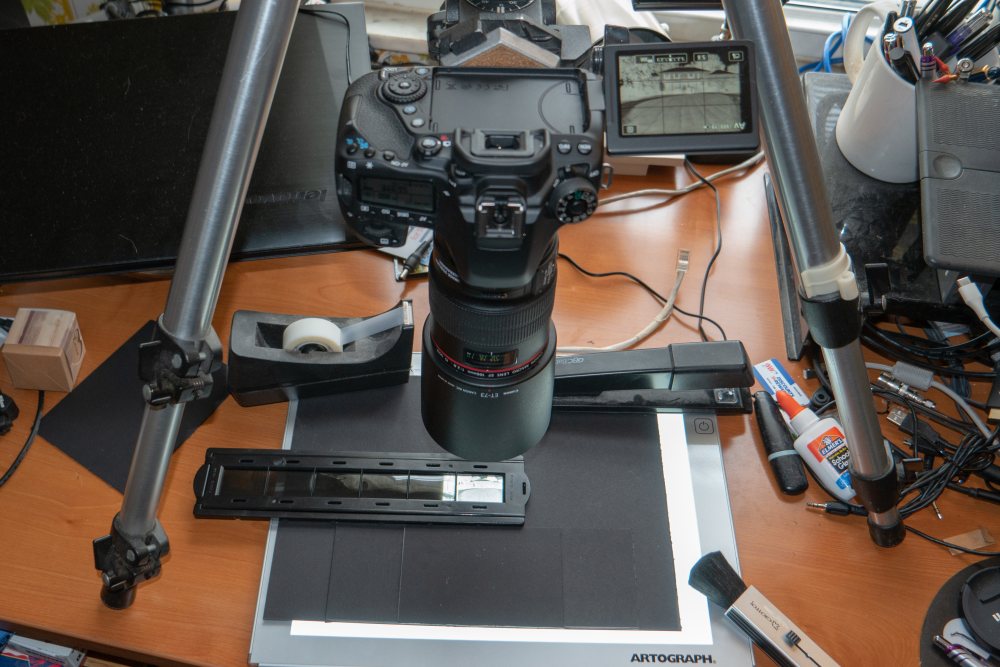
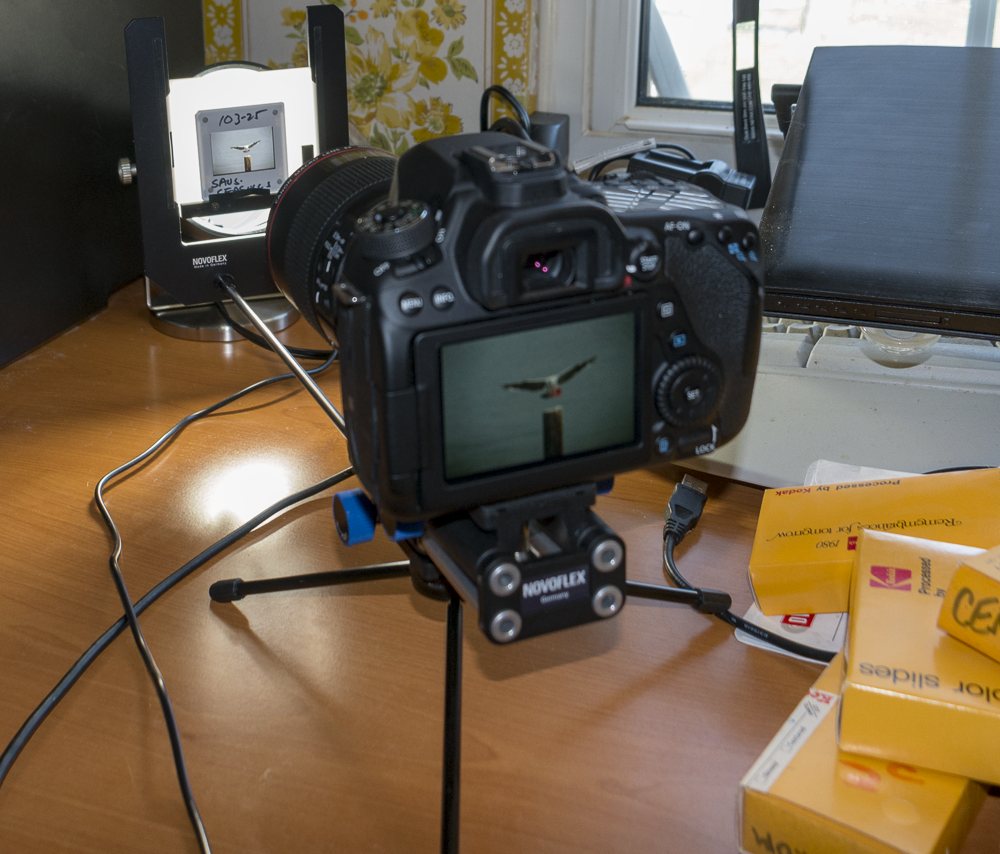 I wanted to use a camera and already have a good macro lens, but I needed something to hold the slides. Novoflex close-up rails and a slide-copy stage are seriously overpriced, but they're the only game in town unless you want to make your own or use a film scanner. You'll also need either a macro lens or extension rings for a more normal lens.
Fuji recently announced that it will discontinue sales of black & white negative film and despite Paul Simon's 1973 song extolling the virtues of the film, digital photography killed it. Kodak stopped manufacturing Kodachrome in 2009 and discontinued processing for Kodachrome at the end of 2010. In early 2017, Kodak considered reintroducing Kodachrome, but later announced that it probably wouldn't happen.
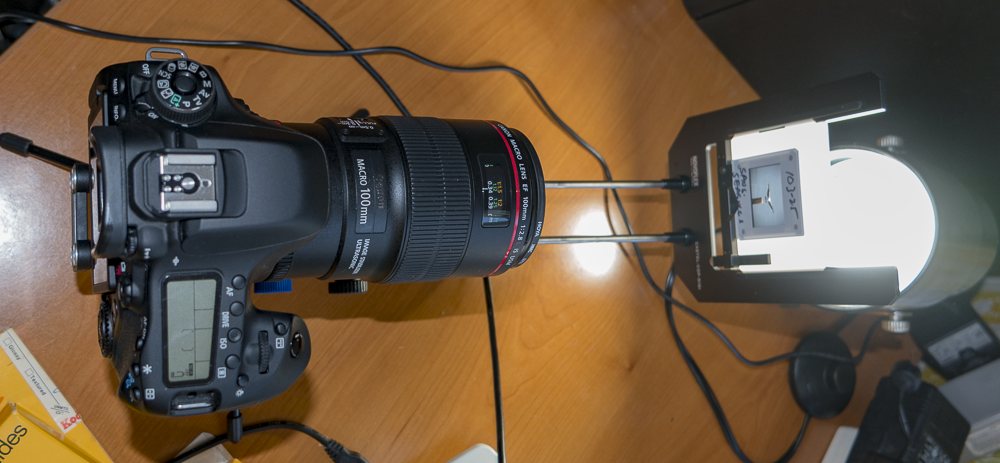 The primary requirements are a solid base for the camera and a light source with a reliable color temperature. I selected a 5000° Kelvin LED bulb.
Copied images should be photographed using the camera's raw mode so that you'll have the maximum amount of control later. Even if you have prints of the images, digitizing works better if you start with the color slides or negatives.
Negatives, particularly color negatives, make the process quite a bit more challenging.
 Starting with a transparency or a negative instead of a print allows the digitizing process to capture the greatest amount of detail. Prints have a smaller dynamic range than film does. Prints may also have a color cast that was introduced by the lab and if the lab used textured paper, the texture will show up in the copies.
Even a point-and-shoot camera will often be capable of capturing transparencies and negatives, but the best results will come from a digital SLR or mirrorless camera with a macro lens. I used a 100mm macro lens, there are ways to convert even a standard lens so that it can focus close enough to work.
Numerous YouTube videos cover the basics.
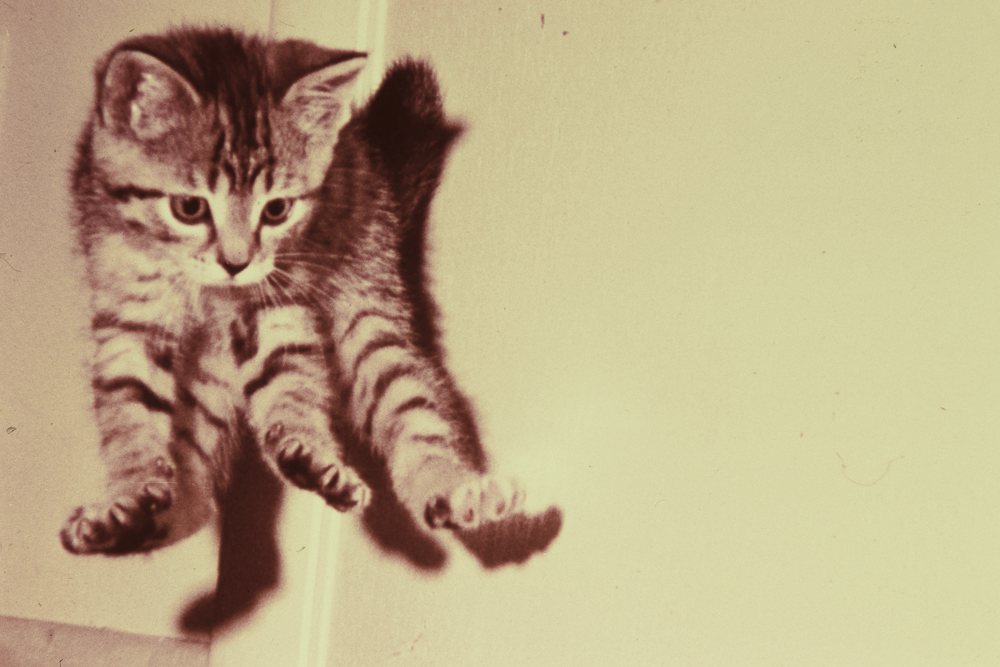 Some of your old slides will be badly faded, as this one from about 1970 was. The door and wall in the background were white, but the kitten's color was wrong when I corrected for the door. Not every old image can be restored to perfection. This picture appears to have been taken on Ektachrome slide film and it has not aged well. Kodachrome generally ages better than Extachrome.
Kodachrome required special processing that was environmentally unfriendly and at one time only Kodak could process it. Ektachrome could be developed by any lab or at home with standard E-6 processing.
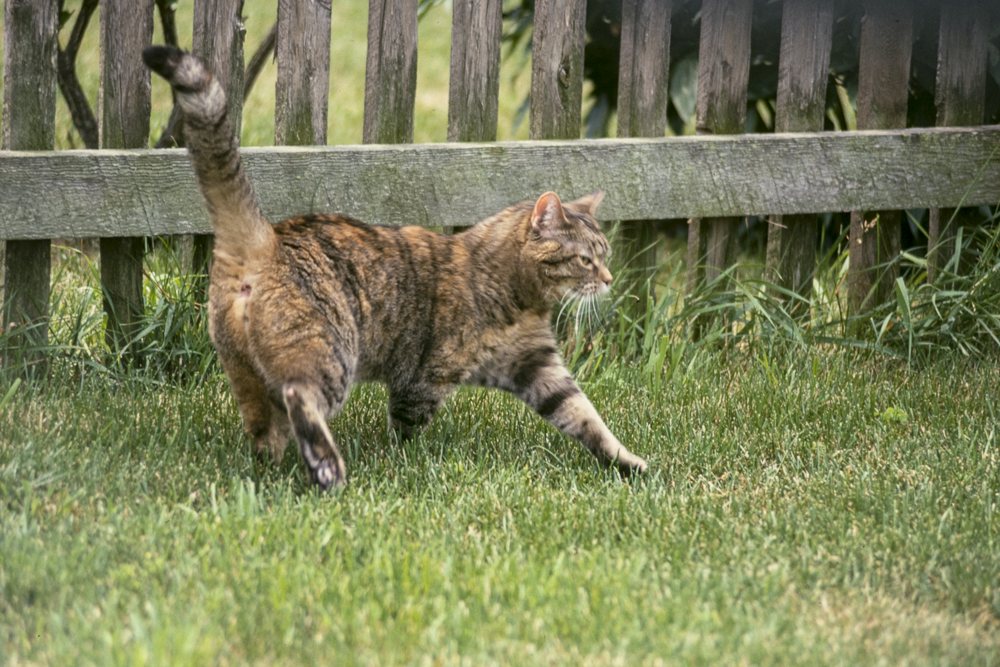 This is the same cat a year or two later and it was taken on Kodachrome.
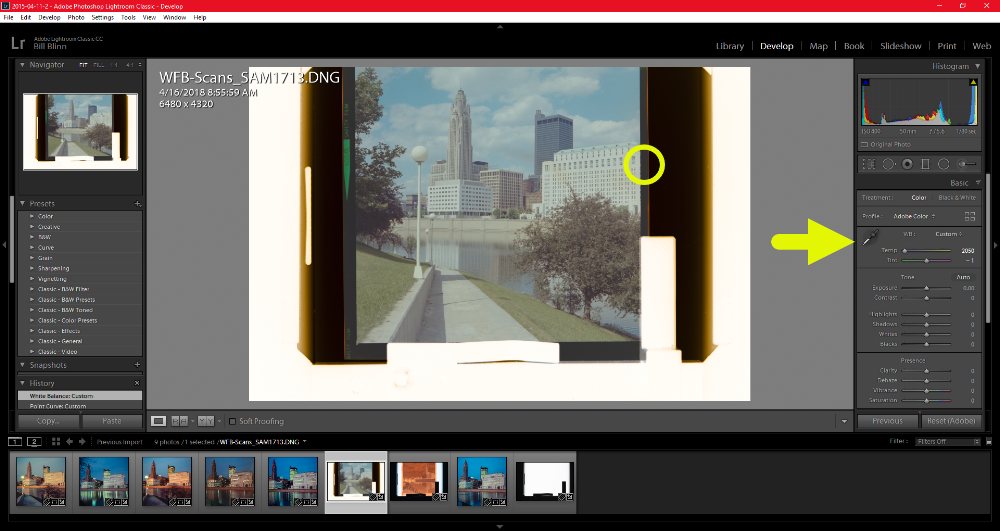
The gray fence in the background was helpful in setting color balance. Most photo applications have an eye-dropper tool you can use to specify something that should be neutral gray. If there's no gray fence handy, roads and sidewalks are usually good secondary choices.
As Paul Simon explained it: "Kodachrome: They give us those nice bright colors. They give us the greens of summers. Makes you think all the world's a sunny day."
Negatives are going to be more difficult and color negatives will be even harder to work with because of the orange cast that's used for reasons far too complex and arcane to even begin to think about here.
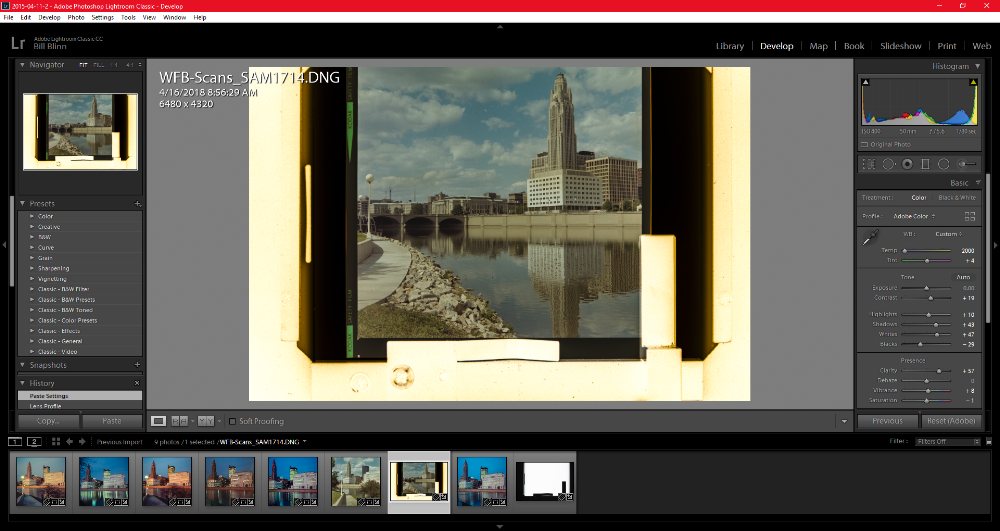
 I found some medium-format transparencies and negatives from 1975. The images are square from a Mamiya twin-lens reflex camera. Two of the images are negatives.
Twin-lens reflex (TLR) cameras generally use 120 and 220 roll film and produce square 6×6 cm images. The top lens is used for viewing and composing the image and the bottom lens is the one that delivers light to the film. Only the Chinese Seagull and Lomography Lubitel twin-lens cameras are still in production.
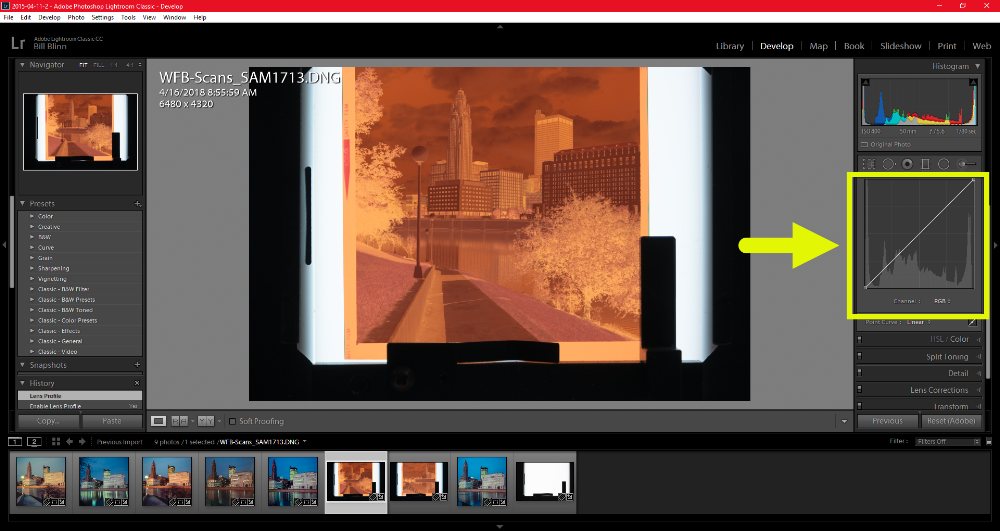 I'm demonstrating the process with Adobe Lightroom, but any photo editor that has a tone curve adjustment will work. Note that the diagonal line on the tone curve starts in the lower left corner and ends in the upper right corner. This is a graphic illustration of input to output: Dark input produces dark output.
If you're working with a negative, this has to be reversed so that dark input produces light output and light input produces dark output. This is done by reversing the tone curve.
 You should have the option of working with the composite (RGB) tone curve or with the individual channels (red, green, and blue). You'll get the best results if you choose to work with the individual channels, but I show the composite tone curve here.
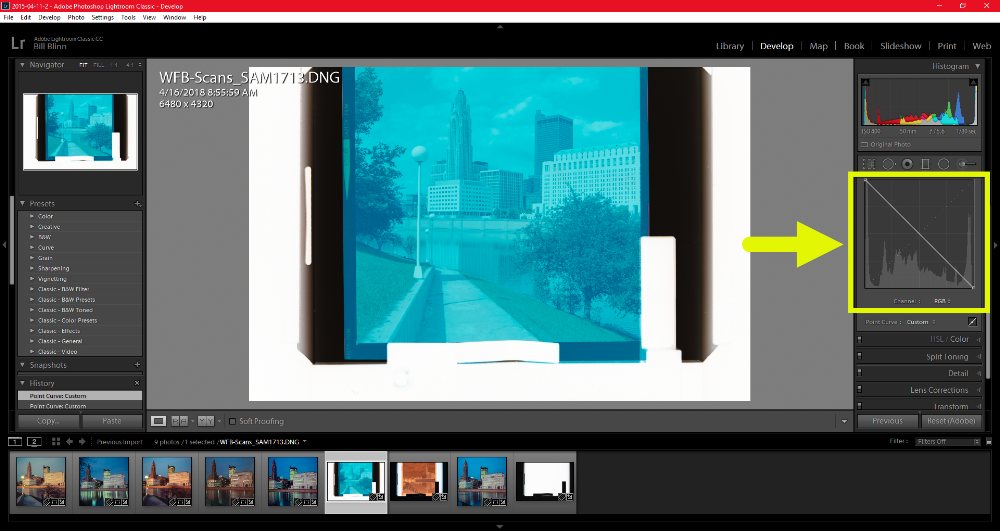
I have reversed the tone curve (it now starts in the upper left and ends in the lower right.) The colors are now positive and the orange cast has been replaced by a cyan cast. The next step involves getting rid of that cast.
Note that my photograph includes some areas between images where there's nothing but unexposed film
 After using the white-balance eye-dropper on the unexposed part of the film, I got colors that are accurate, but muted.
Earlier I mentioned working with the individual red, green, and blue color channels. If you do that, the image will have better contrast and colors when you get to this point. So working with the individual channels will make the initial process take longer, but you'll spend less time tweaking the image and the overall results will probably be better.
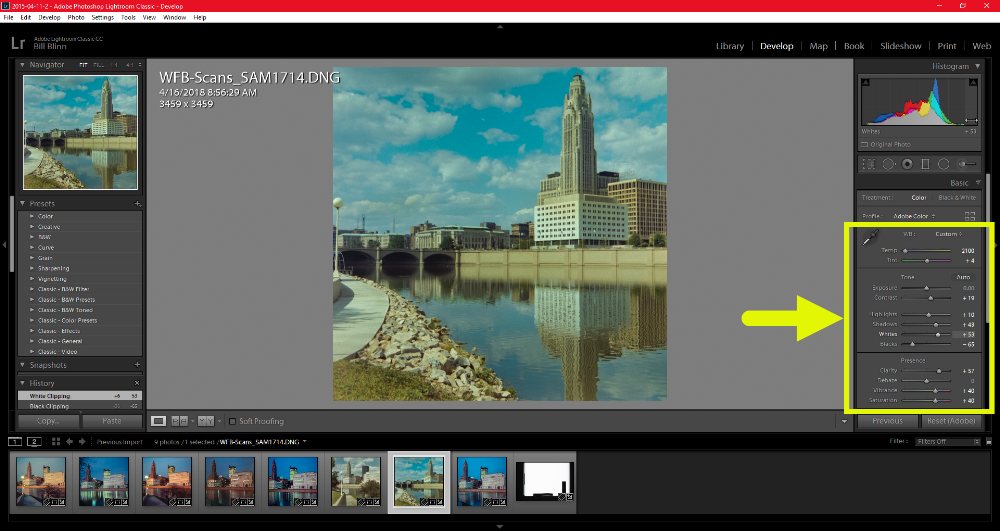 When you adjust the colors and contrast, you'll be surprised by how several of the controls function. Most will do the reverse of what you expect. The reason is obvious once you think about what you've done so far: Converting a negative image to a positive image.
One of the earliest steps involved flipping the tone curve to make the dark areas light and the light areas dark. So now when you adjust whites and highlights, you'll affect shadows and blacks; when you adjust shadows and blacks, you'll affect highlights and white.
Color temperature and tint will also be both reversed and sensitive.
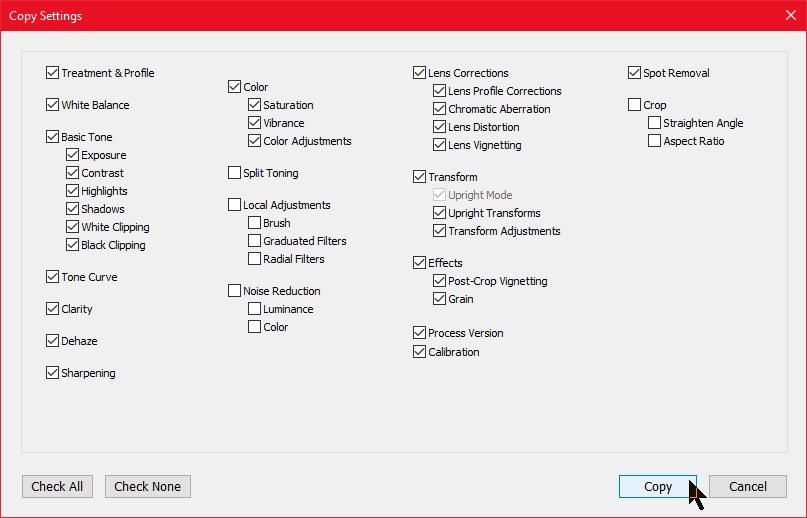 Once you have an image adjusted the way you want it, you can use the settings as a starting point for other images. Lightroom allows users to copy any combination of settings and then apply those settings to one or more images.
Another option with many applications involves saving what's called a preset, an action, or a filter that can be reused. If you choose to work with the RGB tone curve when converting a negative to a positive, saving a preset in Lightroom will make this a single-click operation. Although you could create a preset for use with the individual channels, each of the channels will always need some adjustment. Still, creating the preset will save some time.
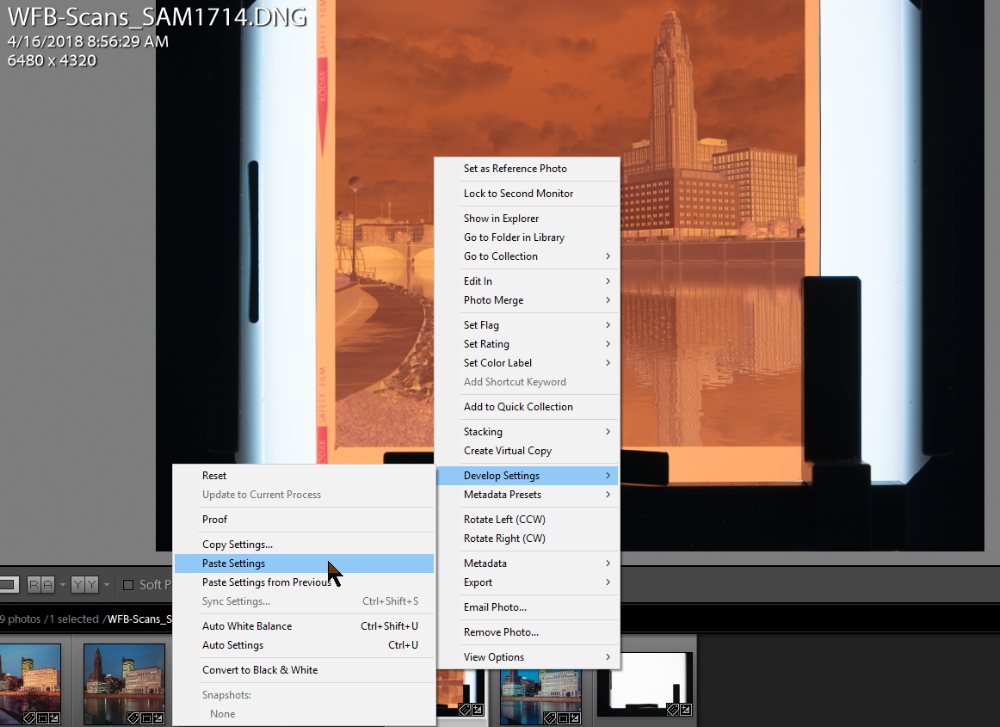 Copying settings works well when you have several images that were created in similar situations -- a series of pictures taken at the same location in the same lighting conditions, for example. After copying the development settings, select another image and paste them onto that image.
The result may not be exactly what you want, but you'll have a starting point in which all of the major changes have already been made. Then you can apply the final tweaks.
 Another reason that negatives are more challenging than slides is that 35mm slides are usually in slide mounts. Negatives and larger transparencies often are not, so you'll need a holder of some sort and a different kind of copy set up.
I use a 9x12-inch LED light table and a tripod to hold the camera. The tripod can be assembled so that the camera points down. Black mat board with an opening cut to fit a film strip holder minimizes extraneous light.
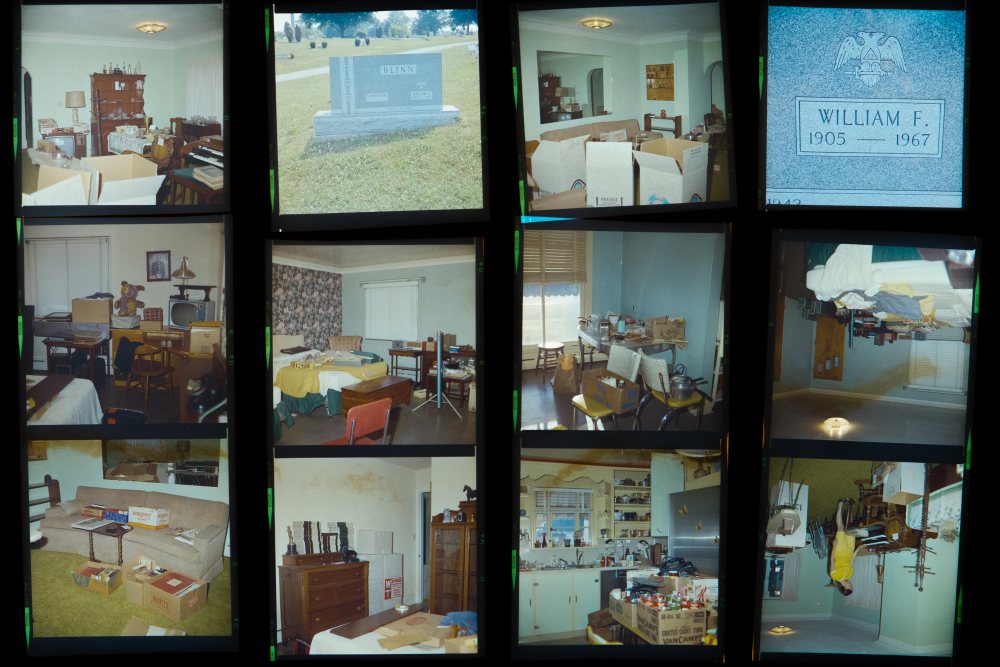 The lightbox makes it possible to photograph an entire sheet of negatives if they're stored in transparent negative holders.
The result is essentially a contact sheet so the individual images can be examined and evaluated. Then you can scan only the images you want to keep after removing the film from the storage page.
The previous illustration shows the light table being used to photograph a single black and white negative. The illustration at the right as a contact sheet made from a page of 120 roll-film negatives.
 Earlier I mentioned a film scanner. That's another option if you don't want to use a camera for digitizing transparencies and negatives. There's also a third option: Some flatbed scanners come with attachments for film. I think a camera is better than either of those choices.
Film scanners and flatbed scanners do have one advantage your camera doesn't, though: The software that runs these devices will perform the magic of converting negative film images to positive digital images. No matter which method you choose, digitizing some of these old images that friends and family haven't seen for years (maybe for decades) is likely to provide a lot of enjoyment.
Last week about this time, I was writing about the Windows 10 Spring Creators Update -- how to get it if you wanted it sooner and how to delay it if you didn't. But now, after a lot of drum beating by Microsoft, the update is missing in action.
Microsoft rolls out updates to the operating system twice a year -- spring and fall. At least that's been the procedure since Windows 10 and, unlike in the past, the updates come at no charge. Microsoft had planned to launch the latest update on April 10th, but software engineers found a bug that has delayed the release -- possibly for a long time.
Microsoft initially said nothing and clearly instructed their PR team at WE Communications (formerly known as Waggener Edstrom) to say nothing. The response was "we'll get back to you as soon as we can." The PR team has probably explained to Microsoft the dangers of this kind of non-response, but apparently that advice is not being taken seriously.
Ignoring a problem does not make it go away. Even the Microsoft Insider blog is avoiding facts. Dona Sarkar has written that machines with the update are seeing a "higher-than-normal" rate of Blue Screen of Death (BSOD) crashes. "As Build 17133 progressed through the rings, we discovered some reliability issues we wanted to fix. In certain cases, these reliability issues could have led to a higher percentage of BSOD on PCs."
On the positive side, Microsoft found the bug (whatever it is), realized how serious it is, and halted the deployment plans before damage could be done. Instead of creating patches for the flawed build, Microsoft will create a new build and that process will take at least a few weeks.
Cats are great alarm clocks, but they have no talent at all when it comes to calendars. Cats also, when they've done something dumb tend to glare at humans with an expression that says I meant to do that! How does this apply to the Internal Revenue Service's website?
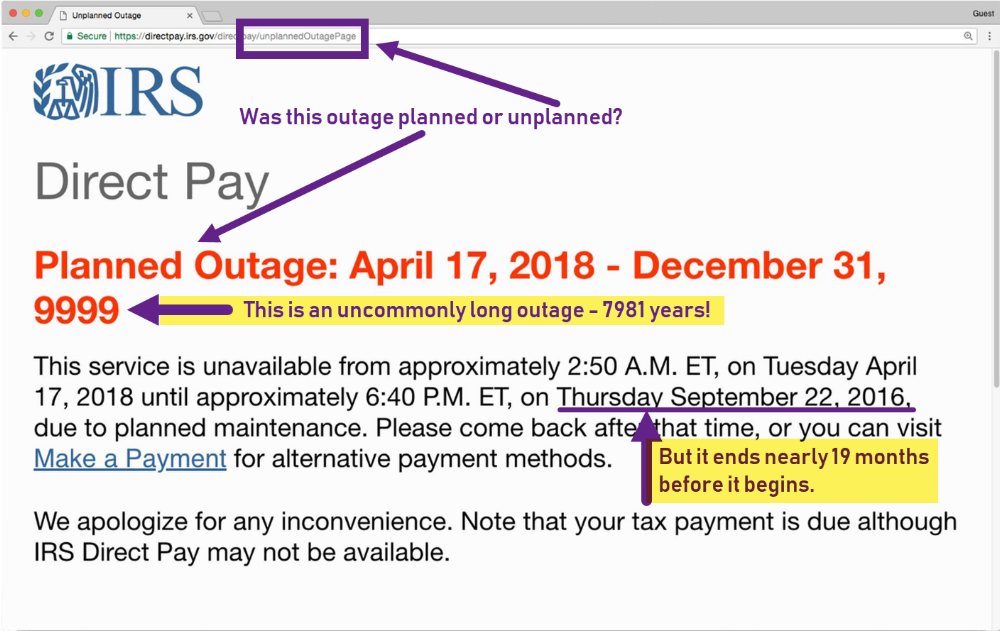 Tax payments were due on Tuesday. Anyone who delayed until then found that the agency's website was inoperable. According to a spokesperson "certain IRS systems are experiencing technical difficulties." Taxpayers who owed money were given a one-day extension to file because the IRS website where taxpayers could make a direct payment or set up a payment plan were all failing for most of the day Tuesday. Last year about 5 million people filed returns on the site on the final day.
OK. Things like this happen. The underlying problem was apparently a hardware issue, so the typical response involves placing a notice on the website to explain the unplanned outage. That's where a bad situation got even worse.