
Xara: Fast, Easy Web Design Is Now Faster & Easier
Developing a website? You could use Microsoft Expression Studio: $150 to $600, depending on features. Adobe Dreamweaver: $400 to $1800, depending on which features you need. Xara Web Designer 7: $50 to $100. The question you're asking is whether an application with such a modest price tag can deliver. Let's find out.
When I reviewed Xara Web Designer 2 years ago, I said "For $50, you won't find a more powerful, faster, or more versatile Web page designer than Xara Web Designer. This isn't the right tool to use for a site with hundreds of pages, but if your goal is to create a high-style site without spending a lot of money, don't overlook Xara Web Designer." Most of that still applies to Xara Web Designer Premium 7. The basic application is still $50 and the premium version (with a variety of features that will appeal to commercial developers) is $100.
What doesn't apply as much today is my comment about this not being the tool for sites with hundreds of pages. That's no longer entirely true because Web Designer can now update all occurrences of a repeating object when it's edited. The "object" will be changed throughout the site. An application such as Dreamweaver does this by means of Library and Template documents. One of the first things you'll notice is that Xara stores the entire website in a single file, so the changes are more akin to find and replace in a Word document.
You can download and try either version for free and when you open the application, you'll find that Xara has provided a 5-page website. This may not seem like a big deal, but if you do more than glance at it, you'll see that "[t]his is a short tutorial, and a working website document you can experiment on. If you're reading this in Web Designer then feel free to experiment and explore the features of the program. If you're reading this as a web page, then this is an example of what you could be producing with Xara Web Designer."
So rather than create my own test website for use with this article, I decided to work through the example site, Introduction.xar.
Digging In
Click any of the smaller images for a full-size view.
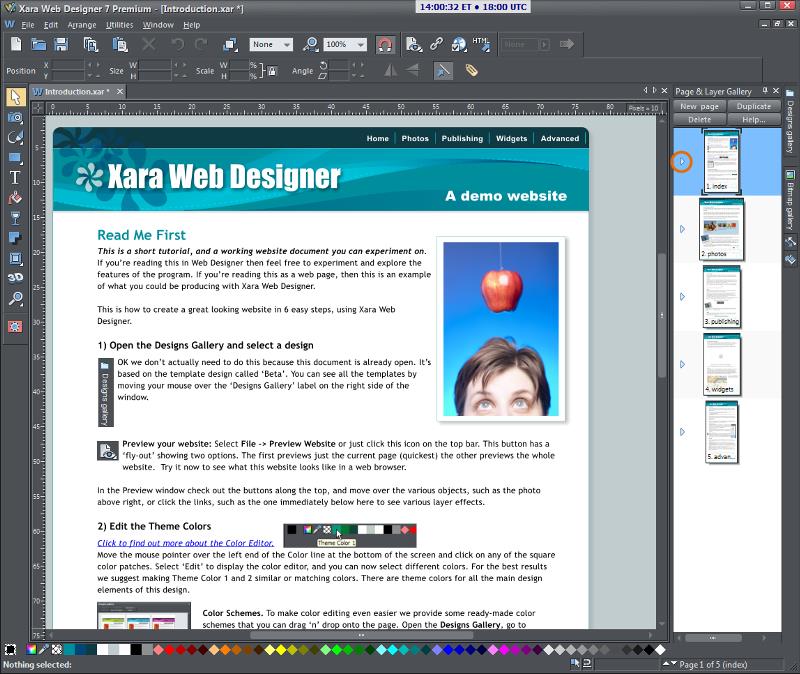 In looking over the first page, I noticed the triangles at the left of each page. It seemed unlikely that these would be decorations, so I clicked one to see what happened.
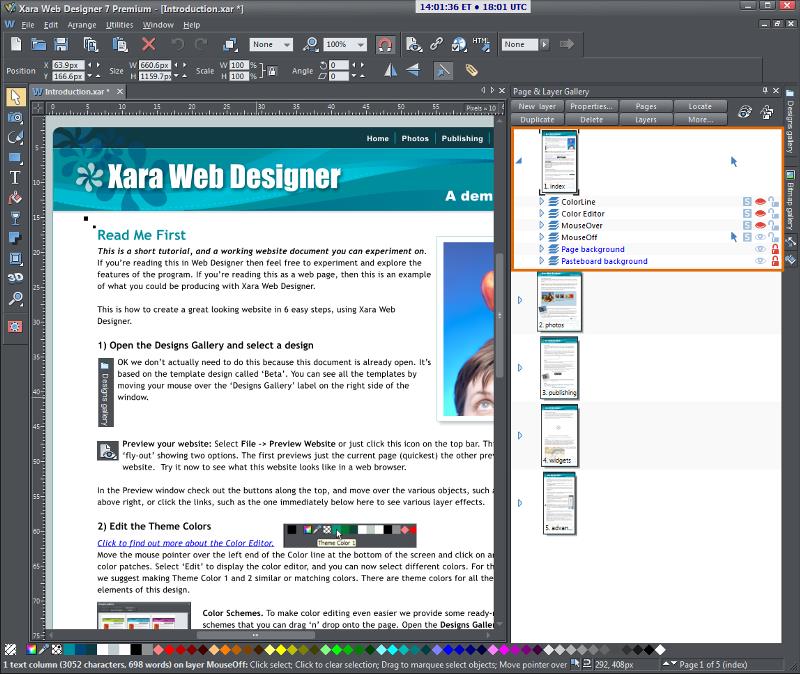 This immediately revealed a list of elements on the page and many of those elements had sub-elements (notice the additional triangles that would twirl open to reveal the components.)
 At any time you can quickly preview the page in a built-in browser but to really be sure what will happen you need to view the site in the primary browsers you expect site visitors to be using. From the Xara browser you can immediately jump to any browser that's installed on your computer: In this case, that's Chrome, Firefox, IE, Opera, and Safari.
 Instructions on page 1 invited me to try changing the colors, so I did. Each theme's colors are at the left side of the color line. To change a color, just right-click the swatch and select Edit. The swatch even tells you what the color is used for (text, page, background, accent, and such).
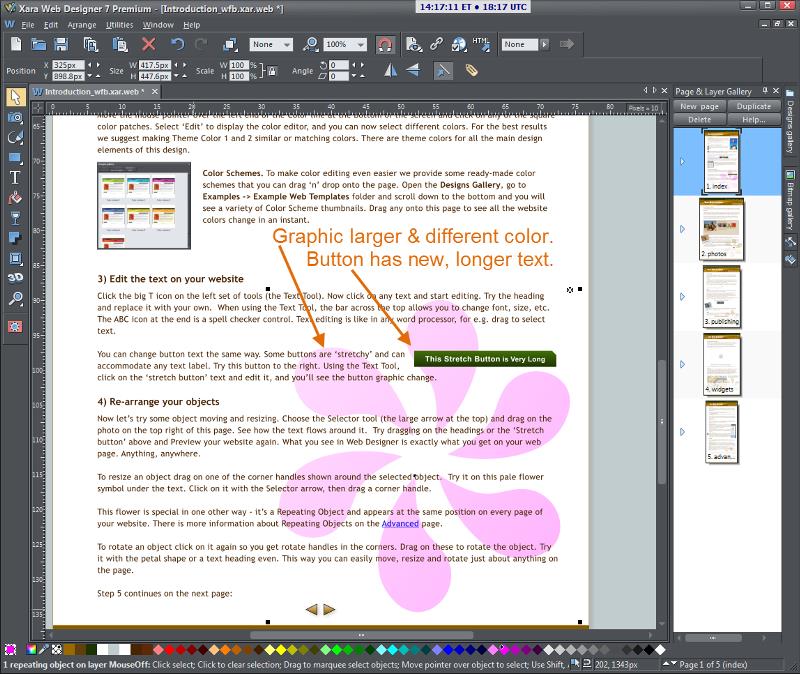 On the next page, I was encouraged to grab the watermark graphic in the lower right corner and do something with it. I changed the size and the color. Placing more text on the button automatically causes the button to grow. In fact, it expanded off the page, so I grabbed it and pulled it back onto the page and the text that the button would have obscured obligingly moved out of the way.
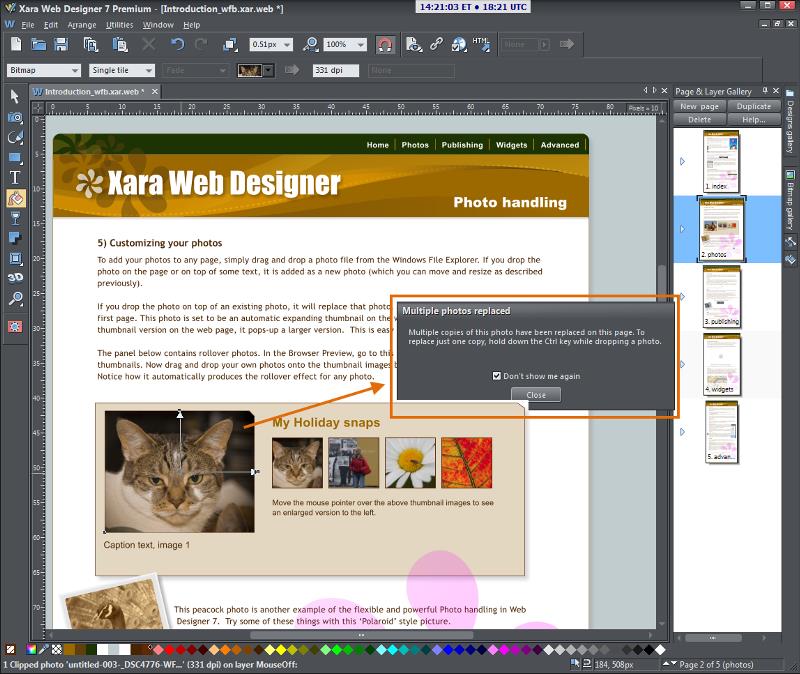 When I dropped a new photo onto the large rectangle, I received a notice that this would replace two images on the page. Rolling the mouse over the smaller images causes each to be displayed on the left. Dropping just one photo in swapped both photos on the page.
 And finally, I dropped another image onto the sepia-tone area after enlarging the area. This also replaced a second copy of the image, one that's in color behind the sepia image. I made the image on top larger but left the color image full frame so when a visitor mouses over this image the photo becomes a color photo and changes from close-up to full frame. The text changes, too.
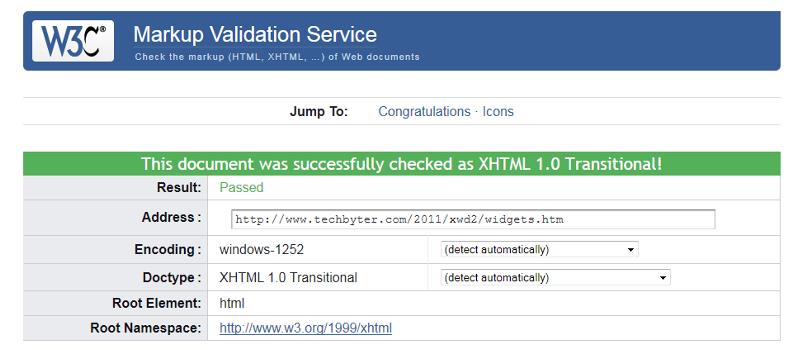 The beauty of all this is that it just works. Grab something and move it, rotate it, or change its color. Better still, in most cases the code even passes W3C validation testing.
Depending on how much information you want to see, open one or both of the following files. They are two versions of the sample site provided by Xara. Each of these will open in a new window so you can open both if you wish and compare them side by side:
 Bottom Line: It's rather like hiring a mind reader to design the site.
If you're planning a large commercial website like Amazon.com, this is not the application you need. For sites that consist of a few dozen pages, it could be a superb fit. And if your goal is to build a basic family or small-business site, the application will cost less than an hour's worth of a Web developer's time.
For more information, visit the Xara website.
Bokeh the Easy Way
"Bokeh", as I've mentioned before is the name of a photographic effect that allows everything in front of or behind the main subject to be out of focus. Too much depth of field can cause an image to appear flat and possibly even be confusing because the viewer won't be able to tell what's important. One way to obtain Bokeh is by using an expensive lens that has an extraordinarily wide aperture. Another way is by means of a new and improved version of Bokeh from Alien Skin.
Click any of the smaller images for a full-size view.
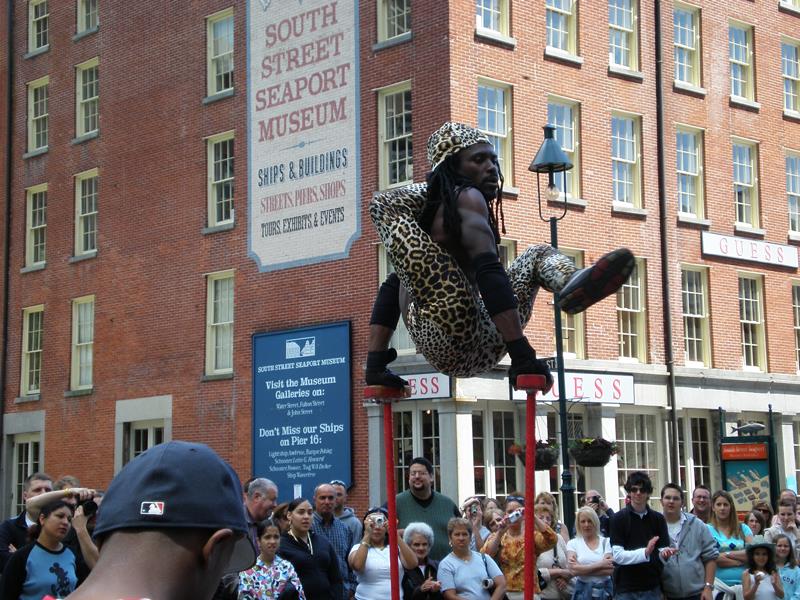
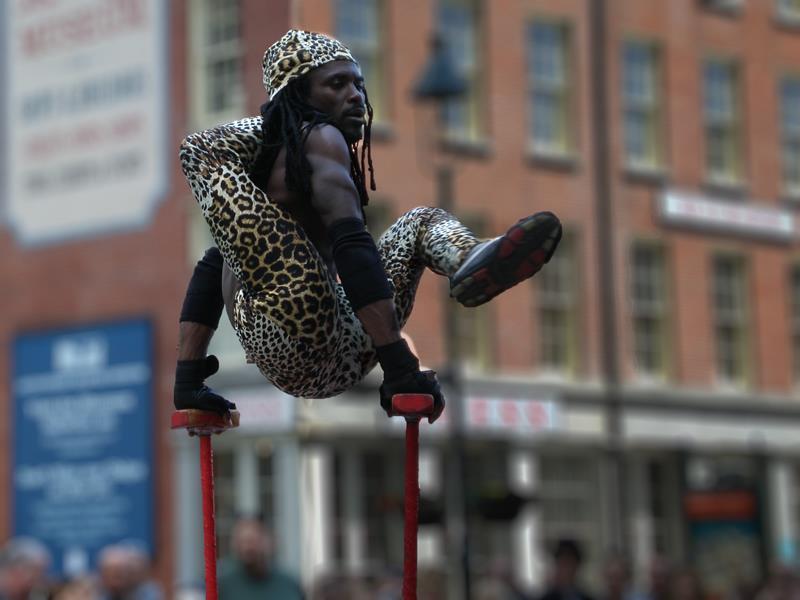
Here's a good example of an image that needs some help. The street performer at the South Street Seaport in Lower Manhattan is so flexible that he can fold himself into a small box. But there's a lot going on in this photograph. The building in the background is bright, so it pulls attention away from the performer. Everything in the foreground and the background is in focus because this image came from a basic point-and-shoot camera. These cameras are designed to make sure that everything is in focus. Often that's a good thing, but it's not what was needed here.
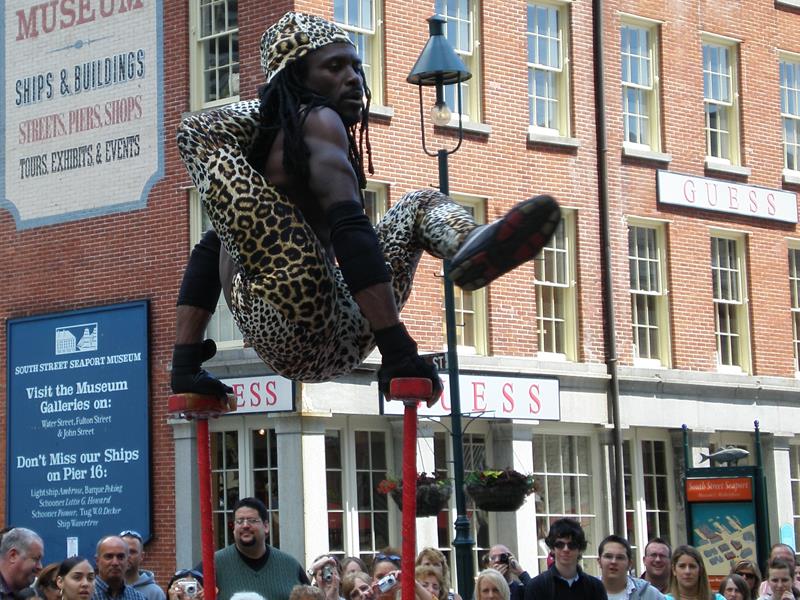 I could improve the photograph with a bit of judicious cropping. The guy in the hat who was in the foreground is now gone and some of the distractions in the background have been eliminated.
But two signs on the wall in the background beg to be read and the lamp post and building on the right call attention to themselves and, even worse, the light pole bisects the performer's knee.
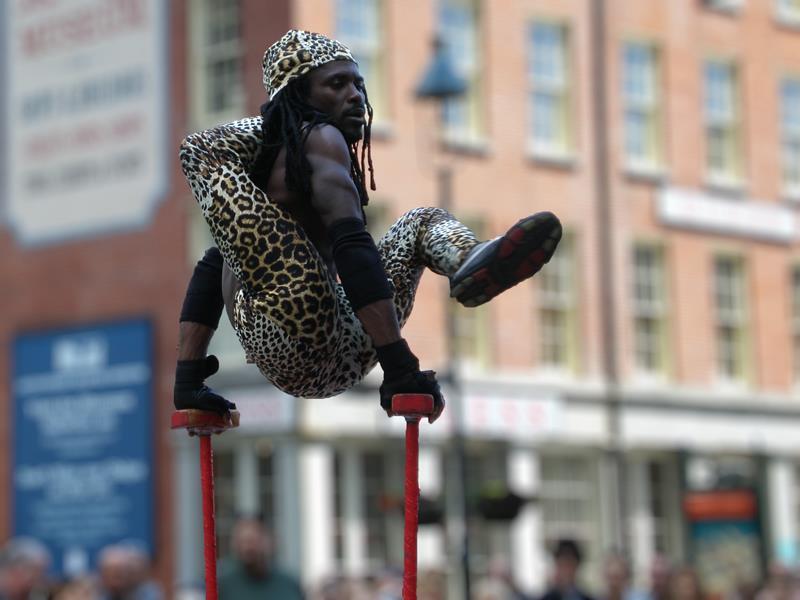 A little judicious masking with Photoshop's selection tools followed by application of Bokeh 2 and suddenly the performer is the center of attention.
This could still be a bit better. The background to the right of the performer is still too bright (aka "hot") and I'd like to darken it a bit.
 So I created a second copy of the Bokeh layer behind the original Bokeh layer and applied an adjustment layer to darken the image. The final step involved adding a transparency mask to the lighter Bokeh image on the top and making the right side of the lighter image transparent so the darker background image would be visible.
Not bad for a simple point-and-shoot camera! With a little help from Alien Skin Bokeh 2 and Photoshop CS5.
Selections? Easy. See this Alien Skin selection video on YouTube.
Who Was That Masked Man?
Masks are essential for images such as the one with the acrobat because the in-focus area must be tightly defined and it doesn't fit into a square, circular, rectangular, or oval shape. Sometimes you get lucky, though, and have an image that doesn't need a mask. (At this point Adobe Photoshop CS5.5 arrived and that required reinstalling Bokeh 2.)
You've probably seen photos of model railroads and such that have a shallow depth of field and, becuase of that, you know the picture is that of a model. But what if you wanted to take a real image and make it appear to be a miniature. Easy!
 Here's the starting point. It's the view outside my window in San Diego when I was an instructor at one of Rick Altman's Corel World programs. Everything is in focus so this is clearly a real-life image of the San Diego Trolley (light rail) that runs from north of San Diego to near the Mexican border at San Ysidro.
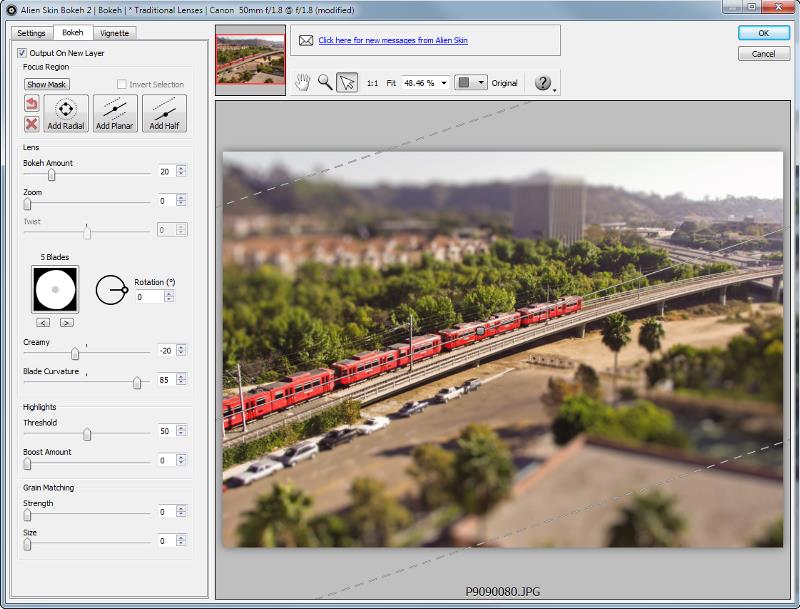 Now I've loaded the image into Photoshop and have pulled up the Bokeh 2 filter. You may be able to see that I've rotated the plane of focus so that it runs along the rail line and I've pulled the zone of focus out a bit.
All that's left is to click OK.
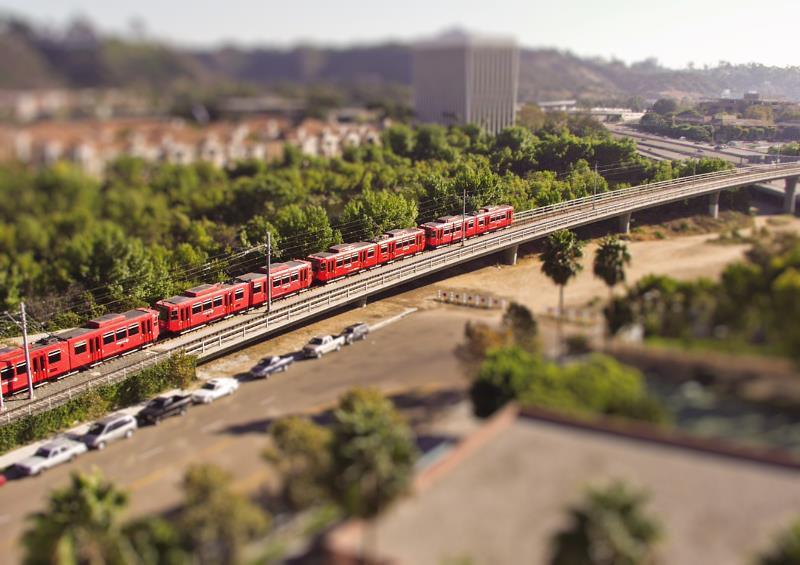 And now I have what looks like a photo of a model railroad except that those condos in the background and the trees in the foreground are real.
Bottom Line: Alien Skin puts high-priced glass on any camera.
Alien Skin's tag line for Bokeh is "creative focus made easy" and that pretty much tells the tale. Large-aperture lenses that create great natural bokeh are expensive. You'd get phenomenal bokeh from a Nikon 600mm f/4 telephoto lens ($10,300) or an AF-S NIKKOR 200mm f/2.0 telephoto lens ($5900). Canon's EF 600mm f/4 telephoto lens ($12,000) would do an equally astounding job. Or consider the Canon EF 400mm f/2.8 image stabilizer lens ($8000). Or you might prefer Alien Skin's $200 Bokeh 2 (also available as part of the $600 Image Bundle that includes Exposure 3, Blow Up 2, Snap Art 2, Bokeh 2, and Image Doctor 2.)
For more information, visit the Alien Skin website.
Speaking of Adobe ...
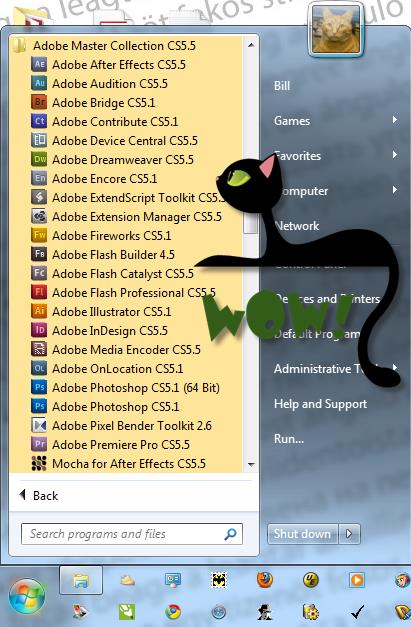
Creative Suite 5.5 Master Collection flew over my transom last week and landed with enough force that I seemed to levitate for several moments. I had expected to have at least 8 to 12 months to recover from CS5 and prepare for CS6. It's still too early for a complete review of any component, but CS5.5 has been on my computer long enough for me to say: WOW!
I can say WELCOME HOME to Audition. Included in CS3, Audition was left out of CS4 in favor of Soundbooth. No new version in CS5, either. But it's back in CS5.5 and I was frightened for a few moments when I learned that Audition CS5.5 can't read an Audition CS3 session file. Those of us who are using Audition 3 simply need to save session files as XML documents and these can then be imported into Audition CS5.5. There are still warnings and some things don't transfer properly but the interface update alone may be worth any pain.
 Some of the CS5 applications changed not at all while others recieved minor updates and a few received massive injections of new features: The video applications, Audition, Dreamweaver, Flash, Illustrator, and InDesign have all been modified to create better output for mobile devices.
As a result, designers and developers will be able to create better content for smartphones and tablet systems. HTML5 is more completely supported and Flash authoring has been improved. It appears to me that if you're a developer who's trying to stay somewhere in the general vicinity of technology's cutting edge you'll want to obtain the update soon. Preferably today.
It's still far too early for me to make any judgment calls, but I can tell you this: The next several months are going to be interesting as I work my way though these new releases from Adobe.
Ipad or Netbook? It Depends.
One of my co-workers has an Ipad and it's clearly a very cool product. The company I work for doesn't allow the use of the common e-mail ports (25 and 110) from company-owned gear and also blocks all instant-message services. I could forward all messages to G-mail and use the Web interface (blecch!) but there's still no solution for IM. The company does provide a Wi-Fi option for employee-owned gear. So should I pick a netbook or the Ipad?
What I selected and what you might select in the same situation could differ. Neither option is right or wrong, so it's important to select the option that's right for you. I thought I'd share with you the process I used to decide.
Here are the data points that I used:
- Price is not the only consideration and shouldn't even be the most important consideration. But it's easy to get out of the way first. The basic Ipad costs $400 but Apple has another model that costs about twice that amount. Expenditure: $400 minimum, but probably more like $800 or $1000 by the time I would obtain a system that met my needs.
- Netbook computers are priced from less than $300 to about $500 so the price advantage is easily grabbed by the netbook. Winner: Netbook.
- Next I considered what I wanted to do:
- E-mail: The Bat (Windows only) is my preferred e-mail client.
- Spam elimination: Antispam Sniper (Windows only) is my preferred solution.
- Word, Excel, Powerpoint, and Access: I need these Windows-only applications.
- Ubuntu Linux: It would be nice if I could install and use Linux.
- The Ipad looks really cool but:
- I would need to use an Apple e-mail solution.
- Antispam Sniper wouldn't work.
- The Office suite won't run on an Ipad.
- The only company more frightened of Linux than Microsoft is Apple.
So the decision turned out to be easier than expected: I bought an Asus Eee PC1215T netbook with a single-core AMD processor, 2GB of RAM, a 320GB hard drive, and Windows 7 Home Premium. As computers go, this is a low-performance machine. It won't run most Adobe applications acceptably, but that's OK because what I primarily need is e-mail and IM. The ability to add the full Microsoft Office Suite is a plus and loading Ubuntu Linux, although it turned out to be a bit of a challenge, took less than a day.
Admittedly this is a pitifully underpowered computer that would be completely unacceptable for those who need to use Photoshop to modify images, InDesign to develop complex publications, or Premiere to create video productions. I don't plan to use the netbook for any of those tasks and I would not be able to use the Ipad for such tasks.
 The netbook is slightly larger than the Ipad. If you consider the fact that the netbook must be unfolded to work, it's a lot larger. The netbook's graphics are nowhere near as cool as the Ipad's. But the difference in price, the availability of applications I need, interoperability with my home computers, and the ability to load Linux made the decision easy.
One day after receiving the netbook, I had all of my essential Windows applications running, Linux 11.04 installed, and WAMP (the Windows version of the Apache server, mySQL, and PHP) was operational.
All this on a computer that weighs about 3 pounds.
Short Circuits
Do You Need a $100 HDMI Cable?
You're setting up a new digital video entertainment center and you want only the best. When it comes to cables, you figure that you got a great deal by purchasing a 6-foot Monster HDMI cable (list $130) from Amazon.com at $59. Did you?
In a word, no. Amazon also has 6-foot HDMI cables for less than $3 (made in China) and you can easily find HDMI cables for less than $10. So why pay $60 or $100?
The expensive cables have gold-plated contacts. But HDMI is digital. The gold does nothing. Digital cables work or fail. There is nothing between. No better or worse. Just OK or not. The cheapest reasonably-well-constructed cable you can find is all you need.
Picture quality, sharpness, color brightness, and such will not be improved by a more expensive cable or degraded by an inexpensive cable. Either the signal gets from point A to point B or it doesn't.
In the old (analog) days, a lot of people connected speakers to their amplifiers with plain old lamp cord, the stuff you could buy at the hardware store. You could get better cable with gold-plated contacts and maybe (MAYBE!) you could hear the difference because those signals were analog. But those days are long gone.
Should you spend several hundred dollars on fancy gold-plated cables because the sales guy says the video will look better and the audio will sound better? In my opinion, and that of professional testing organizations, no.
And if you find any credible research (from Consumer Reports or some similar organization) that says there's a difference between cheap digital cables and expensive digital cables, please let me know.
In 2008, Popular Mechanics published the results of their research that concluded there is in visible difference between an inexpensive cable from Newegg and $100 cables.

 The author's image: It's that photo over at the right. This explains why TechByter Worldwide was never on television, doesn't it?
