
OnOne's Gigantic Photoshop Add-On (Part 2)
I'll continue this week with a look at OnOne's Perfect Photo Suite, an "add-on" for Photoshop. Some add-on! It adds framing effects (PhotoFrame), a huge array of photographic effects (PhotoTools), a powerful resizing feature (Perfect Resize), a background remover (Mask Pro), Color Correction (PhotoTune), and even the ability to add bokeh (FocalPoint).
Bokeh? Last week I mentioned bokeh but didn't explain beyond saying that this is the name for the effect that has the primary point of interest in a photograph in sharp focus while the rest of the image is much softer. Film cameras with slow film and long lenses made bokeh easy. Most digital cameras make attaining good bokeh difficult and most point-and-shoot digital cameras make it all but impossible.
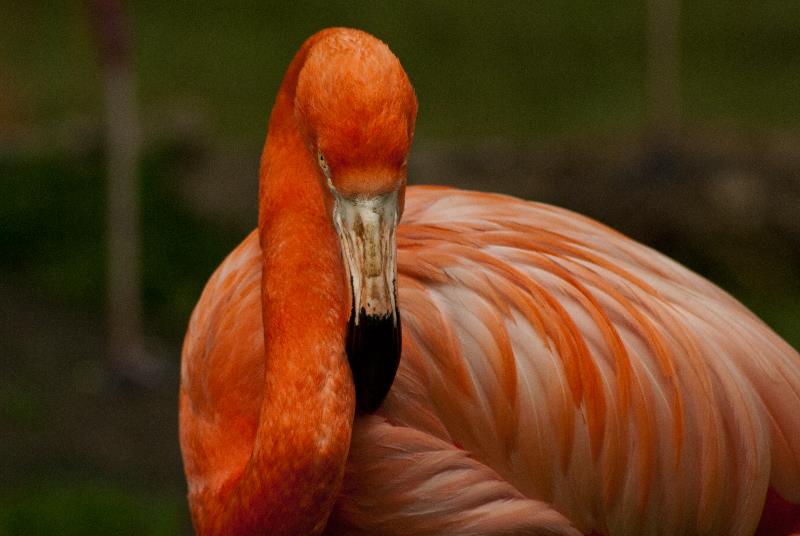 At the right you see an image from the Columbus Zoo. I created this image with a Nikon digital SLR and, because I used a large lens aperture (small number), the background is out of focus and your eye is drawn to the flamingo.
Now let's see how OnOne Software's FocalPoint can help you achieve something similar.
See part 1 of the TechByter review (last week's program).
FocalPoint
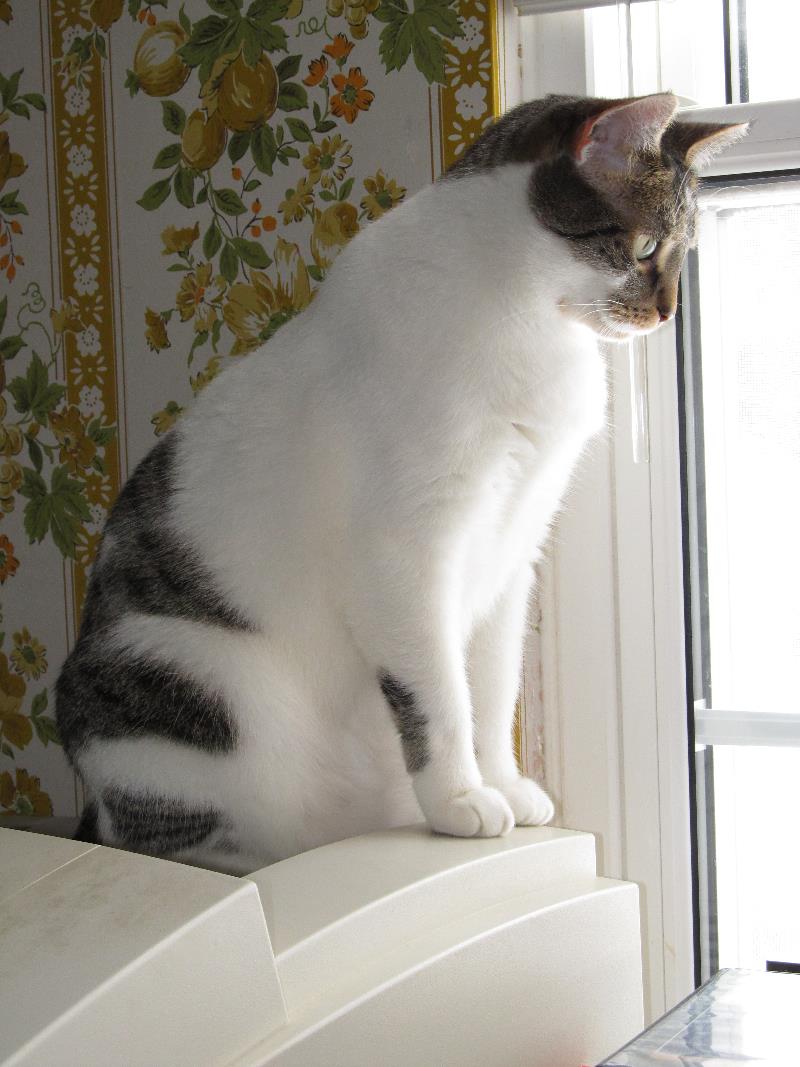 I started with a picture from a point-and-shoot Canon digital camera. This is typical of the kind of image you might obtain from a simple camera. Chloe has pretty yellow eyes and they're in focus. So are her dainty feet, the antique (1970s) wallpaper, the printer she's sitting on, and the window.
As a snapshot, it's fine. But I want something more than a snapshot.
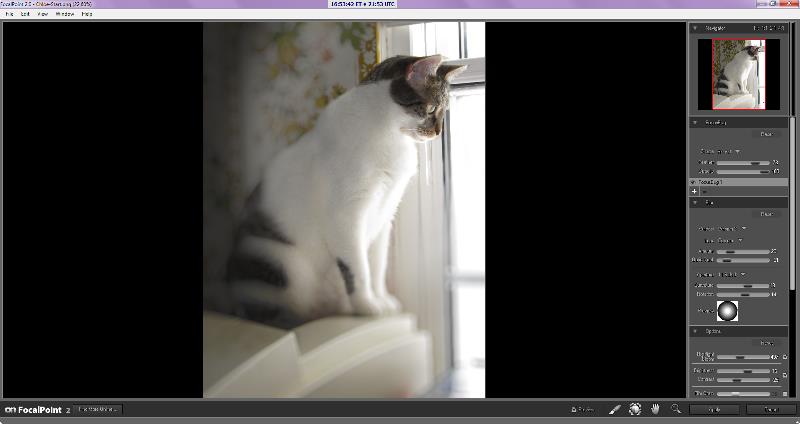 So here we are with FocalPoint. You can set the shape and size of the in-focus area, the width, specify a particular lens to emulate, set the curvature and rotation of the aperture, and even control highlight bloom, brightness, contrast, and film grain. You can also modify the amount of vignette and whether it's light or dark. And if the area of focus doesn't quite please you, there's even an option to brush on focus and out-of-focus areas.
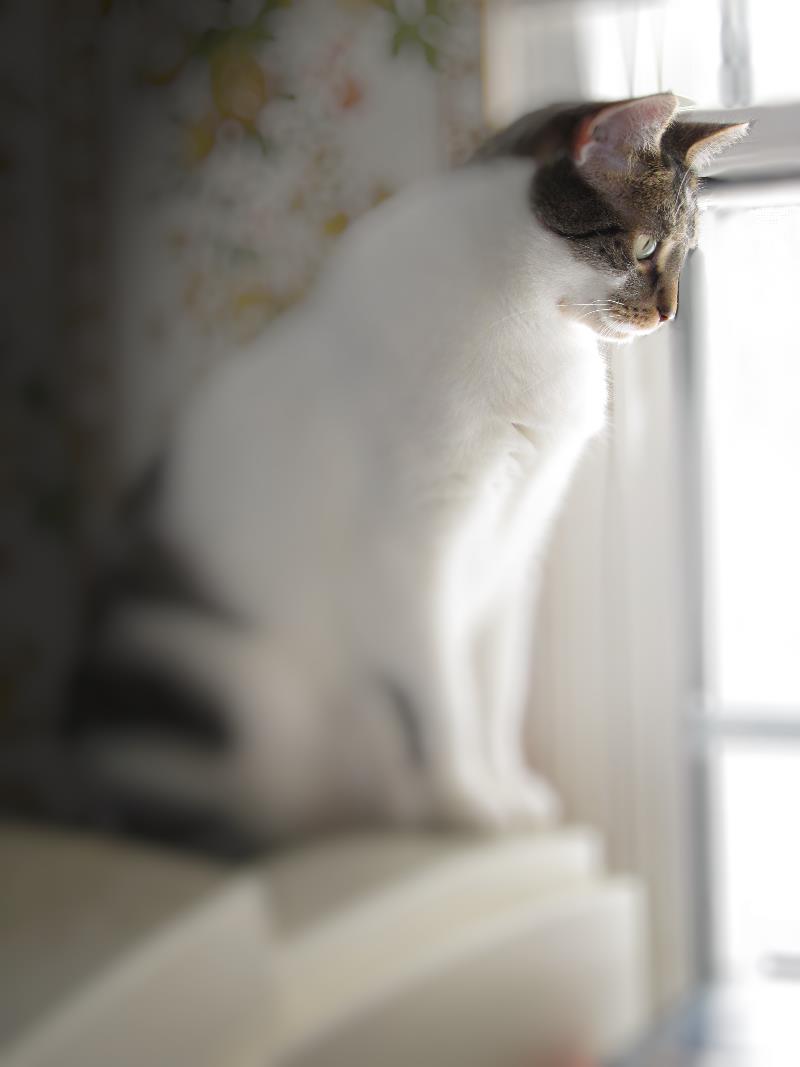 I didn't go much beyond the basics in creating a portrait of Chloe that directs your attention to her eyes and ears. That's what I want you to see in this image and FocalPoint makes it easy.
Mask Pro
One of the more difficult and time-consuming digital photography tasks is the application of transparency masks that allow two images to blend together. Let's say that I have a photograph of a flamingo at the Columbus Zoo. I can safely say that because you've already seen the picture.
And let's say that I have a photograph without a flamingo from the Franklin Park Conservatory. If I would like to have a photograph of a flamingo at the Franklin Park Conservatory, I could ask the Zoo's managers if I could borrow a flamingo and I could ask the managers of the Franklin Park Conservatory if I could bring the borrowed flamingo from the Zoo to the park and photograph it.
I suspect that both answers would be no. Emphatically.
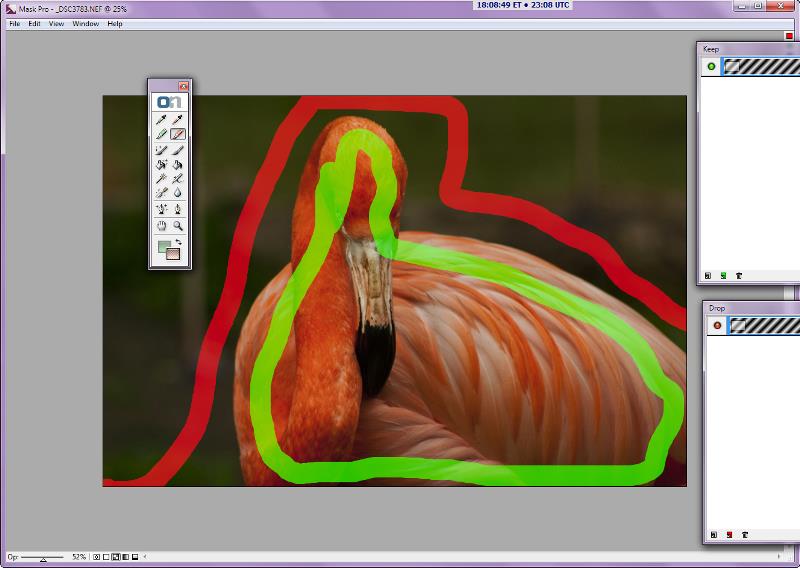 Instead, I could start with my photo of the flamingo and use Mask Pro's tools to mark the area I want to keep (green) and the area I want to discard (red).
Having done that, I could use Mask Pro's magic wand to apply a transparency mask.
Note that I wasn't very careful about drawing my keep and discard areas. The magic occurs when the magic wand examines the two marked areas and makes decisions—decisions that are surprisingly accurate. Some manual touch-up is required, but not as much as I expected.
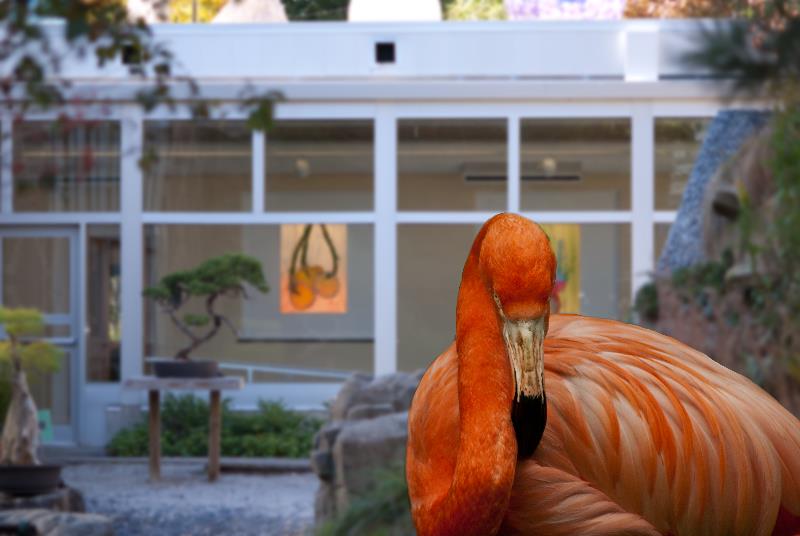 The next step involves opening a Franklin Park Conservatory image and placing the flamingo. I added a bit of Gaussian blur to throw the background out of focus, but that's all that I did.
Perfect? No. There's a lighting mismatch between the flamingo (weak sunlight) and the conservatory (shade). If I intended to use this image for more than just an example of how quick and accurate Mask Pro's masking is, I would fix it. But for turning an hour-long masking project into a 5-minute masking project, I think this is a remarkable tool!
Photo Tools (revisited)
This is possibly the most versatile tool in the kit because you can use any of OnOne's presets, presets donated by users around the world, your own presets, or ad hoc settings. Additionally, you can layer the various effects and even turn off components of each effect. Any image can project many different moods depending on the settings used to modify the original image.
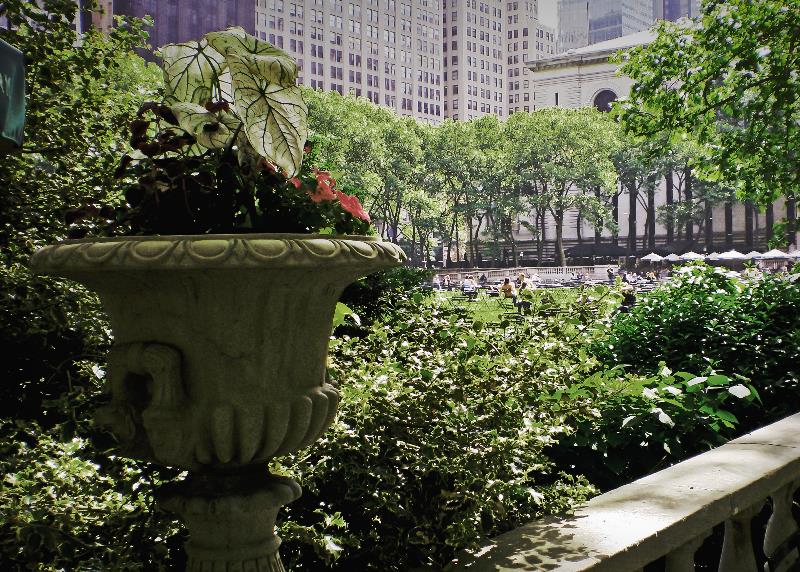
I'm going to start with a photograph that I made with a cheap point-and-shoot camera outside the New York Public Library at 42nd Street and Fifth Avenue. (If you visit New York City and you miss the NYPL's gem in midtown, you will have missed something special.)
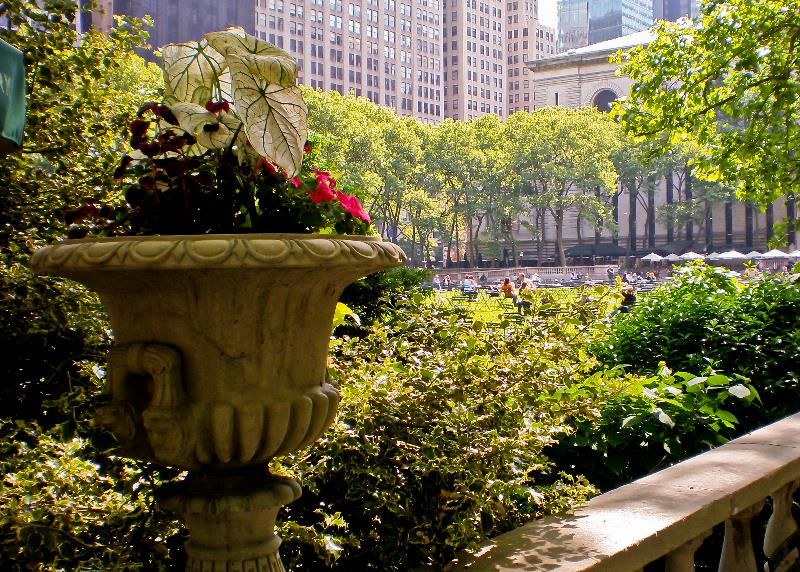 Here's what I started with. It's an average picture. We're looking northwest from the library out onto Bryant Park.
 What do you think of this version of the same image? You may think "pen and ink" or "artistic". The colors and the highlights are more muted than in the original.
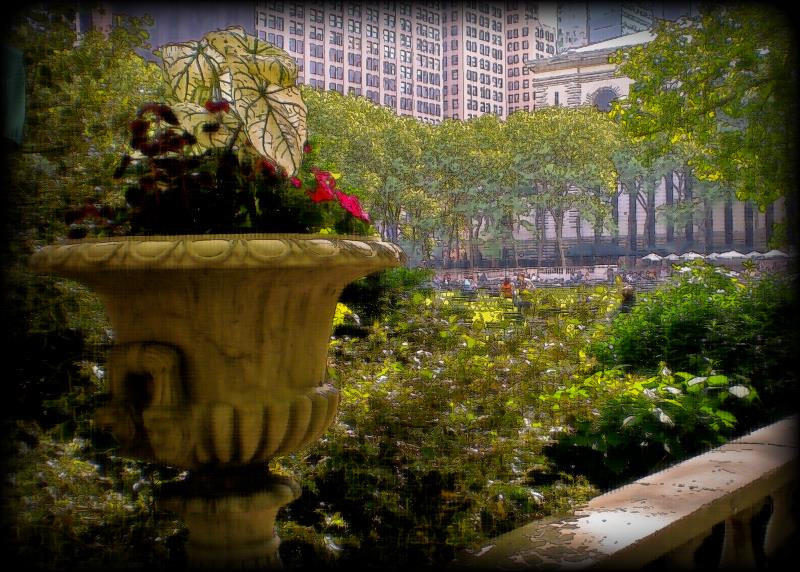
 This rendition reminds me of images that were made in the 1970s. The color is muted.
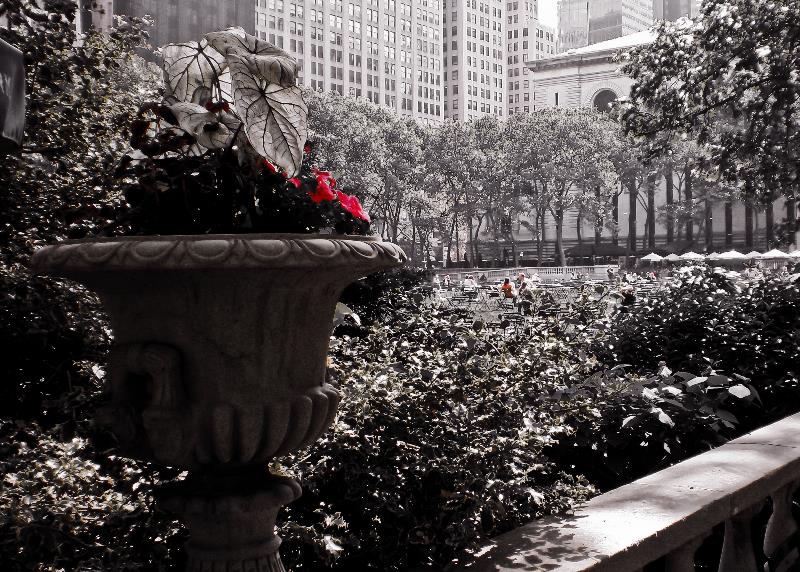 This is an interesting effect. Only the reds remain. All other colors are gone.
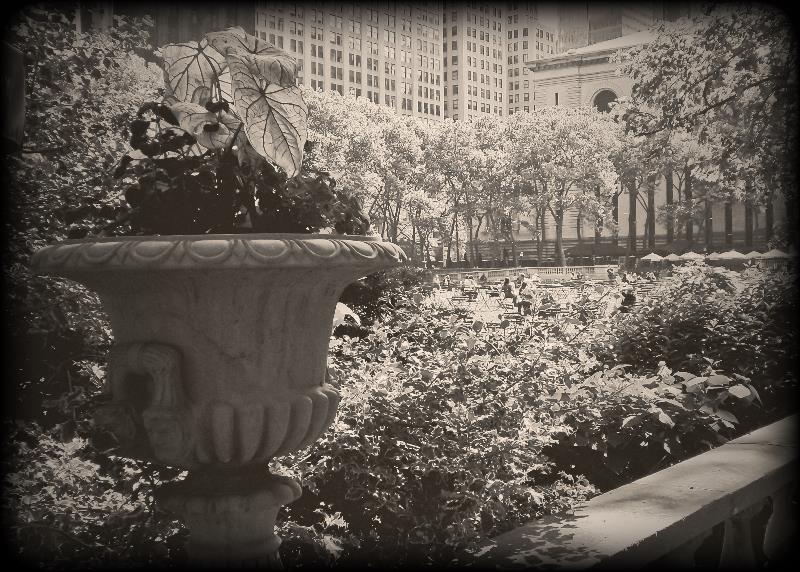 And finally, I offer this image. You might think that it was made in the early 1900s.
One image and four alternate interpretations. None of these interpretations is the right way to look at the image. And none of the interpretations is wrong. When you use a tool such as this, keep in mind that you're working in an artistic medium.
Some self-identifed "perfectionists" insist that manipulation of images is somehow immoral. If that is the case, then Ansel Adams was a sinner beyond compare. Man Ray must have been a true scumbag. Eddie Adams was beyond redemption. Dorothea Lange, Manuel Rivera-Ortiz, Margaret Bourke-White, and countless other photographers knew that pressing the shutter release was only the beginning. What happened in the darkroom (cropping, manipulating, combining) turned rough-cut shots into sparkling images that have continued to impress us decade after decade.
Just about any photographer who ever created a memorable image didn't stop with clicking the shutter release. Any monkey can do that. What counts is how you start with the basic image and work with it to create art.
Perfect Resize
I admit that I was a bit confused about this component of the package. What's the big deal about resizing an image?
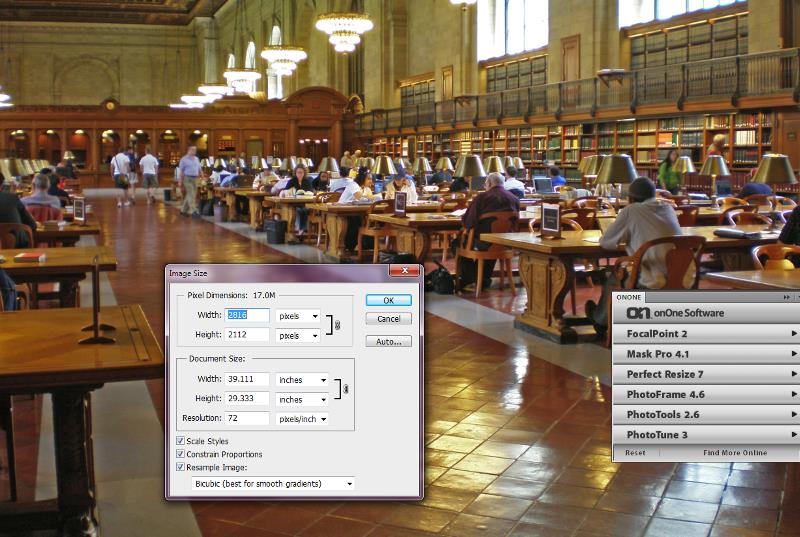 This is a reading room in the New York Public Library. The image is 2816 pixels wide, so I could print a 39-inch image at 72 dpi. That's not good enough.
Let's say I'd like to print an image that's 5 feet wide (60 inches) and that I want to print it at 200 dpi.
 This is the result of telling Photoshop CS5 to modify the image so that it is wide enough to support 200 dpi on a 60-inch-wide print.
The image would probably be adequate because people will view an image that's 5 feet wide from a distance of several feet. But let's see what Perfect Resize can do.
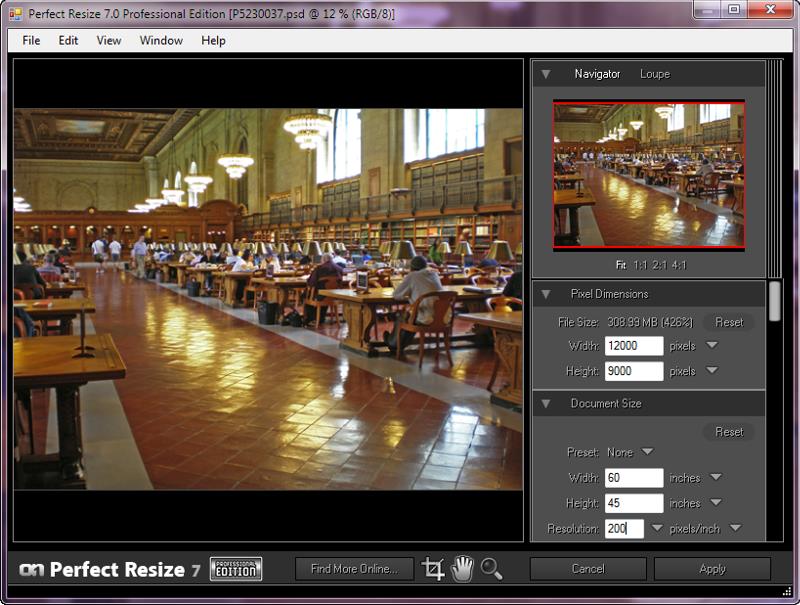 I've opened the image in Perfect resize and I've set it to create a file that will print 60 inches wide at 200 dpi.
Keep in mind that these images were created with an inexpensive hand-held point-and-shoot camera.
 Here's the result. At this magnification, there's not much visible difference between what Photoshop did natively and what Perfect Resize did.
Let's look a little closer.
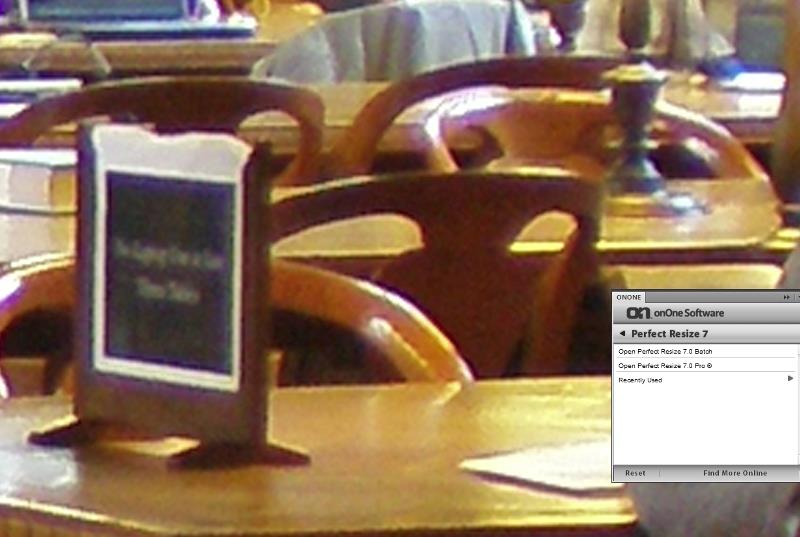
 At 100% resolution (which will be reduced somewhat on the website) this is the image from Perfect Resize.
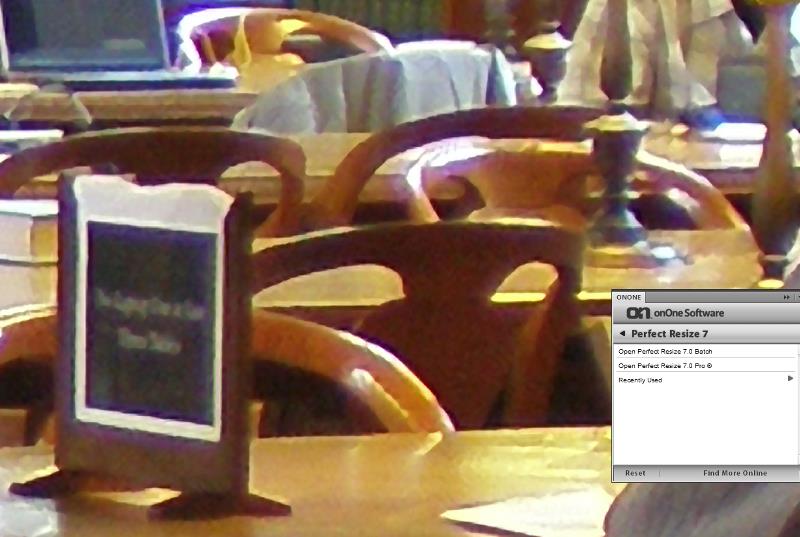
 And here's the same image at 100% after being enlarged by Photoshop CS5.
The differences are subtle, but they would be visible on a print.
 Bottom Line: Save time in the digital darkroom
Initially I was going to award OnOne's Perfect Photo Suite a 4-cat rating. Price was the only factor that kept the application from receiving a 5-cat rating. But then I came to my senses. Assuming your time has any value, even the full price ($500) is a bargain. Instead of spending hours trying to perfect a certain look, you'll spend 10 minutes to do 90% of the job with one of OnOne's Perfect Photo Suite tools and then do a little fine tuning to make the effect your own.
For more information, visit the OnOne Software's website.
A WORD ABOUT IMAGES ON THIS SITE
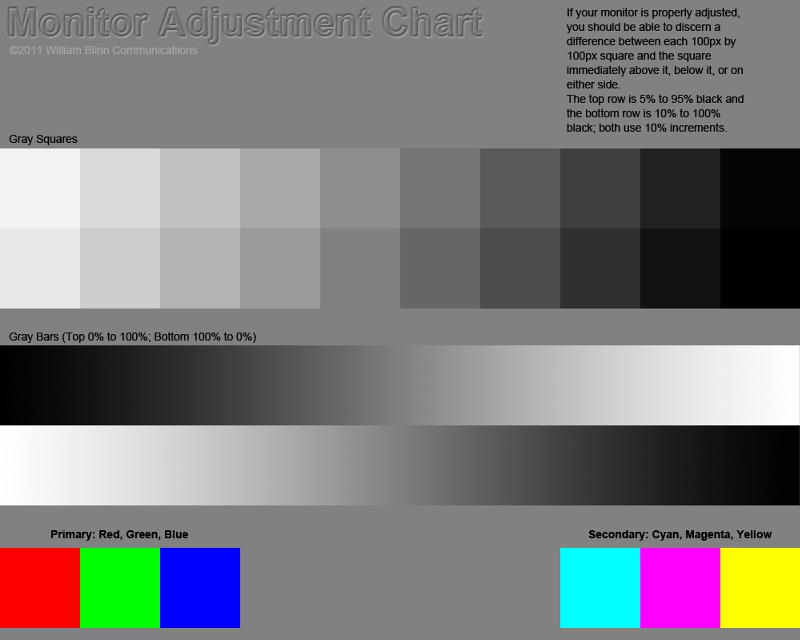
The computer I use has color management software installed. As a result, the images you see on your computer may appear a bit too dark. The image at the right is a color chart that shows various shades of gray from white to black, along with the primary and secondary colors. Click the image to open it and adjust your monitor so that you cad see a difference between the two whitest shades and between the two darkest shades. Your monitor will then be adjusted for optimal photo presentation.
Checking What Starts When Your Computer Starts
 When Windows starts, the operating system examines several locations and files and then starts applications depending on what it finds there. Many applications create these "autorun" entries without your permission and your computer would be faster if you eliminated the ones that you don't use or need. The problem is finding out what starts when Windows starts and then deciding whether you need it.
The solution is Autoruns from System Internals. Microsoft acquired System Internals several years ago and Mark Russinovich is now a Microsoft employee, so you'll find Autoruns on the Microsoft website. It's a large utility application with a lot of tabs. The Everything tab lists literally everything that's running and probably provides too much information.
Don't bother clicking the list at the right because it won't expand. I've included it simply to illustrate how many applications are running on modern computers. If you plan to make changes on a Vista or Windows 7 system, you will need to run the application with Administrator privileges.
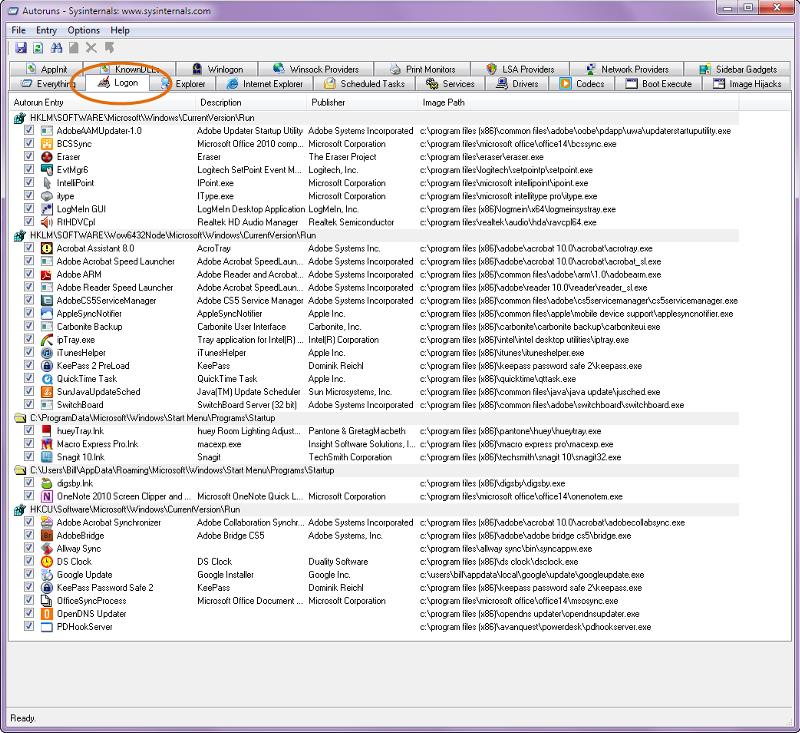 Next door is the Logon tab. This shows the applications that start with Windows. Let's take a look at what starts on my Windows 7 64-bit system.
- Adobe AAM Updater: Based on the name reported to Windows, this is an updater application for a program that I consider important. It stays.
- BCS Sync: This is a Microsoft application that may be related to Microsoft Live, which I don't use. For now, it stays.
- Eraser: This is a wipe-disk utility that I chose intentionally to load.
- EvtMgr6: Logitech application for my mouse.
- Intellipoint: Microsoft mouse application. I do not have a Microsoft mouse.
- IType: Microsoft keyboard application.
- LogMeInGUI: LogMeIn.
- RtHDVCpl: Realtek high definition audio application.
- Acrobat Assistant 8: I have Acrobat X, not Acrobat 9 or Acrobat 8.
- Adobe Acrobat Speed Launcher: Is this really necessary with today's hardware?
- Adobe ARM: Is this really necessary with today's hardware?
- Adobe Reader Speed Launcher: Is this really necessary with today's hardware?
- AdobeCS5ServiceManager: Adobe application updater.
- AppleSyncNotifier: Do I really need this for Itunes?
- CarboniteBackup: Carbonite backup.
- ipTray.exe: Intel desktop utilities.
- iTunesHelper: Is this really necessary with today's hardware?
- KeePass 2 PreLoad: Password manager.
- QuickTime Task: Is this really necessary with today's hardware?
- SunJavaUpdateSched: Java updater.
- SwitchBoard: Adobe application.
- hueyTray.lnk: Color management application.
- Macro Express Pro.lnk: Macro manager.
- Snagit 10.lnk: Screen capture.
- digsby.lnk: IM Utility.
- OneNote 2010 Screen Clipper and Launcher.lnk: One Note utility.
- Adobe Acrobat Synchronizer: Updater application.
- Adobe Bridge: Starts Adobe Bridge.
- Allway Sync: Starts file synchronizer.
- DS Clock: Displays clock on screen.
- Google Update: Updates Google applications.
- KeePass Password Safe 2: Password manager.
- OfficeSyncProcess: Microsoft synchronizer.
- OpenDNS Updater: Open DNS synchronizer.
- PDHookServer: Used by Power Desk.
I noticed several applications that seem to be unnecessary and marked them. Note that to make the changes I specify next, you must run Autoruns as an administrator on a Vista or Windows 7 system.
Then, using Autoruns, I turned these applications off and restarted the computer. Because this is a 64-bit system with a lot of memory, the changes didn't make a significant difference in performance. Slower systems with less memory would see a visible boost in performance.
Bottom Line: Another outstanding free utility from System Internals
Apple and Real Media are just two of the many companies that install applications that start when your computer starts. Maybe you don't need them. Maybe you don't want them. But the only way to avoid this kind of surreptitions "assistance" from these companies is with an application that shows you every application that runs at boot time and allows you to remove them.
For more information, visit the Microsoft System Internals website.
Short Circuits
Oops! Now What?
I heard from listener Kevin Contos this week about an "interesting" problem (any problem is "interesting" if it didn't happen to your computer). There's a new baby in the family and he had received some pictures. Wanting to view them, he right-clicked an image and told it to open with Photo Viewer. No problem, except that he hadn't clicked a photo. He had clicked a link to a photo.
Even worse, "Always open file type with this program" was selected and suddenly every link on the computer wanted to open in Photo Viewer.
Every link. Double-click any icon on the Desktop and Photo Viewer opens. Select anything on the Start Menu and Photo Viewer opens. It's hard to start CCleaner or some other registry editor application when every link tries to start the Photo Viewer.
The solution was a Microsoft chat group:
Click Start Menu, type "regedit" in the Start Search field, press Enter, and navigate to:
HKEY_CURRENT_USER\Software\Microsoft\Windows\CurrentVersion\Explorer\FileExts\.lnk
Once there, click the arrow to expand it, delete the sub-key named UserChoice, and close the Registry Editor and reboot
All was restored. As Contos said, "I can't be the only bleary eyed boob who has done this, so pop this in to your bag of tricks in case the situation arises."
Bravo! Nice solution to what could have been a sticky problem.
Google Announces an Algorithm Change
And it's about time. Content farms will be put out to pasture and you'll be able to eliminate sites you don't like. First on my list is the site that almost always comes up when I toss Google a technical question. It's a paid site and I found, when I subscribed for a year, that the information is generally worse than what I can find on my own. So that site will be high on my list to block.
Content farms, by the way, are sites that typically contain a lot of content, mostly poor-quality stuff, and lots of ads. Because Google's algorithms generally favor content, these sites often rank far higher than sites that are actually useful.
Google changes its procedures frequently, but most of the changes are incremental tweaks that are designed to make searches return better results. Lately, though, Google has been on the receiving end of a lot of criticism and many of the critics point to Google Ads as the reason the search giant has seemed to ignore the problem.
Some of the change may have been a response to a cross-town rival startup, Blekko.com (this is the best name they could think of—Blekko?) Blekko started blocking content farms a few weeks ago and also allows users to set more extensive preferences for searches. Now Google has a personal blacklist, but currently it requires the use of the Chrome browser. If you use Blekko for searching, regardless of your browser, you'll never see another listing for ExpertsExchange.com, Ehow.com, and more than a dozens other sites that the developers say offer little value.
Do We Really Not Care About the Truth?
I received a forwarded message this week. The sender said that he didn't really know whether it was true or not and he didn't care. "Monday on Fox news they learned that the staffers of Congress family members are exempt from having to pay back student loans. This will get national attention if other news networks will broadcast it. When you add this to the below, just where will all of it stop?" The story is, of course, false and it didn't originate at Fox News. But what really concerns me is the statement that the sender didn't know whether it was true or not and didn't care.
Excuse me? When I write about something, I do my best to be sure that what I'm saying has some basis in fact. I won't pass something along without checking it out. The old journalism joke applies: "If your mother says she loves you, CHECK IT OUT."
Fox "News" tends to make things up, but this story seemed out of character for Fox. I checked it out and found, unsurprisingly, that it's false. The Snopes.com report is here. The forwarded message also talked about "The 28th Amendment" and that, too, is mostly false.
So consider this an editorial. Or maybe just a request.
I can understand accidentally passing along something that seems plausible. Ten years ago, I did that occasionally. But I simply cannot comprehend or condone "I don't know whether this is true or not and I don't care"!
Snopes.com is my go-to resource to check the validity of claims that I receive. Both lefties (like me) and righties forward absolutely ludicrous reports without evaluation. As a co-worker (a righty) says occasionally, "critical thinking is a lost art".
Please! It takes less than a minute to check the validity of a message. Just visit snopes.com and type a few words from the message. If it's a known phony or a known legitimate point, you'll have a response in just a few seconds. If snopes.com has no information, you'll know that in a few seconds, too, and then you can decide whether you should pass the message along. Or not.
Why would anyone forward a message without verifying it? If you send me something you haven't vetted, I will check it out. If it turns out to be false, I'll let you know. So my request is this: Even if something exactly fits your political point of view, don't pass it along until you've confirmed its validity.
Lies benefit nobody.

 The author's image: It's that photo over at the right. This explains why TechByter Worldwide was never on television, doesn't it?
