Listen to the Podcast
28 Apr 2019 - Podcast #640 - (23:27)
It's Like NPR on the Web
If you find the information TechByter Worldwide provides useful or interesting, please consider a contribution.

If you find the information TechByter Worldwide provides useful or interesting, please consider a contribution.
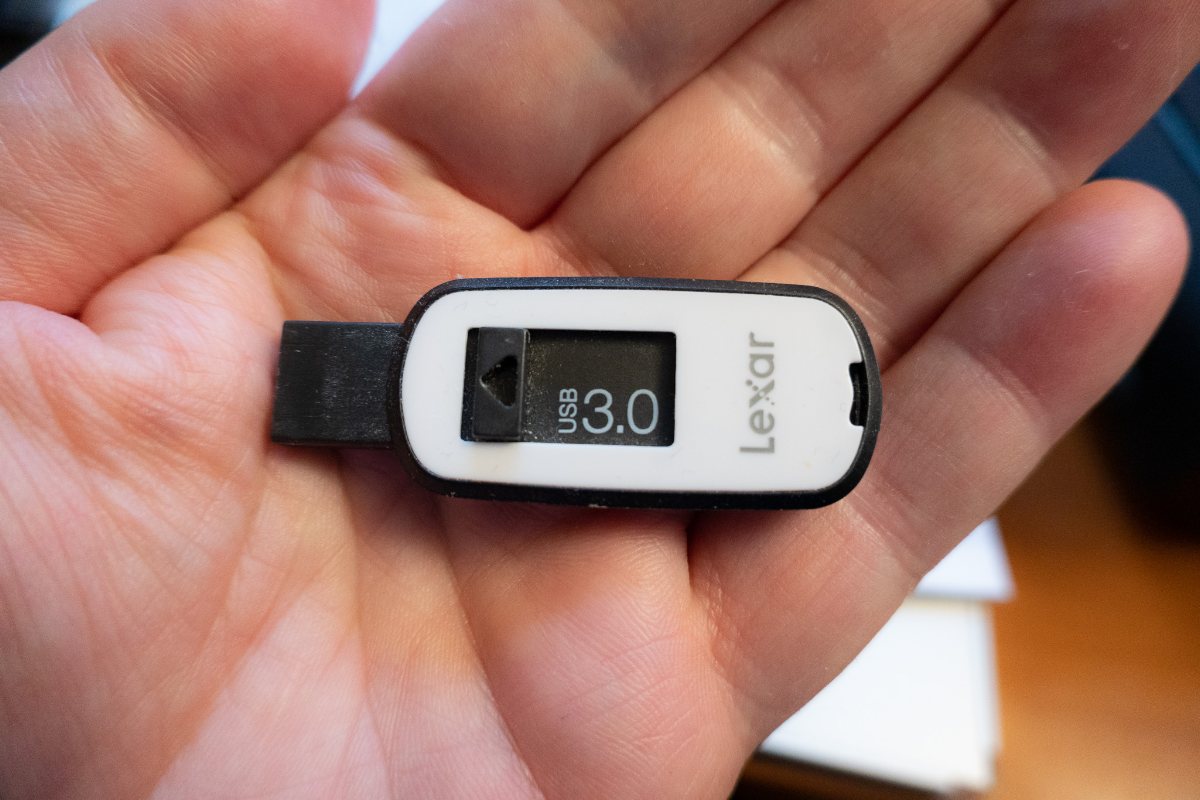
Thumb drives are large enough to carry tens of thousands of documents in a pocket or attached to a key ring. They're easy to use and easy to lose. What happens if you lose one or somebody steals it?
 A lost thumb drive should be safe because nobody should ever pick up a lost thumb drive and stick it into a USB slot on their computer. That's because crooks sometimes "lose" drives around government or company office buildings, hoping that somebody will pick it up, take it inside, and put it into a computer. And people do, sometimes even those who should know better. So saying the data should be safe isn't the same as saying the data will be safe.
A stolen thumb drive is a different story. Someone who steals one of these drives either knows or hopes that it contains interesting data.
If the data on the thumb drive is encrypted, it's much less likely that the files will be compromised. Encryption is relatively easy using an application called VeraCrypt, which is generally considered to be the successor to TrueCrypt.
TrueCrypt, which is still available, is no longer considered safe. Development ended in May 2014, ten years after its initial release. It was provided without charge, as is VeraCrypt. Any existing bugs in the TrueCrypt code (all software has bugs) have not been corrected in the past five years and encryption technology has continued to evolve. So if you're looking for a way to protect files on a mobile device, VeraCrypt is a good choice.
VeraCrypt can encrypt entire disk drives, including the drive containing the operating system, but I'll be describing how to create an encrypted thumb drive. Other options involve creating an encrypted folder on a thumb drive and creating an encrypted partition on a thumb drive. If you carry a notebook computer that contains files with proprietary information, yours or your company's, encrypting the entire drive would be well worth considering and VeraCrypt's documentation explains how to do this.
VeraCrypt is available for Windows, MacOS, Linux, and Android. Compared to TrueCrypt, VeraCrypt has better security so that it is less susceptible to brute-force attacks. When a system partition is encrypted, TrueCrypt used an algorithm with 1000 iterations; VeraCrypt runs 327,661 iterations. For standard containers and other partitions, TrueCrypt used 2000 iterations at most and VeraCrypt runs either 655,331 iterations or 500,000 iterations depending on the protocol. As a result, VeraCrypt volumes open more slowly, but this affects only the initial mount process and it makes the encrypted data much more secure.
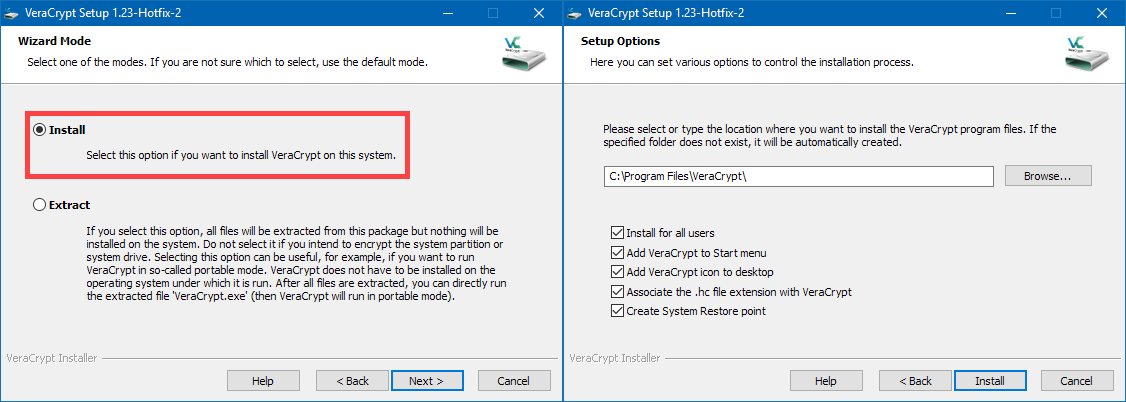 VeraCrypt can be run as a portable application, and that means without installation, but I'll be describing a process that involves installing the application on the computer. The screen shots illustrate installation and use on a Windows 10 computer. If you're installing on a MacOS computer or a Linux computer, there will be cosmetic differences.
VeraCrypt offers three options for encrypting thumb drives:
If you're following along, be sure that the thumb drive you plan to encrypt is empty or that it contains no important data because the process will delete any files that are on the drive.
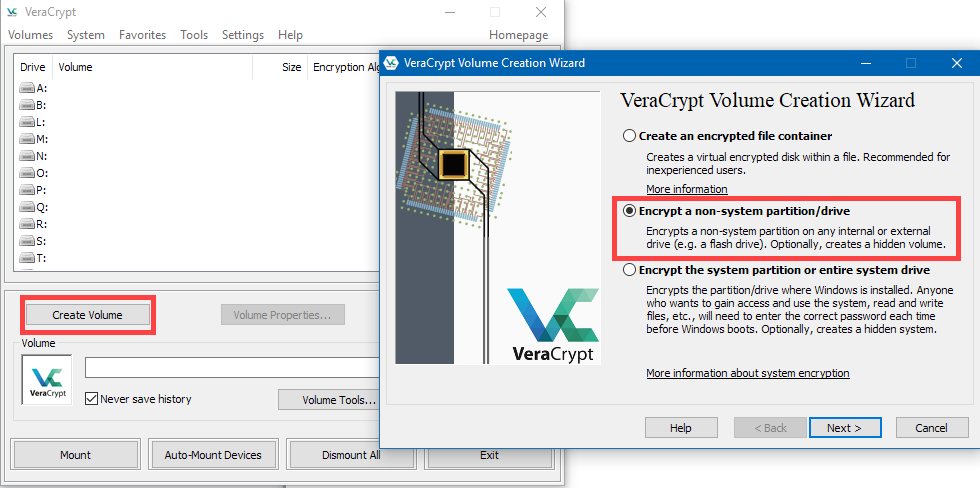 Assuming that you've installed VeraCrypt on the computer, have inserted the thumb drive, and have confirmed that it contains no files that you want to keep, start VeraCrypt and click Create Volume. This will open a Volume Creation Wizard. Select the middle option, Encrypt a non-system partition/drive, and click Next. Windows users will see a User Access Control dialog.
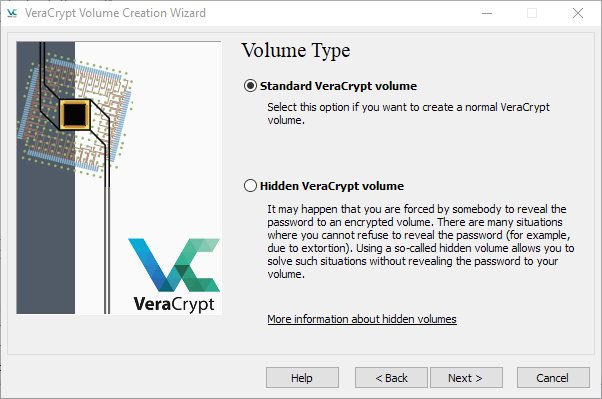 The next dialog allows you to specify the type of volume to create. The options are Standard VeraCrypt volume and Hidden VeraCrypt volume. The hidden option allows for what's called "plausible dependability". If you suspect that you may someday be threatened with bodily harm unless you reveal the password for an encrypted device, choose the Hidden VeraCrypt volume option and read the documentation that explains plausible deniability. For this example I'll choose Standard VeraCrypt volume and click Next.
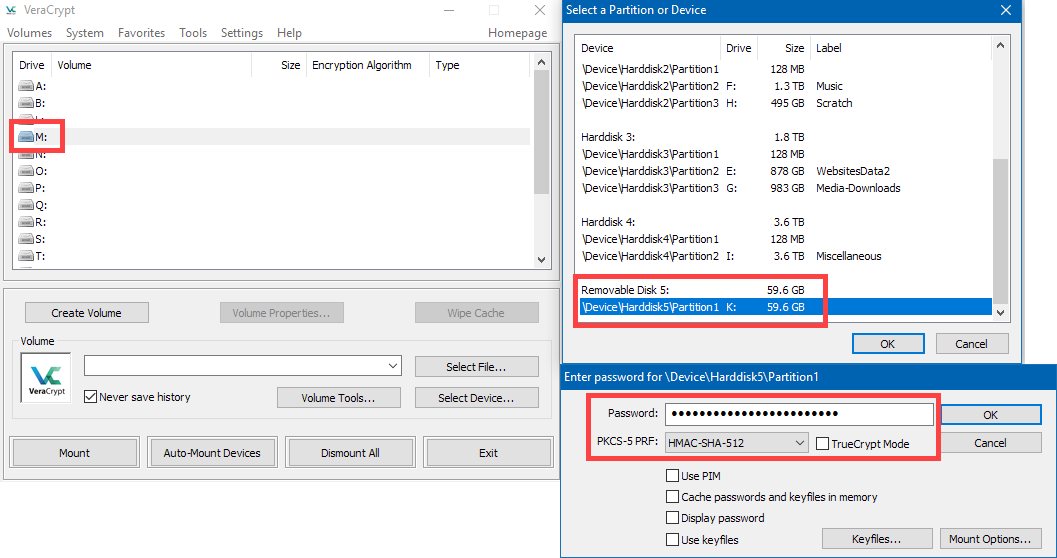
 THIS IS A CRITICALLY IMPORTANT STEP! The next dialog box asks for the volume location. Any data on the drive you've selected will be deleted! If you select the wrong location, you will lose files. So be absolutely positive that you have selected the drive letter for the thumb drive you want to encrypt. Check twice.
Click (1) Select Device and then find (2) the thumb drive in the list of available drives and partitions. Select the partition, not the full drive, and click OK. This will display (3) the volume location. Look again to be sure you've made the right choice and click Next.
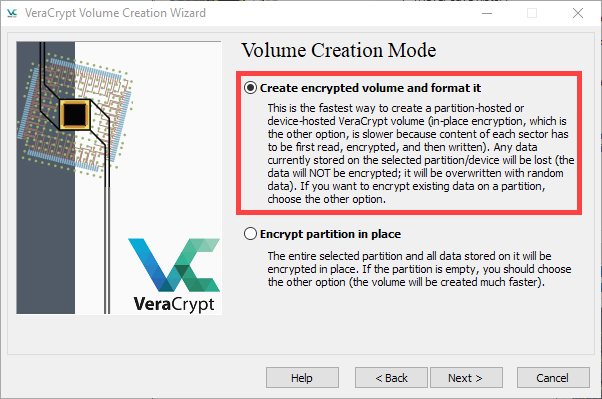 Leave Create encrypted volume and format it as the selected option and press Next.
 The Encryption Options screen defaults to select the strongest encryption (AES) and the strongest hash algorithm (SHA-512). The default settings are the best options, so leave these settings alone and click Next. Because we'll be encrypting the entire thumb drive, the options to specify a volume size are disabled. Look once again to be sure that the size is what you expect it to be and click Next.
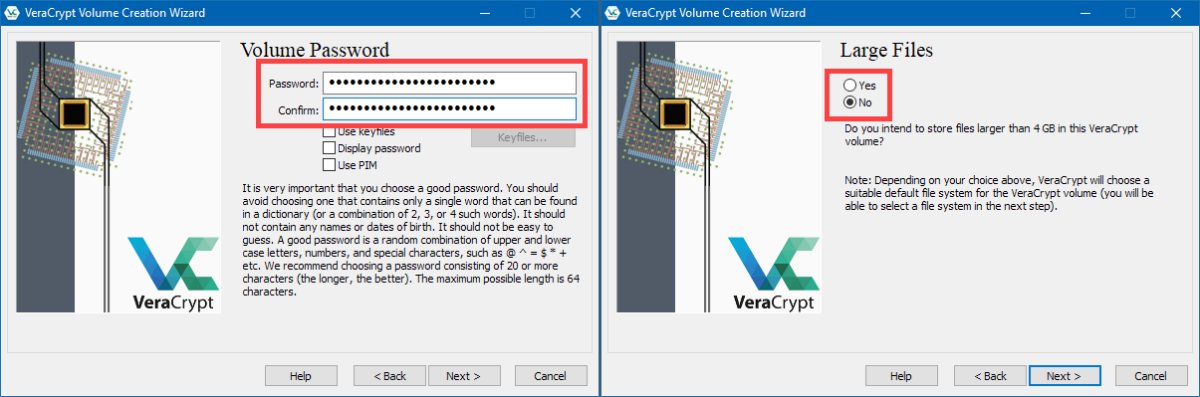 Now you need to select a password. This should be a strong password and one that you can easily remember. VeraCrypt recommends that the password be at least 20 characters long and consist of upper and lower case letters, numbers, and symbols. The maximum length is 64 characters.
When you have created and confirmed the password, the Next button will be activated. Press it to continue to the Large Files screen. If you plan to store any file that's larger than 4GB, select Yes. Otherwise, leave the default setting and click Next.
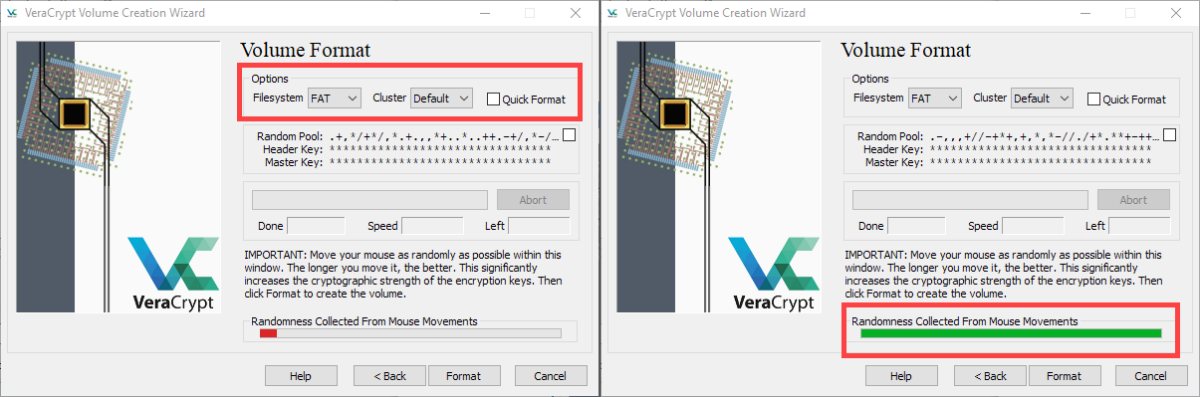 In the next screen, you can specify a file system, but VeraCrypt will have made a selection based on whether you need to store large files. This dialog box has a bar graph near the bottom. Initially it will be blank or red. Move the mouse around randomly on the screen for at least 30 seconds. The bar graph will become longer and eventually turn yellow and then green. Try to avoid moving the mouse in any discernible pattern. What you're doing here is creating some "randomness" that will be used by the encryption process. Wait until the bar is green or (better still) until it reaches the right edge. The process may take several minutes. Then click Format.
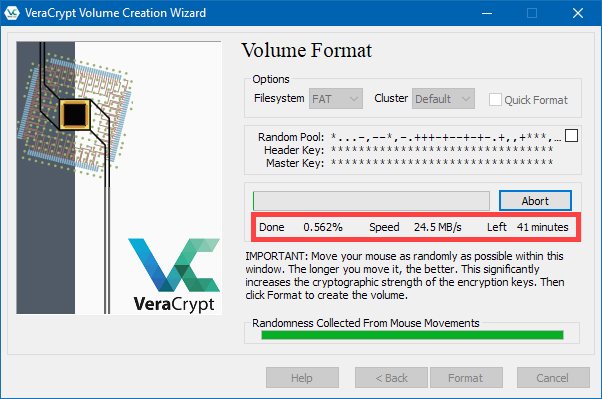 Formatting will take a while -- the better part of an hour for my 64GB thumb drive.
Once you've created an encrypted drive, you'll doubtless want to store some files on it. Before an encrypted drive can be used, it must be mounted. Mounting the drive requires the VeraCrypt application. Yes, that means that VeraCrypt will need to be installed on any computer where you want to use the encrypted drive.
If you want the encrypted drive to be usable on a computer where the VeraCrypt application hasn't been installed, you can create an encrypted folder on the drive or create multiple partitions on the drive and then copy the VeraCrypt program to the unencrypted part of the drive. The folder option is described fully in the documentation and I'll describe the multi-partition option near the end of this article.
 Open VeraCrypt, choose a drive letter from the main window, and click Select Device.
Navigate to your encrypted device and click Mount. You will be prompted to type the encryption password and, when you've done that, the encrypted drive will be mounted as which ever drive letter you selected.
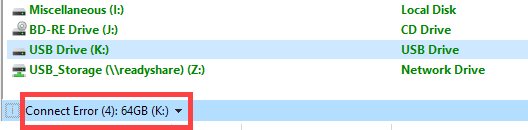 If you attempt to open the encrypted drive without mounting it, you'll see an error message and the Windows File Explorer will tell you that the drive needs to be formatted before it can be used. Formatting the drive will destroy the VeraCrypt data. You'll also see a warning from Windows when you insert a drive that has been encrypted or contains an encrypted partition. The warning will say that the drive cannot be used until it has been formatted. Do not format the drive unless you want to delete the encrypted data.
 When you've mounted the drive, your data will be available for use.
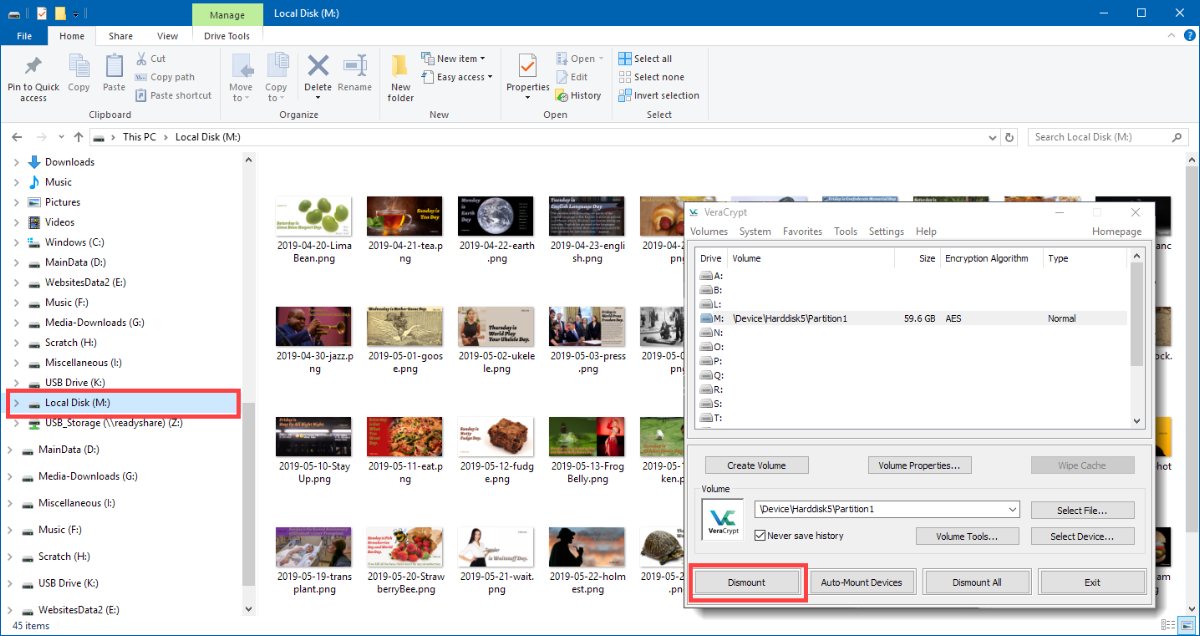
When you're finished, it's best to unmount the drive using VeraCrypt and then to choose the Safely Remove option in the Notification Area. Even if you don't do this, though, the encrypted drive will be dismounted and made unavailable when you shut the computer down.
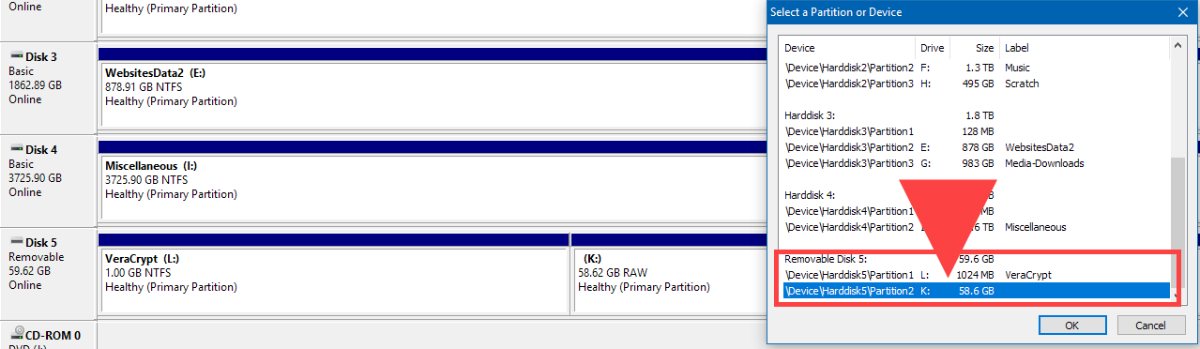 If you'd prefer to create a secondary partition on the thumb drive so that VeraCrypt can be stored on the main partition, you'll need to use the Windows Partition Manager. Delete the existing partition (making absolutely certain that you've selected the thumb drive). Then create a new partition that will be unencrypted. This can be as small as 100MB, but I created a 1GB partition. Format this partition. Then create a second partition that consumes the remaining space on the thumb drive. You do not need to format this partition. When selecting the partition in VeraCrypt, be sure to choose the second partition. Those are the only differences to watch for if you prefer this option.
 You'll also need to run VeraCrypt again and choose to unpack the files instead of installing the application. Copy the unpacked files to the primary partition of the thumb drive and run it from there when you want to decrypt the encrypted volume.
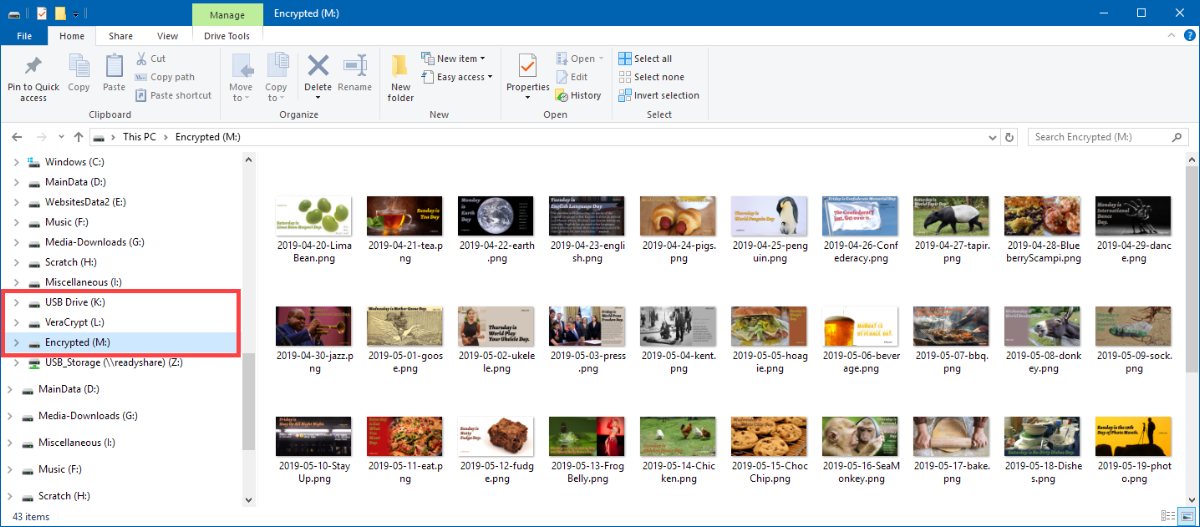
The encrypted (but unreachable) drive (K) will appear in the Windows File Explorer and the operating system will report it as being unformatted. You'll also see the unencrypted partition mounted as the drive that contains the VeraCrypt application (L), and the encrypted drive (M) after it has been mounted.
VeraCrypt can be downloaded from the VeraCrypt website.
Manufacturers of hardware reviewed on TechByter Worldwide typically loan the hardware and it must be returned at the end of the review period. Developers of software reviewed on TechByter Worldwide generally provide a free not-for-resale (NFR) license so that all features of the application will be unlocked.
Well, maybe not huge. After all, standard mechanical disk drives with 4TB of storage are available for $100 to $200, so maybe a 1TB solid-state drive (SSD) may not seem like much, but it's an indicator of changes that are on the horizon.
In the middle of March, I said that it was time to seriously consider replacing your computer's boot drive with a solid-state drive because prices had dropped a lot in the past couple of years. Now there's been another big drop. SanDisk, Samsung, Crucial, and Western Digital are all selling 1TB SSDs for a little more than $100. Granted that for that same $100 you could have 4 times as much storage with a mechanical drive, but 1TB is more than enough for most of our notebook computer users. Those who need more space can easily add one or more mechanical USB3 drives.
I bought a Lenovo notebook computer a few years ago as a secondary machine. It had a 1TB mechanical drive that I replaced with a 500GB SSD. The mechanical drive is in a USB enclosure and I use it for backups. I would have preferred to install a 1TB SSD in place of the mechanical drive, but couldn't justify the price difference. Since then, I've replace the primary computer -- a large desktop machine -- with a much smaller notebook computer that came with a 500GB SSD. Most of my files are stored on an external system that contains 4 mechanical hard drives with a combined capacity of 11TB. Wouldn't it be great if those were solid-state drives!
Well, maybe someday.
Consumer-grade 1TB SSDs are so common that the future is clearly visible. SSDs with 2TB capacity are still in the $300-$350 price range, but the prices will drop as manufacturing ramps up and economies of scale kick in. I'm not going to be replacing the mechanical drives that store data with SSDs anytime soon, but I'm beginning to be able to imagine the time when that will be possible.
For now, the ability to install a super-fast 1TB SSD as a boot drive is enough to keep me satisfied.
My secondary computer (the one I mentioned in the previous article) is enrolled in the Windows Insider program's Slow Ring. I use this computer enough that enrolling it in the Fast Ring would make me very nervous. Even so, the Slow Ring is sometimes challenging.
Take the March update, for example. The process started normally, but stalled either during the download process or the "getting ready" process. In most cases, the download part worked as expected, but the update never got beyond 97% of "getting ready". There were known problems with the update, so I didn't pay much attention to the errors. The computer still booted and ran normally.
Occasionally the system would tell me that the update process had stalled and that rebooting the computer might allow it to continue. It didn't.
Late in March, I decided to force the issue and downloaded the update. Running the process manually also failed during the "getting ready" phase. By early April I was becoming somewhat annoyed. I had booted to Safe Mode. I had deleted the update cache. I had spun the rubber chicken counter-clockwise while murmuring the usual incantations. Nothing worked. The problem was becoming worrisome and it was time to use a larger hammer because security updates were being blocked behind the failed Windows Insider update.
Windows includes a recovery option, but it has only two choices: Keep files or remove everything. It seems like there should be an option to keep all files and applications — and there is, but getting to it isn't easy.
What you need to do is "update" the computer from Windows 10 to Windows 10 and that requires the Windows 10 Media Creation Tool. After downloading this file from Microsoft's website, I ran it and selected the option to create installation media on a USB drive. Once I had that, I had a third option. The setup.exe file can be run with several parameters:
That process ran normally and completed without error; then I was able to run the Windows Update process to get back on track.
Sometimes you just have to smack the operating system upside the head with a two-by-four to get its attention and if you're still using Windows 7 or 8.1, you'll find the media creation tool by starting here.
Adobe developers are looking at a technique that identifies colors in one image and then applies those colors to a vector image in Illustrator. At first glance, you might wonder why anyone would want to do this.
What I see when looking at the video based on a presentation at the annual OFFF Festival in Barcelona this week is a feature that a designer could use effectively early in a development stage. The designer may simply want to see what a different palette of colors might look like on an object that the designer has already created. Doing that would normally consume a lot of time and take considerable effort, but the Color Transfer feature, when it's added to Illustrator, will make it possible for the designer to select an image and then have Illustrator replace colors in the target image with colors from the sample.
Color Transfer extracts the color palette from an image that has been imported into the user's Illustrator library. There's been no explanation yet regarding how the procedure determines which color in the sample image will be assigned to replace any specific color in the graphic, but presumably Sensei is involved. Adobe does say that artists will be able to change assignments after the palette from the sample image has been applied.
Adobe's developers and project managers are an inventive group and they receive a lot of input from users. As a result, they receive a lot of ideas for new features and currently many of the new features seem to involve the company's artificial intelligence technology, Sensei. Sensei is a martial arts term meaning "teacher" or "one who comes before". For Adobe, it's what powers some of the most powerful new features and sometimes powers a feature such as Color Transfer that might, at first glance, seem trivial but that offers capabilities that users will embrace and enjoy. A more detailed explanation is on the Adobe blog.
By the way, OFFF is possibly an initialism for a longer term in Spanish or some other European language. If so, I haven't been able to determine what that term might be. One possibility is "OFFTERLIFE", which is used in the OFFF Festival presence on Facebook. If you'd like to learn more about the festival and maybe plan a trip for next year, check out the OFFF.Barcelona website.