Website made using only Xara Web Designer, and no other graphics or software tools.6) Save & PublishWhen you select File -> Save this saves your website as a Web Designer .web file. This is the working format for Web Designer. To save the HTML files for viewing in a browser you must choose the File -> Export Website menu option. This creates one HTML file for each page of your website and puts all the associated files into a folder next to this.PublishingIn order to put your website on the web for all to see, you need a web hosting company. There are hundreds of companies that offer ‘web space’. The process of transferring your website from your hard disk to the web server at your hosting company is called FTP upload (file transfer protocol). You need three pieces of information from your web hosting company: Your FTP host name, your username and password.Before you can publish you must export the website to your hard disk first. Then, assuming you have your FTP account information simply select File -> Publish Website, and you’ll be asked to enter those three FTP details.--- End ---The following sections demonstrate a few more features:Pop-upsYou can easily create pop-ups with Web Designer. These are links, buttons or photos that when clicked, or even just when the mouse is moved over the link, a pop-up window appears.The following is an example of this in action. In the web browser preview of this page, move the mouse pointer over the peacock picture or the following annotated buttons, or even this text. This example is quite sophisticated in that it has multiple pop-ups with faded backgrounds, but it shows what’s possible. In Web Designer the Page & Layer Gallery on the right side can be expanded to show the layers on each page (click the small triangle to expand any page), and you will see each of the pop-up layers.These 4 buttons along the top toolbar provide access to the most common functions of Xara Web Designer. Three of them have fly-out menus of other controls. Mouse-over the individual controls to find out more.This photo is a repelling object (if you drag it around the page in Web Designer the text moves out of the way). It also uses a pop-up effect so as you mouse-over the image it shows another layer on top.NavBarsWeb Designer includes what is probably the most advanced navigation bar (NavBar) building feature of any web authoring program. Along the top of these pages is a simple example, and here’s another, that has sub-menus. (preview this web page to try them out)Building high-class graphical NavBars like this has previously been the preserve of skilled graphic artists. Now you can add such designs to your website. What makes these so special is that you can just edit the button labels and all the graphic design is adjusted to accommodate the label automatically. You can of course have them any color, and we include dozens of alternate designs in the Designs Gallery. You can also incorporate drop-down menus with various animation and transparency effects.The next pages provides a few pointers to some more advanced features such as embedding videos, making items repeat across all pages, and other features.PreviewLinksWeb PropertiesExport & Publish
Preview current page
Preview whole website
The Preview button opens a Web Browser so you can see exactly how your website will appear. If you click this button directly without waiting for the fly-out, it will preview just the current page. To preview the whole website wait until the fly-out appears and click the second option.If you have exported your website to your hard disk, this button will also re-export it.
The Link button allows you to set all types of links on regions of text, graphic objects or photos. First select the item you want to give a link, then select this button.You can link to external websites, you can make the link automatically pop-up a large photo (see example on page 1), you can link to any page or anchor point in your website. You can make the link pop-up a layer or link it to an uploaded document such as a PDF file.
Website
Page
ImageMouseoverPlaceholderFTPNavBars
The Website Properties button accesses the main dialog for setting various properties. E.G. the website properties is where you set the website keywords, Google analytics (visitor tracking) and more.The Image properties control lets you control thumbnail pop-ups and image optimization.The mouse icon controls mouse-over effects for objects (as you’re seeing here).The last button opens the Navbar dialog to build and control the smart Navigation bars like you see on the top of each page of website.
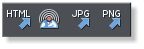
Save HTMLPublishSave JPGSave PNG
This button controls export and publish options. the first saves the website HTML to local disc. The second will publish the website to the web. The last two will export the selected item as a JPG or PNG graphic.
This is a pop-up layer that can contain any text, graphics or photos. By using the Mouse-over tab of the Web Properties dialog you can make any link or any object trigger a pop-up like this.


 Website made using only Xara Web Designer, and no other graphics or software tools.


 6) Save & Publish
When you select File -> Save this saves your website as a Web Designer .web file. This is the working format for
Web Designer. To save the HTML files for viewing in a browser you must choose the File -> Export Website menu
option. This creates one HTML file for each page of your website and puts all the associated files into a folder
next to this.
Publishing
In order to put your website on the web for all to see, you need a web hosting company. There are hundreds of
companies that offer ‘web space’. The process of transferring your website from your hard disk to the web server
at your hosting company is called FTP upload (file transfer protocol). You need three pieces of information from
your web hosting company: Your FTP host name, your username and password.
Before you can publish you must export the website to your hard disk first. Then, assuming you have your FTP
account information simply select File -> Publish Website, and you’ll be asked to enter those three FTP details.
--- End ---
The following sections demonstrate a few more features:
Pop-ups
You can easily create pop-ups with Web Designer. These are links, buttons or photos that when clicked, or even
just when the mouse is moved over the link, a pop-up window appears.
The following is an example of this in action. In the web browser preview of this page, move the mouse pointer
over the peacock picture or the following annotated buttons, or even this text. This example is quite
sophisticated in that it has multiple pop-ups with faded backgrounds, but it shows what’s possible. In Web
Designer the Page & Layer Gallery on the right side can be expanded to show the layers on each page (click the
small triangle to expand any page), and you will see each of the pop-up layers.
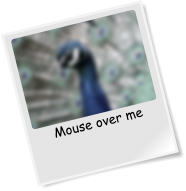
These 4 buttons along the top toolbar provide access to the most common functions of Xara Web Designer. Three of
them have fly-out menus of other controls. Mouse-over the individual controls to find out more.
This photo is a repelling object (if you drag it around the page in Web Designer the text
moves out of the way). It also uses a pop-up effect so as you mouse-over the image it
shows another layer on top.
NavBars
Web Designer includes what is probably the most advanced navigation bar (NavBar) building feature of any web
authoring program. Along the top of these pages is a simple example, and here’s another, that has sub-menus.
(preview this web page to try them out)
Building high-class graphical NavBars like this has previously been the preserve of skilled graphic artists. Now you
can add such designs to your website. What makes these so special is that you can just edit the button labels and
all the graphic design is adjusted to accommodate the label automatically. You can of course have them any color,
and we include dozens of alternate designs in the Designs Gallery. You can also incorporate drop-down menus
with various animation and transparency effects.
The next pages provides a few pointers to some more advanced features such as embedding videos, making items
repeat across all pages, and other features.
6) Save & Publish
When you select File -> Save this saves your website as a Web Designer .web file. This is the working format for
Web Designer. To save the HTML files for viewing in a browser you must choose the File -> Export Website menu
option. This creates one HTML file for each page of your website and puts all the associated files into a folder
next to this.
Publishing
In order to put your website on the web for all to see, you need a web hosting company. There are hundreds of
companies that offer ‘web space’. The process of transferring your website from your hard disk to the web server
at your hosting company is called FTP upload (file transfer protocol). You need three pieces of information from
your web hosting company: Your FTP host name, your username and password.
Before you can publish you must export the website to your hard disk first. Then, assuming you have your FTP
account information simply select File -> Publish Website, and you’ll be asked to enter those three FTP details.
--- End ---
The following sections demonstrate a few more features:
Pop-ups
You can easily create pop-ups with Web Designer. These are links, buttons or photos that when clicked, or even
just when the mouse is moved over the link, a pop-up window appears.
The following is an example of this in action. In the web browser preview of this page, move the mouse pointer
over the peacock picture or the following annotated buttons, or even this text. This example is quite
sophisticated in that it has multiple pop-ups with faded backgrounds, but it shows what’s possible. In Web
Designer the Page & Layer Gallery on the right side can be expanded to show the layers on each page (click the
small triangle to expand any page), and you will see each of the pop-up layers.
These 4 buttons along the top toolbar provide access to the most common functions of Xara Web Designer. Three of
them have fly-out menus of other controls. Mouse-over the individual controls to find out more.
This photo is a repelling object (if you drag it around the page in Web Designer the text
moves out of the way). It also uses a pop-up effect so as you mouse-over the image it
shows another layer on top.
NavBars
Web Designer includes what is probably the most advanced navigation bar (NavBar) building feature of any web
authoring program. Along the top of these pages is a simple example, and here’s another, that has sub-menus.
(preview this web page to try them out)
Building high-class graphical NavBars like this has previously been the preserve of skilled graphic artists. Now you
can add such designs to your website. What makes these so special is that you can just edit the button labels and
all the graphic design is adjusted to accommodate the label automatically. You can of course have them any color,
and we include dozens of alternate designs in the Designs Gallery. You can also incorporate drop-down menus
with various animation and transparency effects.
The next pages provides a few pointers to some more advanced features such as embedding videos, making items
repeat across all pages, and other features.
 Preview
Links
Web Properties
Export & Publish
Preview
Links
Web Properties
Export & Publish