Listen to the Podcast
13 May 2022 - Podcast #792 - (19:45)
It's Like NPR on the Web
If you find the information TechByter Worldwide provides useful or interesting, please consider a contribution.

If you find the information TechByter Worldwide provides useful or interesting, please consider a contribution.
Anyone who has scanned any old photo negatives has probably encountered the presence of dust and scratches. The application you use to scan the negatives probably can help remove these unwanted marks.
I'll be talking about VueScan here even though it's not the only application that can reduce or eliminate dust spots and scratches. Silverfast can also do the job, but I have three scanners and three operating systems. That would mean I'd have to purchase six Silverfast licenses to allow the use of all three scanners on all three operating systems. Depending on the Silverfast version and how many scanners and computers I would want to support, the cost would range from $300 to $1800. Even so, only the Windows 11 and MacOS computers would be supported, not Linux.
VueScan works with more than 6500 scanners and can be installed on every computer I own for just $100. It runs on Linux in addition to Windows and MacOS computers, so that choice was easy. Let's look at the process in action.
Click any small image for a full-size view. To dismiss the larger image, press ESC or tap outside the image.
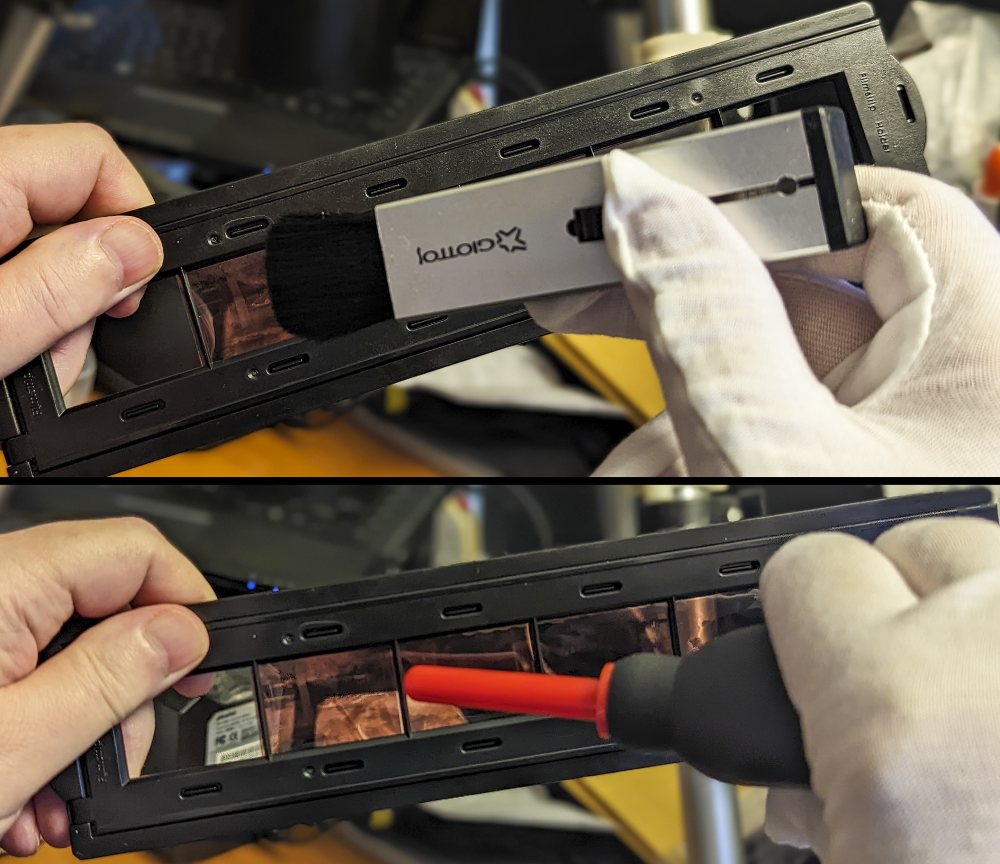 Preparation can reduce dust spots, but won't have any effect on scratches. Removing any dust that's on the negative before scanning it will reduce what the clean-up process will have to do. So presuming you're using a negative holder and either a 35mm film scanner or a flatbed scanner that can scan negatives, start by using a brush that's designed for use with film on both sides of the film. Follow that by using a hand-held air bulb to blow any remaining dust away. Do not use canned air; it's expensive and can create additional problems. If you'll be scanning a lot of negatives, buying a small air compressor could be a good investment.
No matter how diligent you are, there will probably be a least a couple of dust spots. And if there are scratches, they will appear in the scans. In a perfect world, scratches would never happen. Before digital cameras existed, professional photographers sent their film to professional labs such as Meisel in Dallas or Burrell in Crown Point, Indiana. Both labs appear to have closed down. Professional labs maintained their processing equipment so that negatives were returned to photographers without dust or scratches. After all, the initial prints were just the beginning for professional photographers. The goal was to sell additional prints and enlargements, so the negatives had to be in pristine condition.
Not so for "drug store" processing. Many people never had enlargements made and some even threw negatives away, so if the negatives were scratched after the initial prints had been made, it wasn't a big deal. As long as the original prints didn't look too bad, everybody was happy.
Now some of us are resurrecting those old negatives and scanning them. Instead of viewing a small hand-held print, we see the image on a large monitor. The problems are obvious.
 The solution, at least for color negatives, is VueScan's Infrared Clean option. This requires a scanner that's capable of performing an infrared pass and doesn't work for black-and-white negatives. Let's see this process in operation.
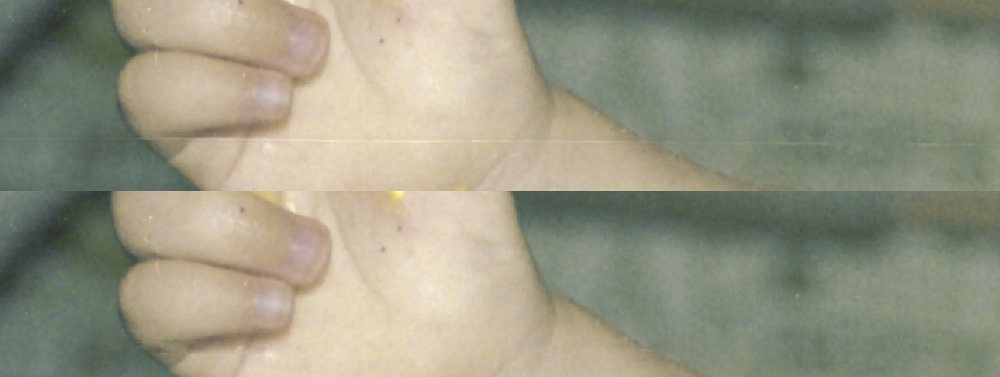
 The image on the left is VueScan's first pass. Here it has converted the film scan from negative to positive, but there's still a strong blue cast that's the result of inverting the orange cast of color negative film stock. The arrow points to a scratch that occurred during film processing. Circles show some of the dust spots. The image on the right is VueScan's initial results. The color is reasonably accurate and most of the dust spots are gone. The scratch, although reduced somewhat and not obvious on this small image, is still there.
 After opening the VueScan image in Lightroom Classic, it's clear that VueScan eliminated some of the scratch (top). A few seconds worth of work with Lightroom's tools repaired the remaining bits of the scratch.
 The final step involved improving the contrast. The result, while not quite perfect, is a good example of what can be done with a 37-year-old negative that was in less than perfect condition.
Some film scanners can create an additional infrared channel in addition to the red, green, and blue channels. The infrared channel detects scratches and dust. Once identified, the defects can be corrected. The larger the imperfection, the more obvious the corrections will be.
IBM developed and patented the first processes for infrared cleaning. Applied Science Fiction licensed the technology. The technology is used in some Canon scanners under the name Film Automatic Retouching and Enhancement, or FARE. Both LaserSoft and VueScan use technologies they have created independently.
Color film has three color layers and the dyes used are mostly transparent to infrared light. This means the infrared scan will appear to be almost entirely black, except for where the film has dust spots or scratches. These appear as lighter areas on the scan. The most common way to remove dust spots and scratches involves interpolating data from surrounding areas. That's why larger repairs are less successful.
Infrared cleaning isn't possible with black-and-white film that uses silver halide because, unlike color dyes, silver halide is not transparent to infrared. Toward the end of the film era, some black-and-white films, such as Ilford XP1 and XP2, used dyes instead of silver halide. These films were processed in C-41 chemistry and could be included with runs of color film. Ilford XP2 is still sold, but Kodak's competing dye-based black-and-white film, BW400CN, was discontinued in 2014 and Ilford is the only source of such films now.
Infrared cleaning does work with these chromogenic black-and-white films, but the scanner needs to be set to scan color negatives and the scans will need additional work to eliminate unwanted color in an application such as Adobe Lightroom Classic.
I started scanning old prints and negatives in January 2021 and sharing new sets of images every day with family members by uploading processed images to Google Drive. So far that's more than 7500 individual pictures and a few videos from old VHS and Super8 tapes.
These memories are important. Old film, old prints, old movies, and old video tapes won't last forever. Now is a good time to pull them out of storage and digitize them. Your daughters and sons will appreciate it.
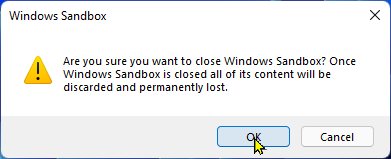
If you're sometimes nervous about installing a new application on a Windows computer, there's a way to test it first without putting the computer at risk. Using the Windows Sandbox, you can install the application for testing in a safe location.
The Sandbox is intended for use only with Windows 10 Pro and Windows 11 Pro, but you may be able to install the function on a computer running a Home version of Windows if you follow instructions from TenForums. It does work with Pro versions of either Windows 10 or Windows 11.
Prior to the Sandbox function, testing software in a protected area required the creation of a virtual machine. But setting up a virtual machine isn't particularly easy and Microsoft introduced the Sandbox with Windows 10 version 1903. The Sandbox is isolated from from the computer's operating system, and everything in the Sandbox is vaporized when you close it.
The Sandbox can be activated on any computer that supports virtualization and is running Windows 10 or 11 Pro or Enterprise. And maybe, as noted, Windows Home.
Click any small image for a full-size view. To dismiss the larger image, press ESC or tap outside the image.
 Before trying to install the Sandbox, confirm that your computer supports virtualization. Open the Task Manager, select the Performance tab, and click the CPU component. A column on the right side of the display will tell you whether virtualization is enabled. It probably will be because that's the default state for most new computers. If not, you'll need to to visit the CMOS settings and enable it. This differs a lot from one machine to another, so check the documentation for your computer.
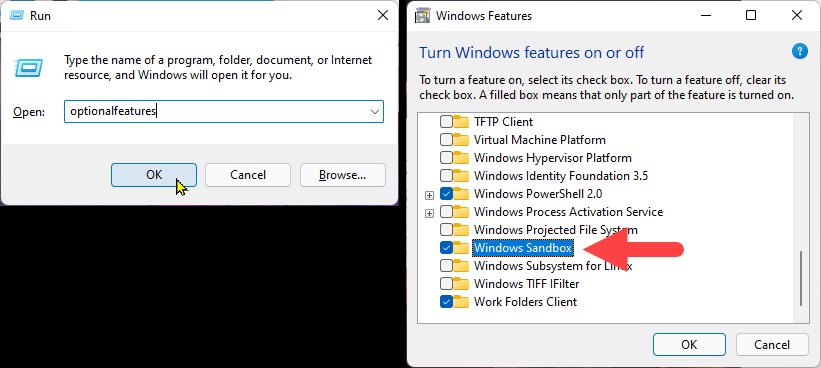 If the computer supports virtualization and is running a Pro or Enterprise version of Windows, you can enable the Sandbox by pressing the Windows key and R, then typing "optionalfeatures" and pressing Enter. Scroll down to Windows Sandbox and enable it.
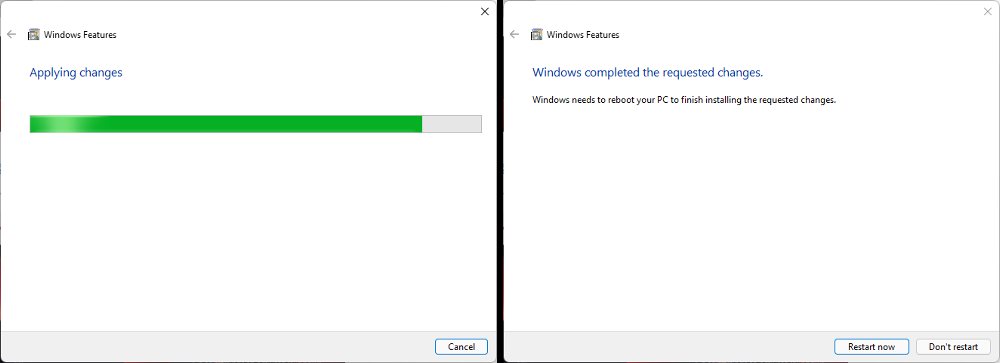 You'll see a progress bar and you'll then be prompted to reboot the computer. The boot process will take more time than usual because an update process is involved. The Sandbox is now installed and ready for use.
 To start the Sandbox, open the Start menu and type "sand". Either right-click Windows Sandbox and choose Run as administrator or choose that option from the text area at the right.
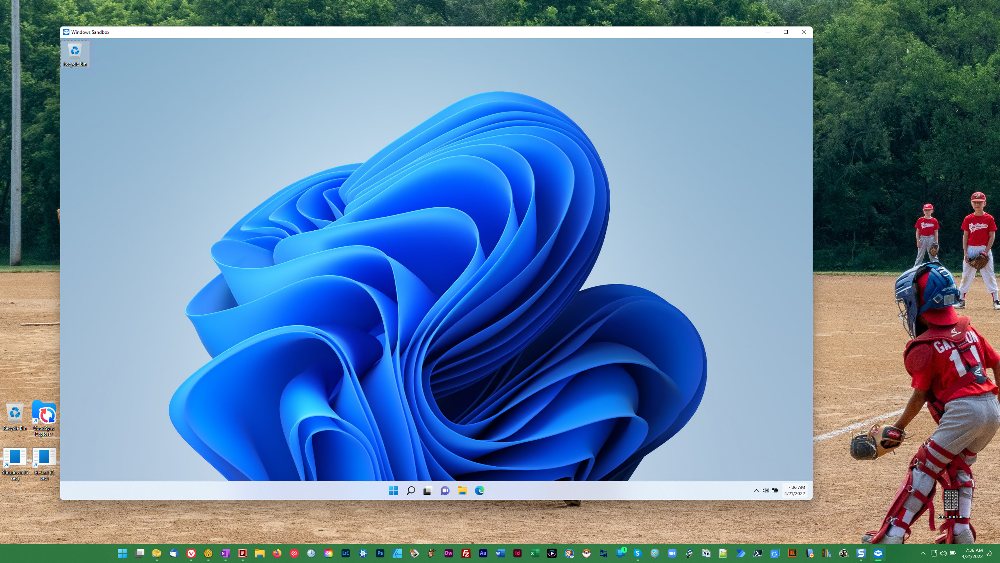 A new Windows screen will open on top of your Desktop. The Start menu has only a few options, but it's otherwise a functional instance of Windows 10 or Windows 11. To install an application, you'll need to copy the installer file from the main computer to the Sandbox. Dragging and dropping will not work. Instead, open a file browser, locate the application you want to run or install, press Ctrl-C to copy it, activate the Sandbox by clicking it, and then pressing Ctrl-V to drop the file onto the Desktop.
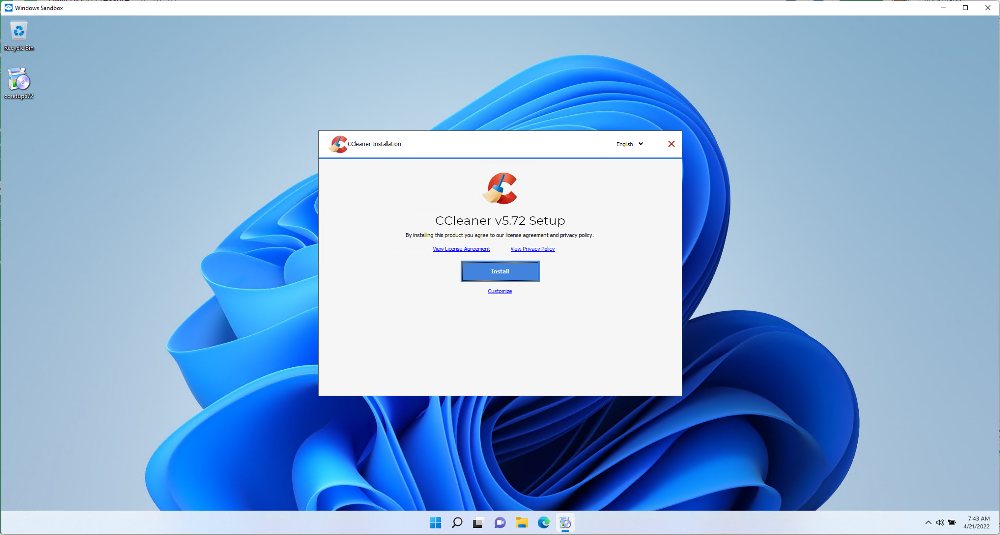 Double-click the file to run it or start the installer. If the installer needs access to the internet, it may or may not work. More about that in a moment. In most cases, the file will either run or the installer will launch and walk you through the normal installation process for the application. You'll be able to use the file normally.
If you open the File Explorer in the Sandbox, everything will look reasonably normal except that any external disk drives will not appear and none of your user accounts will be present. If you start the Settings app, you'll see that the Sandbox Windows edition is the same as the computer's Windows edition, but that it has only 4GB of RAM.
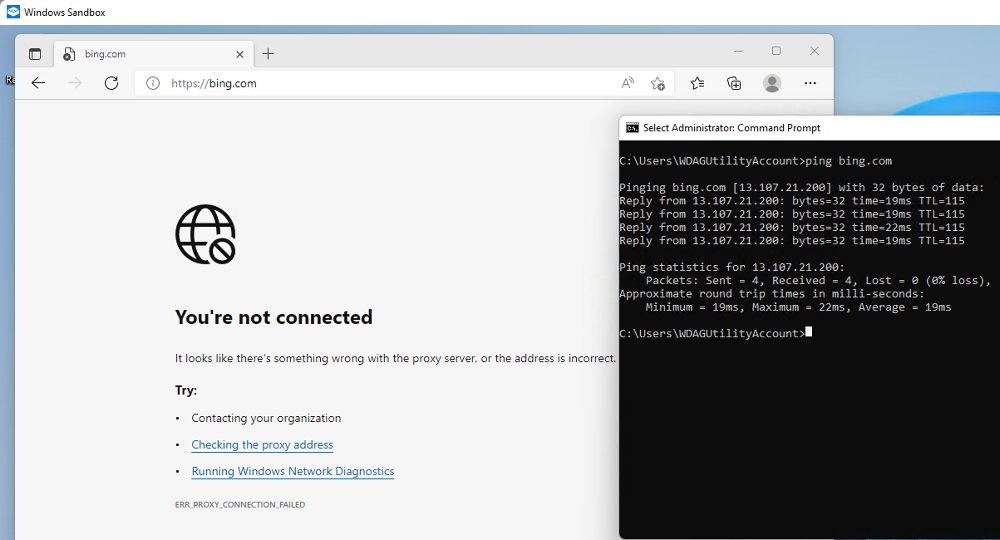 You may not have an internet connection, either. This seems to be a relatively common problem and there are articles about enabling an internet connection such as this one at Guiding Tech. But the problem may actually be with the built-in version of Microsoft Edge. There clearly is a network connection because I was able to ping Microsoft's Bing search engine from the command line and the FTP client Filezilla worked flawlessly when I installed it. The Vivaldi browser failed, too, and it appears that the problem involves proxy settings. I'll resolve it if I ever need to use a browser in the Sandbox.
 The Windows Sandbox is an excellent security feature because nothing is written to any disk anywhere on the computer and anything you install in the Sandbox will be deleted when you close it. So when you have doubts about an application you'd like to try, installing it first in the Sandbox can save a lot of trouble.
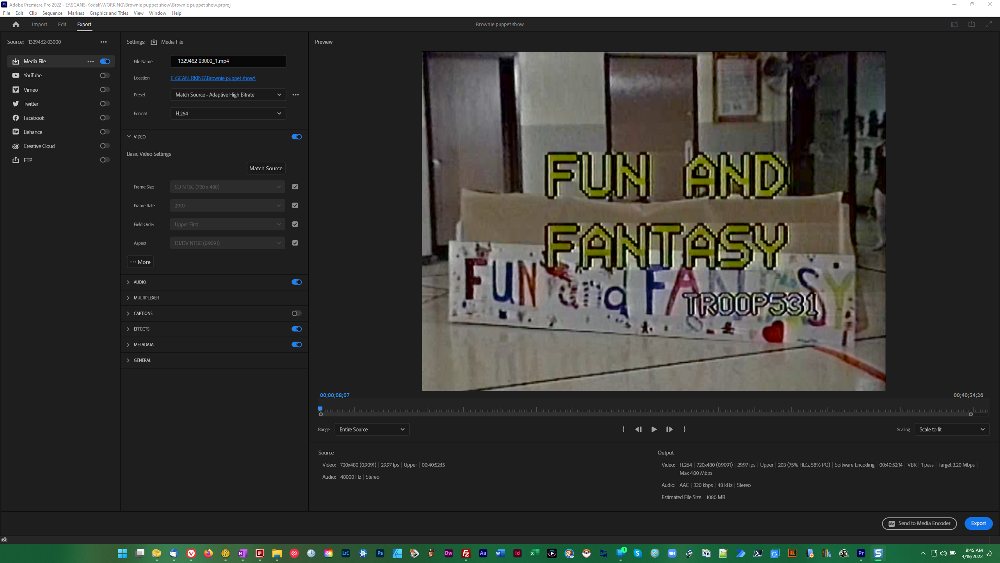
Adobe Creative Cloud includes a lot of applications, so many that subscribers may forget about the ones they use infrequently or never. Take Premiere Pro, for example. It's a complex video production tool that's been used to create motion pictures such as Deadpool, Gone Girl, and Terminator: Dark Fate. So it would be easy to assume that it would be too complicated and hard to learn for projects such as digitizing old home movies or video tapes.
There's no question that it's complex and that mastering Premiere Pro can easily consume several years, but it's an application that can be used by those who have little or no experience. When you need to accomplish an unfamiliar task Google or DuckDuckGo will locate a tutorial.
Click any small image for a full-size view. To dismiss the larger image, press ESC or tap outside the image.
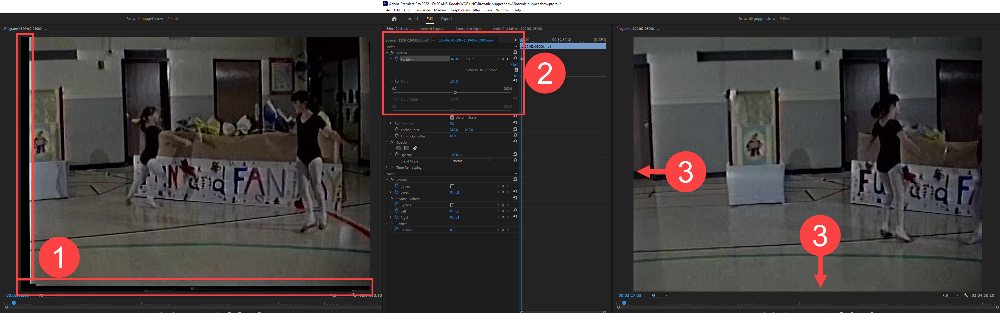 Here's an example: I had some old video tapes digitized. They were made with a video camera that used Hi8 video tape. The resulting digitized files had (1) blank areas at the left and bottom edges of the frame. Keep in mind that these are low-resolution standard NTSC files from the 1980s. Nothing can be done to fix the resolution, but they can be improved a bit.
Premiere Pro allows the user to zoom in and reposition the image. This is a feature that's intended to be used to change the framing a bit with high-resolution 4K or 8K videos, but it can help in a case like this. (2) Zooming in just slightly while maintaining the position of the top-right corner of the video (3) fully fills the frame and eliminates the blank areas.
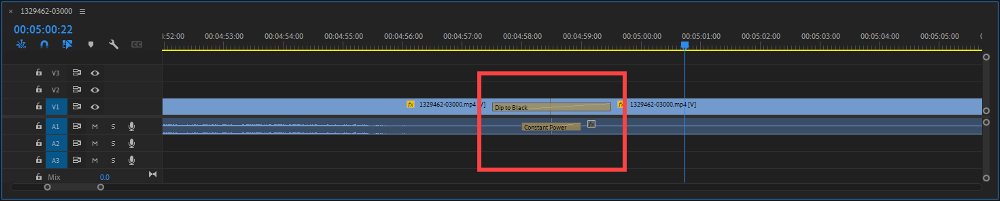 There are powerful video and audio transition effects that can be applied between clips after extraneous parts have been removed. This video also had a section where the audio was far too quiet, and that can be remedied directly in Premiere Pro. For more advanced audio editing, the soundtrack can be edited in Audition.
 Controls to adjust color, brightness, gamma, and other video settings are primarily designed for use when the video has been captured in raw mode with a professional grade camera such as the Sony PXW:FX9K, which is available at Walmart for just $15,197 or the Red Camera DSMC2 Gemini Digital Cinema Camera Kit priced at $27,500 — and not available at Walmart. Even so, these controls can be used to make modest improvements to antique NTSC videos such as mine.
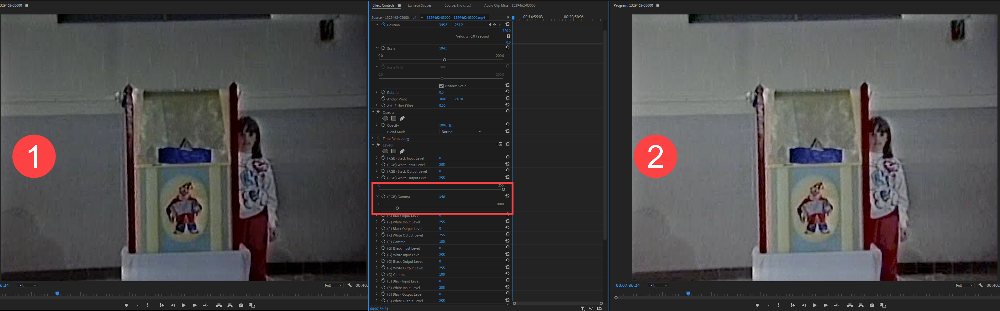
A slight adjustment to the gamma setting improved a (1) too-dark original image to a (2) visibly brighter image without otherwise degrading the image.
 After eliminating blank areas at the beginning and end of the digitized video, editing to remove unwanted sections of the video, adding some transition effects between scenes, improving the audio, and brightening the video, it was time to export the old video in its new and improved state.
The export process in Premiere Pro has been simplified greatly so that it's suitable for use by people who aren't video or motion picture professionals. All of the settings for professionals are still there, but they're in the background. Once the export process is complete, the video can be uploaded to a video sharing service.
The video was of a Girl Scout puppet show that included music that would constitute a copyright violation if I attempted to share it publicly. But a video such as this can be shared privately on YouTube. It will generate a notice about copyright issues, but it's legal as long as it's not shared publicly.