Listen to the Podcast
18 Dec 2020 - Podcast #723 - (22:14)
It's Like NPR on the Web
If you find the information TechByter Worldwide provides useful or interesting, please consider a contribution.

If you find the information TechByter Worldwide provides useful or interesting, please consider a contribution.
Admittedly this week's main topic is a bit esoteric, but stick with me for a bit because you might find it to be useful at least occasionally. And besides, I have a couple of good puns. The Bulk Rename Utility is, as the name strongly suggests, a utility for renaming files. And thank you, Captain Obvious, for that.
Why might you need a utility to rename files? After all, it's easy enough in the Windows File Explorer: Just click the file name a second time or press F2 or choose Rename from the ribbon. What could be easier? So to be clear, I don't use the Bulk Rename Utility if I need to rename just a file or two.
Around the end of November, I needed to process nearly 150 files using a process that changed the capitalization without my permission. It's not a big deal because Windows isn't case sensitive, so "a file.txt" is the same as "A File.txt" to the file manager. The procedure that processed the files converted the names to title case. A file I had named "3X5Y some file name.txt" was converted to "3X5y Some File Name.txt". I liked the "Some File Name" part being capitalized, but the "3X5y" part was annoying.
In my example, 3X5Y, the 3 could be any number from 1 to 6 and the 5Y part could be absent. If present, the number was never higher than 3. X and Y were always the same.
I could have done a little command-line ninja work or write a directory of the files to disk and create a macro that would rename the files. Either of those would require some testing that might have taken longer than just manually renaming 130 files.
This is exactly the kind of situation that calls for the Bulk Rename Utility.
A more common use might be to rename files from a digital camera. My photography workflow always starts with Adobe Lightroom, and it allows me to rename all files when I import them into the catalog. But not all photo applications allow for renaming, so digital photographers have directory after directory filled with files with names like IMG_27558.CR2. Having a descriptive name helps.
When I import files, I add a descriptive word or two, followed by an underscore, the original file name, and my initials. I also have Lightroom convert the files to Adobe's DNG format so IMG_27558.CR2 might become Halloween_IMG_27558_BB.DNG. The Bulk Rename Utility can't convert files from a proprietary format to DNG, of course, but it can easily add the prefix ("Halloween_") and the suffix ("_BB").
Click any small image for a full-size view. To dismiss the larger image, press ESC or tap outside the image.
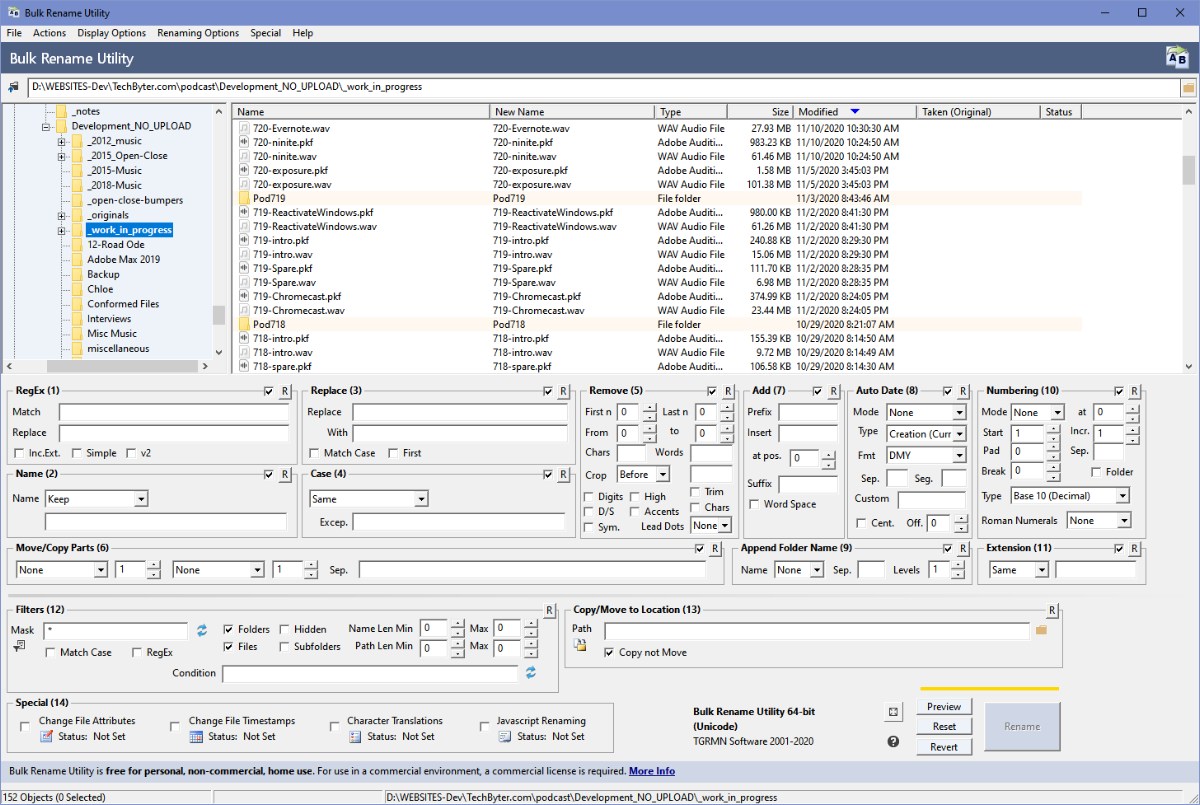 The Bulk Rename Utility, which is free for personal use, offers an amazing number of options, and that's why many people panic when they see the interface. So the important first step is to understand that you don't have to fill out all the little text boxes and place check marks in any of the selectors. Use only the ones you need to specify the name change you want and leave everything else alone.
The Bulk Rename Utility has 14 major sections that include nearly 30 text boxes, more than 20 check boxes, and about a dozen drop-down selection lists. But to quote the Hitchhiker's Guide to the Galaxy, "DON'T PANIC!"
There is good news. If you want to know how every little part of the program works, you can download a manual. The bad news is that the manual is more than 50 pages long. The better news is that there's a handy online FAQ that answers a lot of questions.
But the excellent news is that most of us don't need the manual or the FAQ. I've downloaded the manual because, especially with the pandemic, I have no life outside the house and will read just about anything. If you have really complex needs, you may want the manual. That said, it's really not very hard to read the section headings on the user interface and figure out which ones you need.
Say, for example, that you know regular expressions backwards and forwards, although it's not clear what good there is to knowing them backwards. RegEx is box number one because it's the most powerful option. But most people haven't studied regular expressions (aka "RegEx") because doing so requires reading and understanding one or more 1000-page books. I know enough about RegEx to be dangerous, so I move on to the other sections.
Without using RegEx, I can rename files and folders; replace multiple file names with a fixed file name and a sequential number; convert file names or extensions to lower case, upper case, or title case; add a secondary extension or remove it; replace any text in the file name with other text; add a fixed prefix or suffix; add text in the middle of the file name; remove any number of characters from the beginning or end of the file name; and on and on and on.
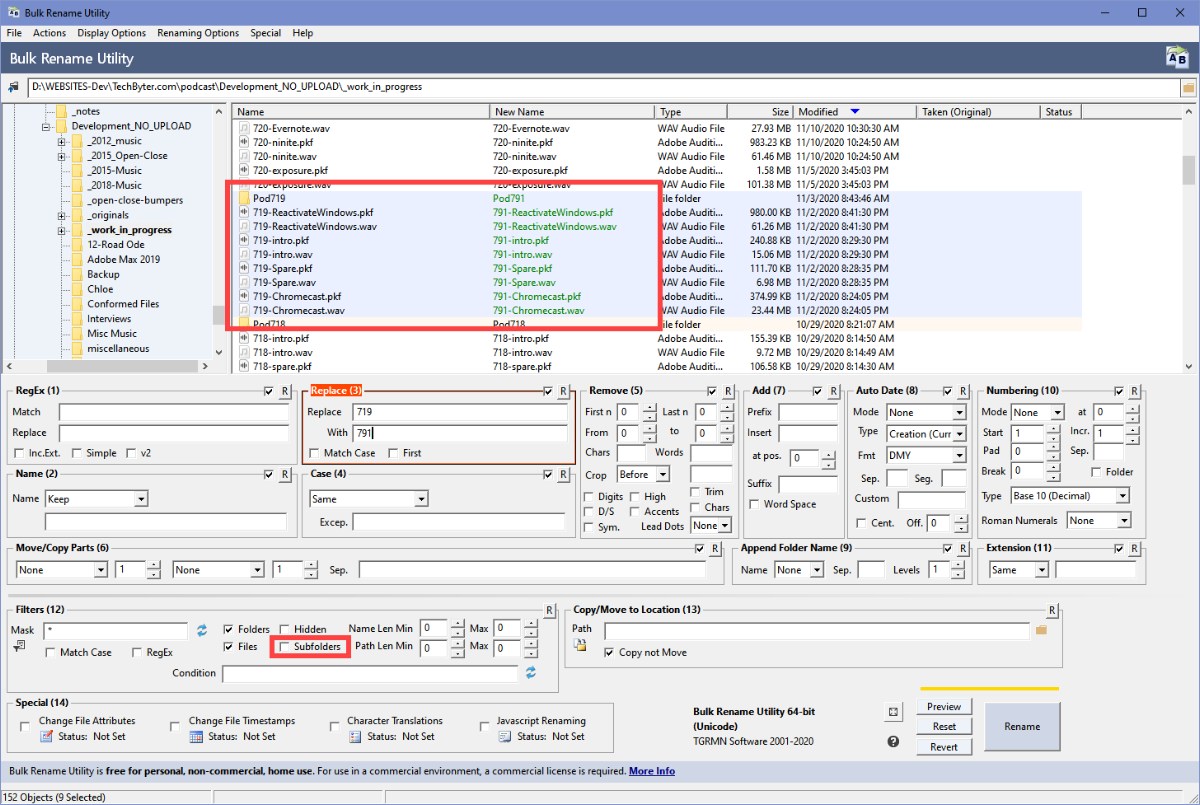 Let's say that I accidentally set all the files for Podcast 791 (which will occur sometime in 2022) to 719 (which ran on 13 November 2020). Now I need to fix that error. So I select the 719 directory and all 719 files, select Subfolders in the filters section and specify in the replace section that 719 should be changed to 791.
 The Bulk Rename Utility shows the old name and the new name and all I would need to do if I wanted to commit the change would be to click the Rename button in the lower right corner. It's worth noting that changing the file names would not modify links inside the Adobe Audition session file. When I opened the session file, it would report broken links and I would need to resolve that problem. This isn't a Bulk Rename Utility fault; if I had renamed any of the files manually, the same problem would have occurred.
So it's up to the user to determine whether renaming a file will create a problem.

 Even if you need to rename multiple files irregularly, this is a utility you should have.
You may not need to rename a lot of files every day. Or every week. Or even every month. But when you do need to rename a batch of files, there's nothing better than the Bulk Rename Utility. It's free for home and non-commercial use, but commercial users should plan to license the application. The cost is $93 for a single computer, and that drops to $50 per seat for more than 5 computers.
Additional details are available on the Bulk Rename Utility website.
The cat rating scale ranges from 0 cats (worst) to
5 cats (best).
Perhaps you've noticed that USB devices have proliferated so much that they outnumber the quantity of ports offered by the computer. That would be a good reason to add a dock, but there's an overwhelming number of options.
Maybe you don't need a dock, but just a simple hub. The primary computer I use has two USB 3 ports and a single Mini DisplayPort on the right side. There's a single HDMI port, an Ethernet port, a Thunderbolt 3 port, and two USB ports on the back. The computer sits in a dock made by the computer manufacturer, and the dock adds six USB ports, an Ethernet port, two DisplayPort ports, one HDMI port, one DVI port, and one VGA connector. That seems like it should be enough, but it isn't.
This computer has a lot of USB devices and so there are two ten-port USB hubs. Not all of the ports are in use at all times. In fact, at least four ports have cables attached but the cables are rarely attached to anything. One is used to recharge a wireless USB mouse, so it's connected to the mouse only about once a week. Three ports are used for cables — one with a Mini-USB connector, one with a Micro-USB connector, and one with a USB 3 Standard A connector. These are used for external drives and other devices that are connected occasionally. There's a ColorMunki device for screen calibration, a DVD player, a Blu-Ray burner, the Focusrite audio device that digitizes sound from a microphone, and a couple of scanners.
Rather than connect and disconnect cables, adding a couple of USB hubs seemed to be the better choice.
Docks are about more than just USB connections, and there are more docks than those offered by the computer manufacturer. The computer manufacturer will provide a docking port that's typically on the bottom of the notebook computer. Third-party docks almost always connect using a Thunderbolt 3 or USB-C port.
To keep the terminology straight, consider the progression of USB technology:
The current technologies are USB 3, USB 4, Thunderbolt 3, and Thunderbolt 4. USB-C is more a description of a connector type than a description of the underlying technology. To make things even more confusing, Apple's original Thunderbolt connector was identical to a Mini DisplayPort connector. That was resolved with Thunderbolt 3 that uses USB Type C connectors.
We could be forgiven for thinking that the people who design, specify, and manufacture these things are attempting to confuse us.
Let's leave the confusion for a bit and consider a practical application for a dock: How many video ports does your computer have? Many have just one, which is sufficient if you want to connect a single external monitor. Believe me: If you've been using the notebook's built-in monitor, you'll never want to go back after adding a large external monitor.
And if you've ever worked with multiple monitors, you'll probably never want to go back to just one. A co-worker fought against having the IT folks put a second monitor on his desk for more than two years. Eventually somebody convinced him to try it for a day or two. The second monitor never left his desk.
But what if your notebook computer doesn't have two ports. It at least some cases, Apple provides two Mini DisplayPort ports. I know because I have an older MacBook Pro that has two. My Lenovo Windows computer, though, has just one. It's possible to daisy-chain multiple monitors on a DisplayPort port, but this won't work if your computer has an HDMI connector or older technology.
Besides providing more USB ports, a dock can also add video ports for multiple monitors. A USB-C port that supports Thunderbolt 3 will allow a single cable to deliver power and transfer a large amount of data to and from the computer. This includes the ability to serve video data for two 4K external monitors running with a 60Hz refresh rate without dragging down disk performance.
The problem then is to determine whether your computer's USB-C port supports Thunderbolt 3 (or 4). The ports are identical and not even the latest Microsoft Surface Pro 7 supports Thunderbolt 3. Maybe a Surface Pro 8 will, but don't hold your breath.
Some notebook computers come only with Wi-Fi, but if you use the computer where a wired connection is available, being able to use Ethernet will make a difference. Adding a dock to a notebook computer can provide that Ethernet connection in addition to video connections, more USB connections, and even power connections.
It's worth a look for the computer on your desk, or for when you buy a new computer.
InDesign is one of the more specialized applications in Adobe's Creative Cloud, but updates and improvements in one application sometimes give clues about what Adobe might introduce in other applications, so let's take a look at the October 2020 version.
InDesign is a typesetting and layout application that can be used to create business cards and stationery (although Illustrator is probably the more common choice for jobs like that). Its primary use is in developing brochures, pamphlets, magazines, and books.
Text wrap has been improved. It's easy to wrap text around a regular object such as a rectangle or an oval, but irregular objects are more difficult. InDesign can use Adobe's artificial intelligence to identify the main subject in an image and then create a contour around it. The contour is editable. Using the automated process to create a starting point can save a considerable amount of time. This, perhaps, is the most important of the new features.
An important new feature in the latest version is called Share for Review. A document that's being written, edited, or designed can be shared with individuals or publicly. Depending on the security required, users may need a password to access the document. Those who have been invited to view the document can leave comments. The document owner can then modify the publication and mark the issue as resolved, reply to the comment, or choose not to implement the suggested change.
Font management has been improved, too. Typefaces can be installed generally, for use in all applications, or placed in a special directory so that they're available only in InDesign. The problem with having access to so many typefaces via Adobe Type is that users install so many that working with them is difficult. The October 2020 version of InDesign adds an auto-activate function so that typefaces can be deactivated to reduce clutter and then InDesign will automatically activate needed Adobe typefaces if typefaces called for in a document aren't installed when the document is opened. This works only with Adobe Fonts. If non-Adobe typefaces have been uninstalled or deactivated, the user will be warned about missing typefaces when the document loads.
Colors are important to readers and so they're important to designers. InDesign's character styles have always allowed the user to specify exact colors. If a decision is made to change all second level headlines in a publication from Pantone 285 to Pantone 574, simply changing a single style definition makes the change throughout the document, no matter how long the document is or how many second level headlines exist. What's new with InDesign 2020 is the ability to find and replace colors that are used in objects that are part of the document.
There's a new option for color management -- HSB (hue, saturation, and brightness). This option joins spot colors, process colors, LAB (International Commission on Illumination) colors, and the better-known CMYK and RGB colors. Some people find the HSB system to be easier to understand because it treats hue, saturation, and brightness independently. Hue is expressed as a position on a circle with red at 0° (or 360°) and cyan at 180°. Green is at 120° and blue at 240°. These are pure color values with no reference to how bright or saturated the colors are. As a result, colors such as black, white, and gray are not expressed by the hue value. The saturation value expresses how strong the color is from 100% (completely saturated) to 0% (completely desaturated). Complete desaturation represents white, black, or any shade of gray. The brightness value determines, well, the brightness: 100% is the maximum and 0% is the minimum. Black, white, and gray can have any hue value, a saturation value of 0%, and a brightness value of 0% (black), 100% (white), or any value in between (gray).
What's the point of keeping an eye on improvements in applications you don't use? Adobe shares technology among its various applications. Subject selection is a feature in Photoshop, and now it's present in InDesign. Likewise, text manipulation features developed for InDesign have found their way into Photoshop and Illustrator. Sometimes watching applications you don't use can make it possible to see around a corner and anticipate what's coming in one of the applications you do use.