If you're a photographer and you're not using Lightroom, you're probably working too hard. The Lightroom-Photoshop combination costs about $100 per year and it's a bargain. Even if you don't use Lightroom and Photoshop, you'll find some useful information here because many applications include similar basic features.
Adobe and others have video training and lots of sites offer tips to help new users learn how to use the tools and to teach experienced users how to get the most out of the software. The combination is so powerful because Lightroom handles all of the major modifications such as exposure, color balance, and lens corrections while Photoshop can be used to create more precise changes -- all the way down to the pixel level.
Summer is approaching and with it vacation season. That means you'll probably use your camera more and this seemed like a good time to put together some tips, tricks, and tweaks that'll be useful when you get home with a camera full of images.
Tip #1: Shoot raw images. Even many point-and-shoot cameras offer the ability to store unprocessed images. Two things will happen as a result: First, your images will be much larger. Instead of 3 or 4 megabytes per images, they'll be 10MB or 20MB and maybe even larger. That's OK, though, because storage is cheap. Second, you'll be able to use every bit of information that the camera's sensor can capture. When images are saved in JPEG format, as much as three-quarters of the sensor's detail is discarded. If you want to get the best images out of Lightroom or any other image processing program, you need to start with the most detailed image.
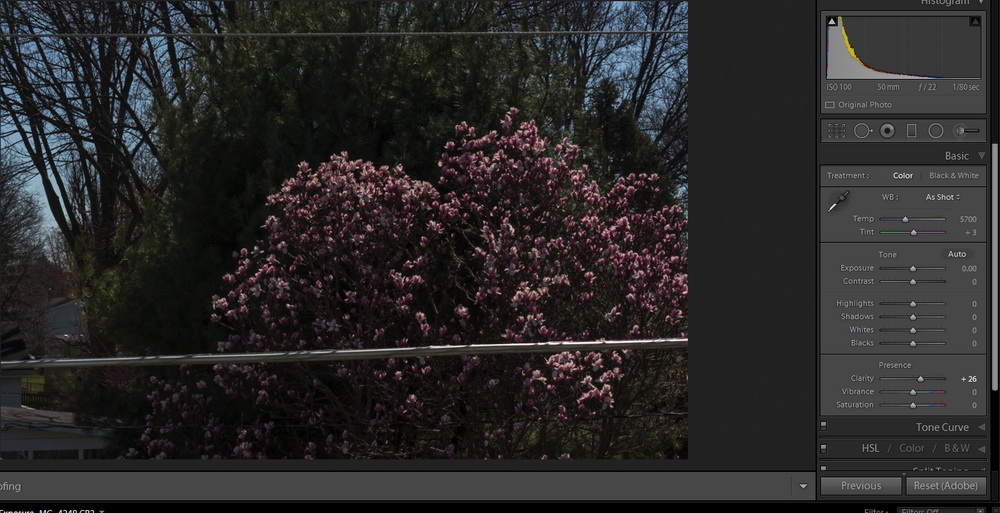 To illustrate the difference raw images can make, I created two files of the same view, one raw and one JPEG (high quality). Both files are underexposed by 3 stops. In the film world, there would be no recovery from an error such as this because each "stop" doubles or halves the amount of light that reaches the film or sensor. One step underexposed reduces the light to half of what it should be; a second stop underexposed reduces that value by half (half of half is one quarter); the third stop underexposed reduces the already reduced value by half (half of half of half is one eighth). This is one seriously underexposed picture.
 The JPEG version can be improved, but only so much. Note the lack of detail in the tree behind the flowering bush.
Yes, I know this is a really bad picture, but I didn't have anything lying around that was 3 stops underexposed, so I just leaned out the back window and ignored the cable TV wires and the other utility lines.
Click any of the smaller images for a full-size view.
Press Esc to dismiss the larger image.
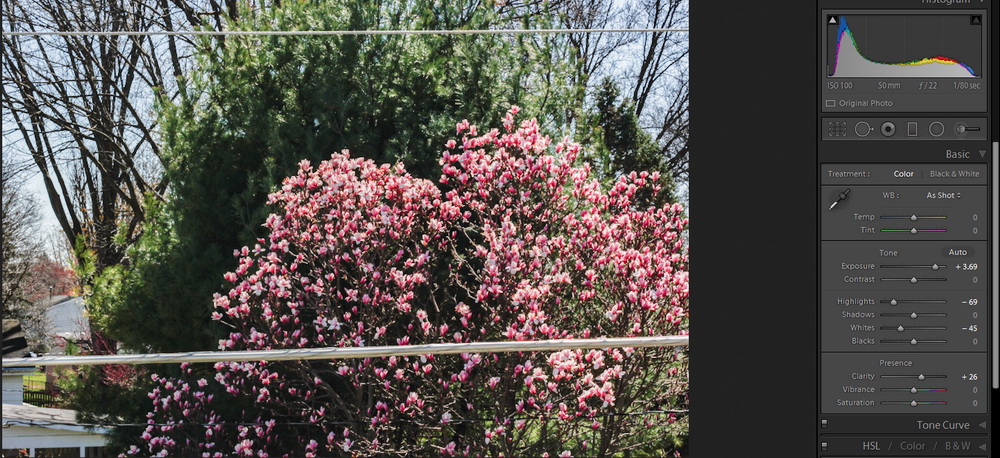
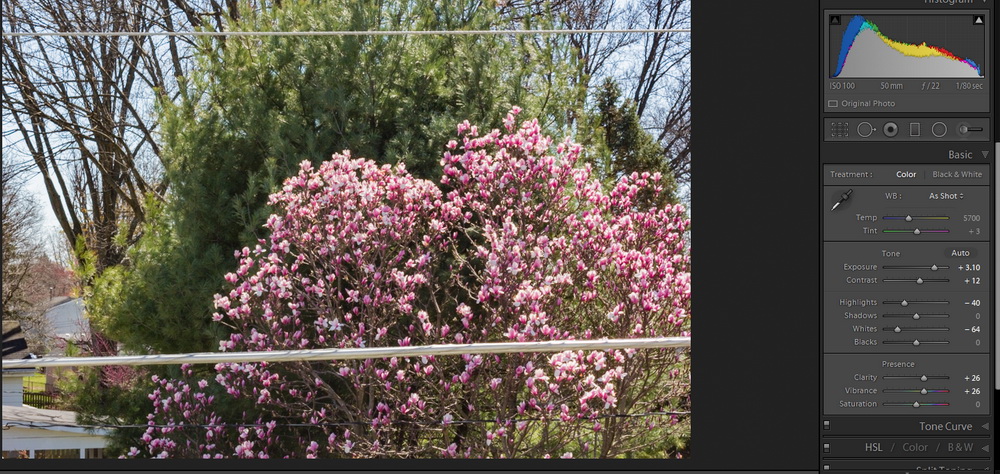 Here's what happens if you have a raw image. The shadow detail is much better, but the reason for using the camera's raw mode isn't because it can save you from a disastrously underexposed image (although it can) but that being able to use all the extra information in a raw file gives you a much better chance of creating a remarkable image instead of a standard snapshot.
Tip #2: Crop. Nearly every image made can be improved by cropping, even if you think you're doing a good job of composing in the viewfinder.
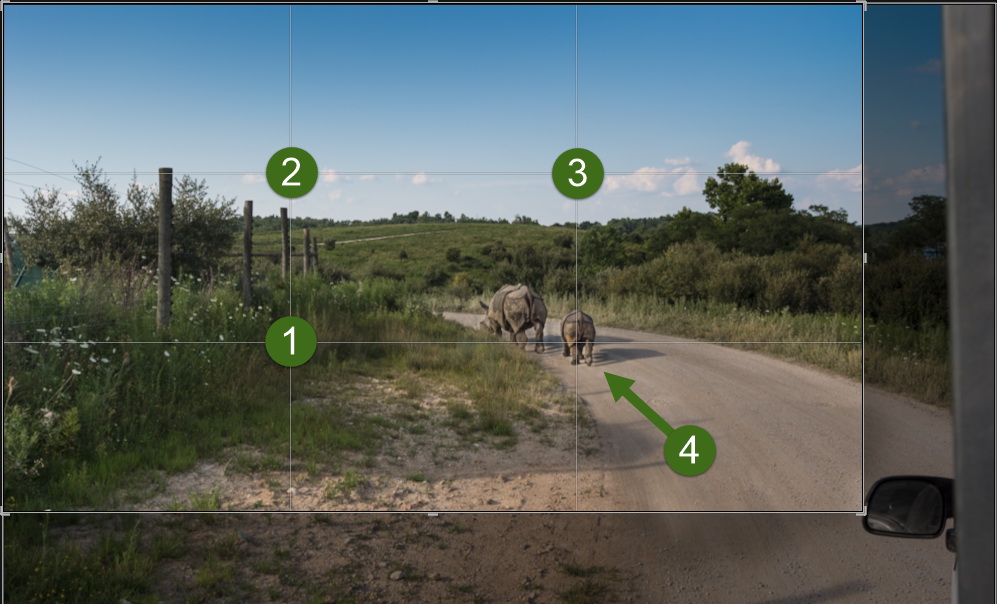 A mother and baby hippopotamus were walking along a road at The Wilds, the Columbus Zoo's nature preserve near Zanesville. I was in the back of a pickup truck and part of the truck was in the resulting image. A slight crop achieved two desired effects: I was able to remove the truck from the image and the crop placed the hippos at one of the four ideal "rule of thirds" intersection points.
The rule of thirds has been around for a while. It even pre-dates photography. John Thomas Smith wrote about it in his 1797 book, Remarks on Rural Scenery. In the book, Smith quotes an earlier work (Sir Joshua Reynolds, 1783) in which Reynolds discusses the balance of dark and light in a painting.
 Tip #3: Go beyond the default tools. Lightroom divides tools into 8 categories: Basic, Tone Curve, HSL/Color/B&W, Split Toning, Detail, Lens Corrections, Effects, and Camera Calibration. Changes you make in the Basic section affect color temperature and tint, exposure and contrast, highlights and shadows, whites and blacks, and 3 controls that Adobe combined under "presence": clarity, vibrance, and saturation.
Those controls alone may be enough to create an image that exactly matches your photographic vision, but take a look inside the other compartments of the tool box.
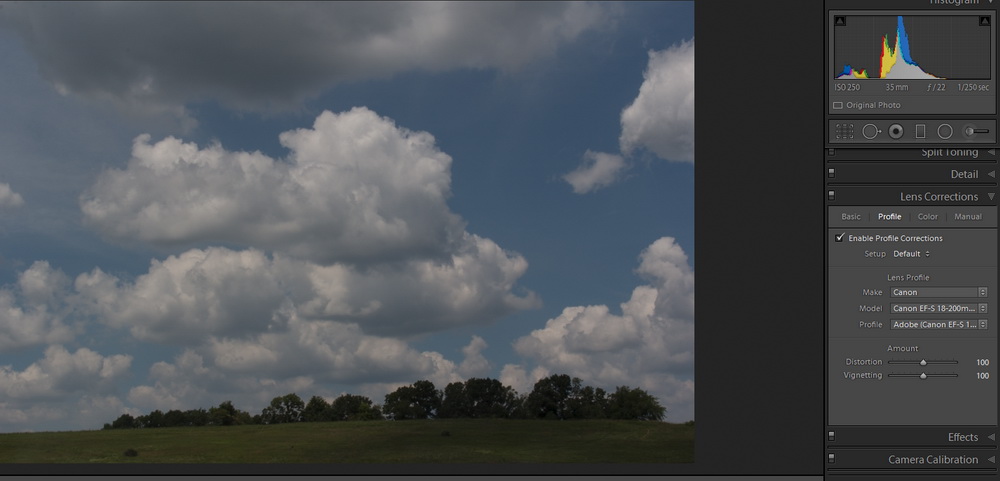
One quick example: Maybe you have a picture like this. It's an attractive image of the sky at The Wilds. I've already use a lens profile to correct known issues with the lens, but the overall image is somewhat dull because it's underexposed.
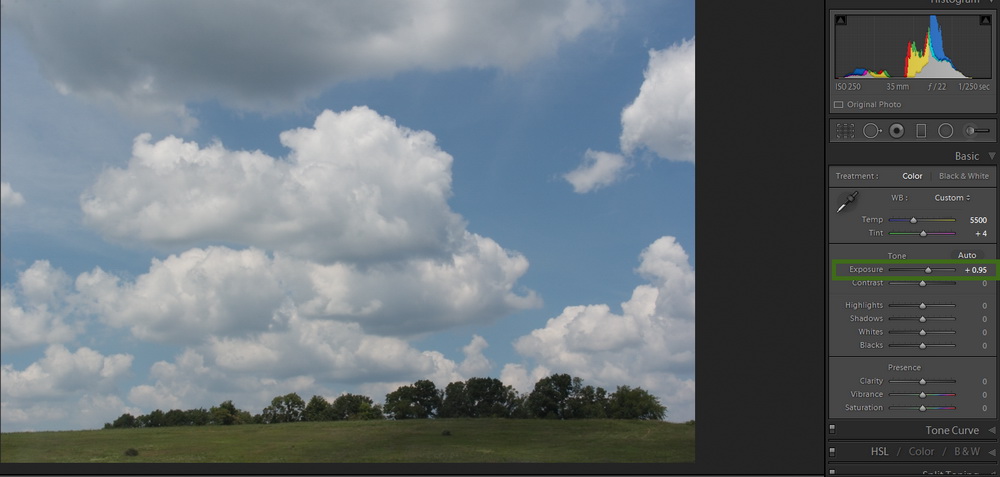 Increasing the exposure brings out detail in the foreground, but reduces the drama that was present in the darker sky. This calls for a targeted luminance adjustment. "HSL" is the abbreviation for hue, saturation, and lightness and that's where I went. I selected the luminance option, targeted the blue in the sky, and reduced the luminance.
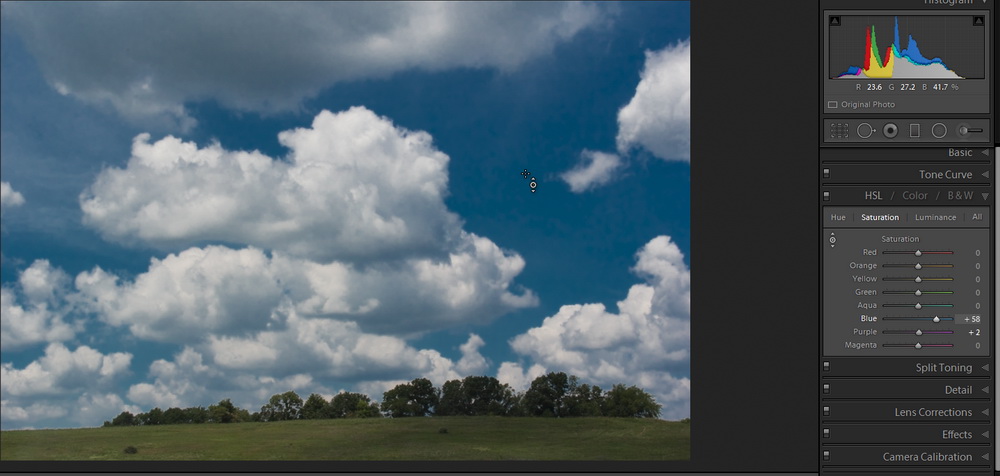 Then I used the saturation tool, again selected the sky, and increased the saturation. The result is a sky that looks a lot more the way my eye saw it.
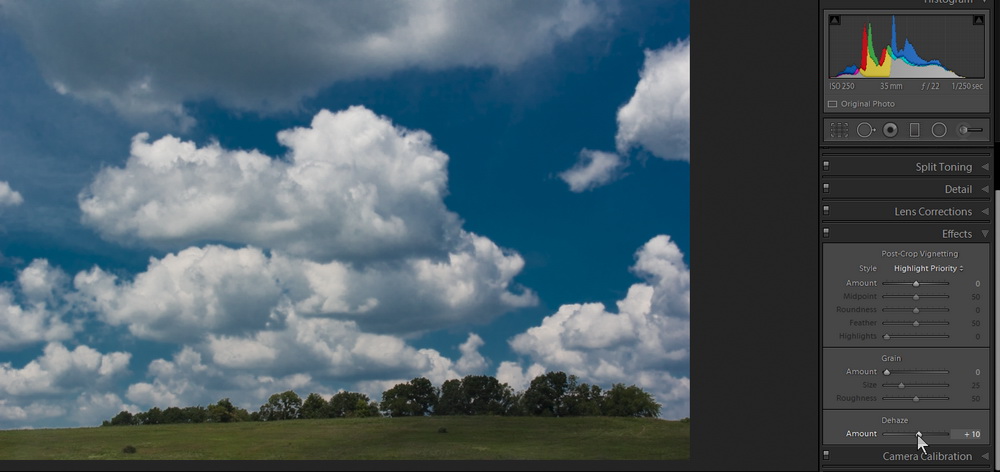 And finally (you might consider this one enhancement too many), I used the new dehaze tool to give the image slightly more punch.
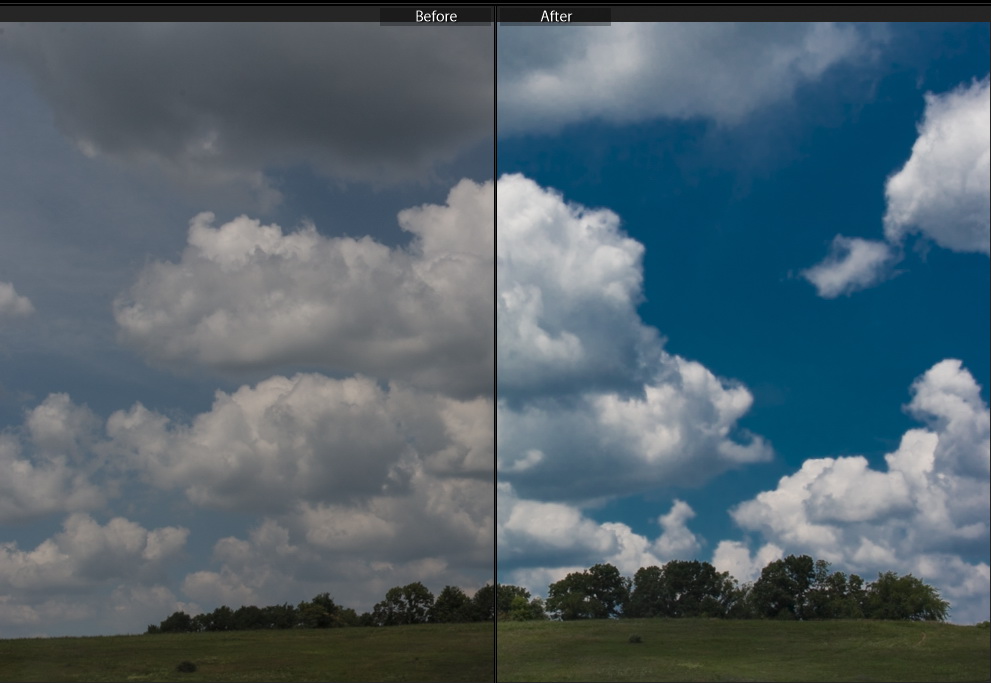 Before and after side-by-side.
 Tip #4: Do things you're not supposed to do. You're supposed to hold the camera steady, but sometimes you can break that rule and create a successful image. Consider this from Zoo Lights at the Columbus Zoo. It's an OK picture of the lights ...
 ... but what if I used a long exposure and zoomed the lens while the shutter was open. That would create a blurry image, wouldn't it? Well, yes it would, but it was what I was looking for. Long exposures coupled with moving the camera up and down, left and right, in a circular motion, or you name it, and you might produce a very different image.
 Tip #5: Look for stuff. It's just a green extension cord, but up close, cropped, and with slightly manipulated colors.
Tip #6: Buy a book. Ben Long is a talented photographer. Even better, he's a talented teacher. Lynda.com has several of Ben Long's videos and, if you can afford a month or two's subscription at Lynda.com, you could probably watch all of them.
If not, Long's Complete Digital Photography (Eighth Edition) will serve you very well. It's more than 500 pages with information about how cameras work, what you can do to become a better photographer, and how to use the various applications that edit images.
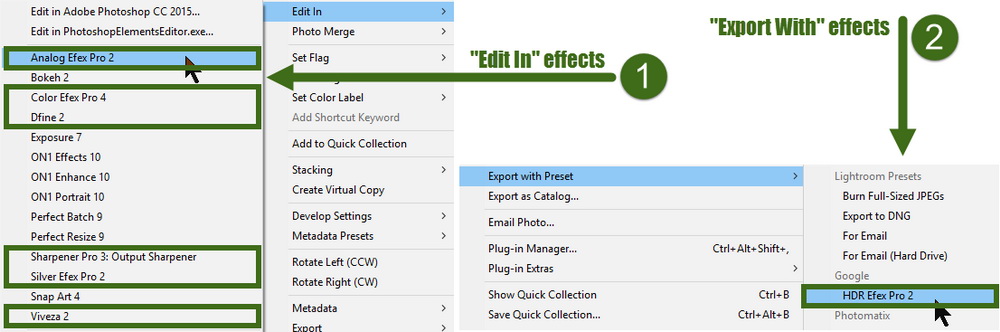 Tip #7: Add some filters. Several companies sell filters that work with Lightroom and Photoshop, but filters created using Photoshop standards will probably work in most other photo editing applications. And in addition to the filters you can buy, there's no shortage of free filters.
Filters work in one of two general ways. Most will appear on a filters menu (1) but some with be on the "export with" menu (2).
They're called filters in part because they can mimic effects that film photographers could create by adding glass or plastic filters to their lenses. They go well beyond that in also allowing the user to create effects that could be created by developing the film in a special way or by using one or more techniques when making prints.
 Here's a picture of some bread sticks we had for Easter lunch. They were delicious and they look good, but I felt that I could improve the visual appearance.
 I started with some of Lightroom's basic adjustments, but still felt the image could be better.
 Most modern applications and filters automatically create duplicate versions of the original image so that you can always get back to the starting point. Lightroom is particularly helpful in this regard by creating virtual duplicates. All of Lightroom's edits are non-destructive because the program maintains a database of modifications that have been made to the image. This means that the original raw file is never touched.
Now they look freshly baked, just out of the oven, and toasty brown. I used Nik's HDR Efex Pro to accomplish this look and I didn't have to spend any money to do it. Google acquired the Nik Collection, made a basic set of filters available for free, and then -- just a couple of weeks ago -- released the full pro set for free.
You'll find them on Google's website.
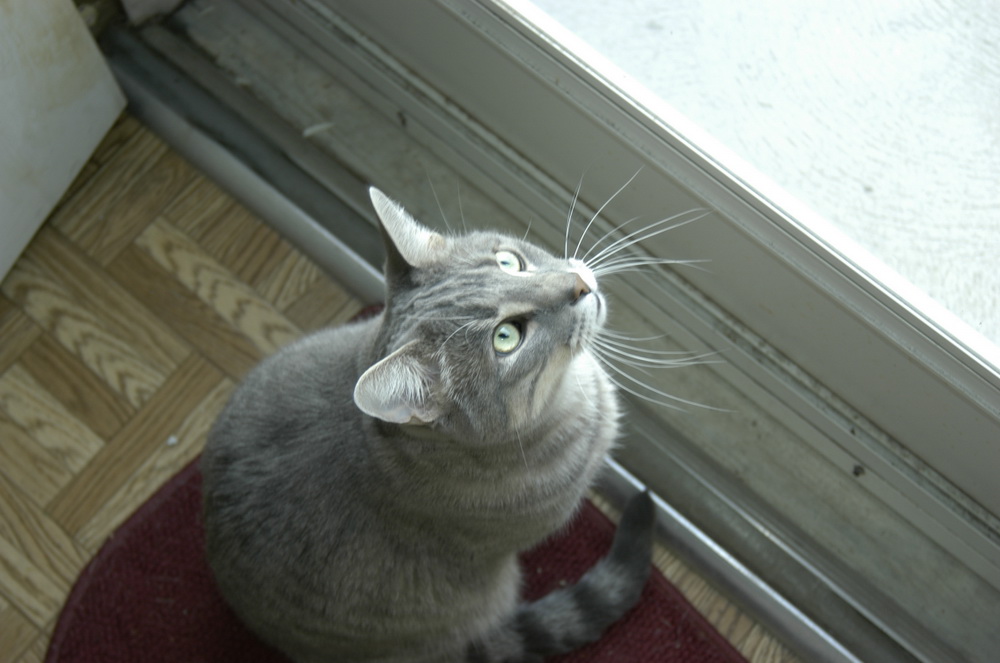 Tip #8: Do goofy stuff for fun. Occasionally, you might look at a picture and wonder what if ...? Stop wondering and start doing. In about 2003, I took a picture of Scampi Cat. He's the one who used to come along to WTVN on Sundays for Technology Corner and he's always loved to look out the front door.
He was sitting there one day and I had a camera in my hand, so I did the natural thing and took the picture. It's OK, I thought, but ...
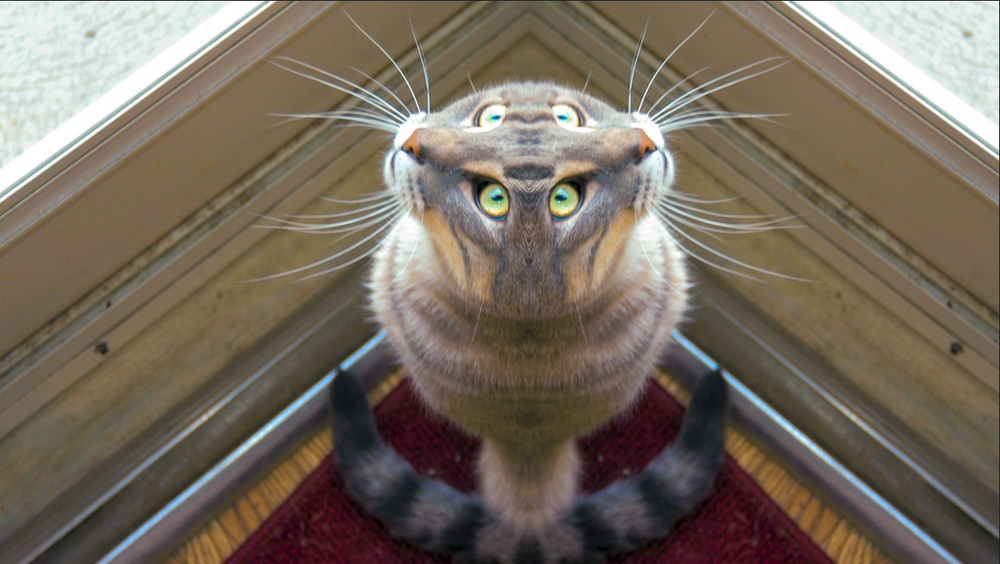 ... what if?
And that became one of my favorite pictures of the cat.
Tip #9: Take lots of pictures. If you have a digital camera, and who doesn't these days, your photographs are essentially free. Of course you had to pay for the camera, one or more lenses, and an application used to edit the images. But in the old days, you had to pay for the camera, one or more lenses, and then buy film, pay for processing, and have prints made. So instead of paying $1 or more every time you press the shutter button, you now pay nothing.
The only way to get better with any art, craft, or skill is practice. Lots of it and when practice costs nothing, what are you waiting for?
With more than a week to go before it had to go back to court with a status report, the FBI said that it no longer needs Apple's help to open an Apple phone used by San Bernadino shooter Syed Rizwan Farook. Case closed. But now what?
For Apple, it's not good news. While Apple won't have to write software it doesn't want to write, it's clear that their phones aren't as secure as Apple thought they were. For the FBI, it's not so good, either. You'd think that the FBI would be able to hire people who could break the encryption or that they'd know somebody at the National Security Agency who could do the job during lunch.
It's likely that the government will declare that the method used is classified, much as the government retroactively classified information that had been published in magazines during the Cold War.
Now it's Apple saying that the FBI should provide information about how the unknown non-governmental organization it used to open the phone did the job. Apple would like that information so that it can improve the encryption it uses.
What we have is the end of one case, but both sides are ready to return to court as soon as another case presents itself.
Reasonable people may continue to hold out hope that the participants will find some middle way, a compromise, that doesn't entirely please the government and doesn't entirely please Apple. But reasonable people shouldn't hold their breath waiting for this to happen.
Former federal prosecutor Shawn Thompson will be discussing the legal aspects of implementing an insider threat program this coming Thursday at a conference in Boston that will also be webcast.
Many security experts consider insiders (employees, contract workers, and those who have access to the corporate network because they provide products or services) are potentially more dangerous than hackers who attack from the outside.
Thompson handled several FBI investigations involving insider threats. "Balancing security with the privacy concerns of employees is a difficult challenge," Thompson says. The webinar will explore how to achieve a good balance by understanding the legal framework pertaining to insider threats.
For example, the rules pertaining to monitoring employees at work, what privacy rights employees have, whether insiders' social media accounts can be monitored, and whether an employer can monitor employees when they're not in the workplace.
The webinar is scheduled for Thursday, April 7th at 1:30pm (Eastern) and is provided without charge. Joining instructions are available on the event LinkedIn page.
Thompson has more than 15 years of experience investigating, prosecuting, and managing insider threats. He has served at the insider threat program manager and as a senior litigation attorney at the Department of Defense as well at in several capacities with the Department of Justice and the Federal Bureau of Investigation.
The program is sponsored by ObserveIT, a creator of insider threat management software that is used to monitor corporate networks, detect threats, and prevent intrusions.