
What Kind of Camera Are You?
Sometimes Adobe confuses me. There's Photoshop, Photoshop Elements, Photoshop online, and Photoshop Lightroom. Which application is right for which person? Until recently, I hadn't worked with Photoshop online or Photoshop Elements. Although these aren't applications I'll use, I can understand why Adobe created them and why they might be the right applications for you.
As I worked with Photoshop Elements, I began thinking about cameras. Some people want a simple camera that makes all the decisions. Others want a camera that makes all the decisions but allows the user to overrule them. Still others look for cameras with advanced features and some people want a camera that gives them total control.
The same is true for Adobe's photography products.
Camera Types
Digital cameras have taken over the marketplace, so I won't consider any film cameras in this quick summary. You'll find 4 or 5 general categories of cameras for the consumer market and another 1 or 2 for the professional market.
- Basic point and shoot cameras. These are cameras that are intended for people who know nothing about photography and don't want to know anything about photography. You'll pay $25 to $100 for a camera like this and it will be equivalent to the old Kodak Instamatic, probably with a fixed-focus lens, no zoom, but maybe a built-in flash.
- Point-and-shoot cameras with some controls. These cameras will often have a basic type of autofocus, accurate exposure controls, at least a 1:3 zoom lens, and the ability to set various exposure modes. The price range is $100 to $200.
- Mid-range, advanced amateur cameras. These are sophisticated cameras with a lot of controls and zoom lenses with a 1:5 ratio or more, but these cameras are not SLRs and the lens cannot be removed. The price ranges from around $200 to around $1000.
- Consumer SLR cameras. The price range nearly coincides with the previous group of cameras and the controls are similar, but the SLR looks and feels more like a traditional camera. You gain the ability to change lenses as needed, faster shutter response, and (in most cases) a full optical viewfinder. Prices start around $500 and the top end of the consumer market is around $1500.
- Professional SLR cameras. These cameras look and feel like consumer SLR cameras, but will allow for long bursts of high-resolution images, the body will be made from tougher materials, and you can expect to pay $1500 to $10,000.
- Professional high-end cameras. $10,000 and up. These are the cameras that are able to show detail in the cavity of a gnat's tooth. Example: Hasselblad H4D-60 Digital SLR Camera (body only) for $40,000. It creates 60-Mpxl 16-bit images. Very few people are in the market for this kind of camera.
Adobe Photo Processing Applications
Adobe's line-up isn't that wide, but it covers all of the bases. Prices shown are street prices for non-upgrade licenses. If you have an earlier version of the application, the upgrade price will be significantly lower.
- Photoshop.com: This is Adobe's online basic photo touch-up service. It's free and it's also surprisingly capable. It supports only JPG images, so don't bother trying to upload a camera raw image. After uploading your images, you can crop them, resize them, modify exposure and color balance, fix red eye, modify the fill light, add cartoons or text, and then save the finished image back to your computer. Naturally, you need a high-speed connection. ($free)
- Photoshop Elements 9: That's the subject of today's program and I'll tell you all about it in just a moment. ($90)
- Photoshop Lightroom 3: I wrote about Lightroom 3 in early October. Although this workflow control application can serve professionals well, it's also a superb tool for amateurs. It works well in conjunction with Photoshop and Camera Raw. ($270)
- Photoshop CS5 and Photoshop CS5 Extended: I wrote about Photoshop in June and said that it is "everything you need and then some." If you need the ability to control your images at the pixel level, you need Photoshop CS5. ($650 and $950)
- Adobe Camera Raw: This plug-in technology comes with Photoshop and with Lightroom. I was surprised to find that it also works with Photoshop Elements if you attempt to open a raw file. Adobe Camera Raw makes it possible to pre-process images before you open them in one of the editor programs. ($included)
Elements is More than Elementary, My Dear Watson
Previously I've read articles about Photoshop Elements. I've leafed through a couple of books on the subject, but I never downloaded a trial version. Having been thoroughly spoiled by having access to Lightroom, Photoshop, and Camera Raw, I can say with utter certainty that I won't be using Elements on a regular basis. But I can also say with utter certainty that anyone who wants to do more than is possible with the online service but who doesn't want to spend time learning the intricacies of Lightroom or Photoshop will be delighted with Photoshop Elements.
Click any of the smaller images for a full-size view.
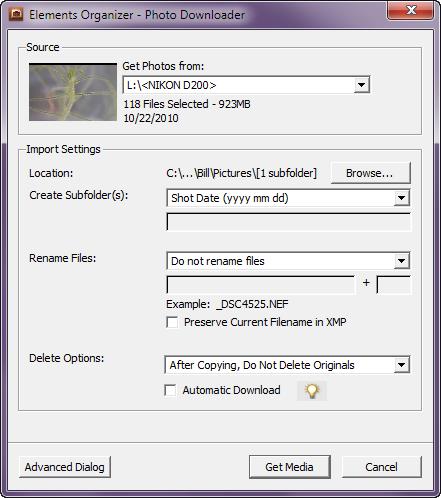 Let's start with the import process. The dialog is shown at the right. You can allow the files to be imported with the camera's (usually useless) file name or modify the settings so that the images will have names that mean something.
You'll also want to set the main directory where all of your images will be stored and then I would recommend using the option that creates a new subdirectory for each batch of photos based on either the date the images were made or the date you imported them.
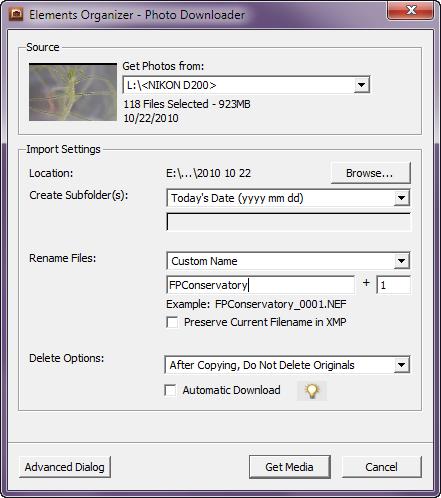 In my case, I pointed to the location of my camera's memory card, allowed Elements to create a new directory, and changed the names of the files to begin with "FPConservatory" because they came from the Franklin Park Conservatory.
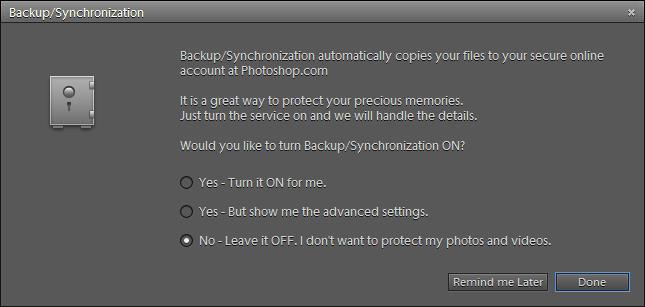 Because this was the first batch of photos I loaded with Elements, I was asked if I wanted to store my images at photoshop.com. I decided not to because I handle backing up images on my own. Adobe provides 2GB of space for free. That's enough for 50 to 100 JPG files, but only enough for about 20 raw files, so you'll need to purchase more space if you choose this option.
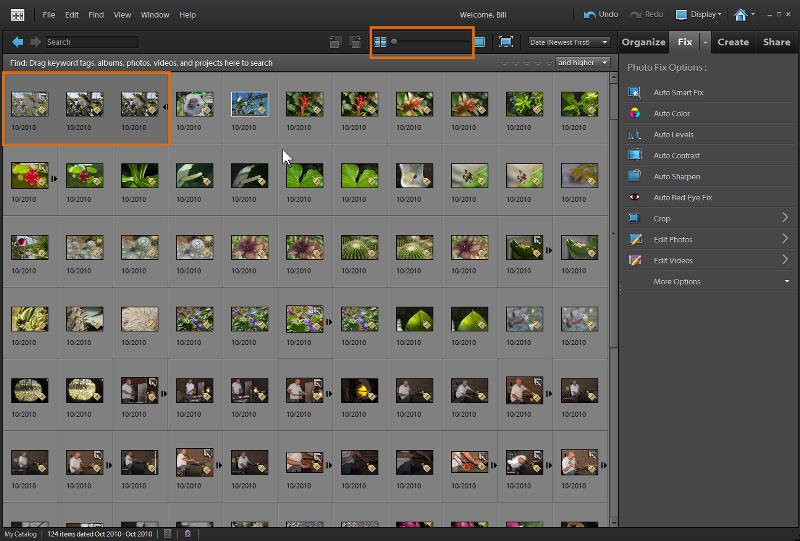
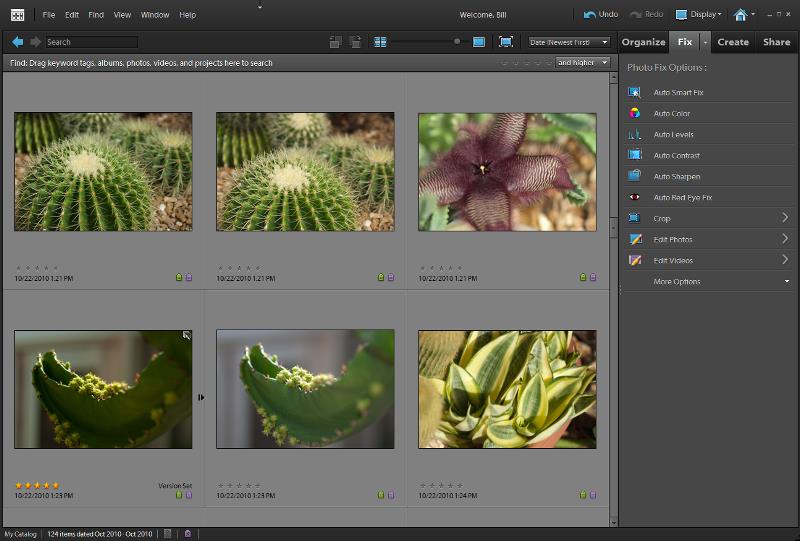
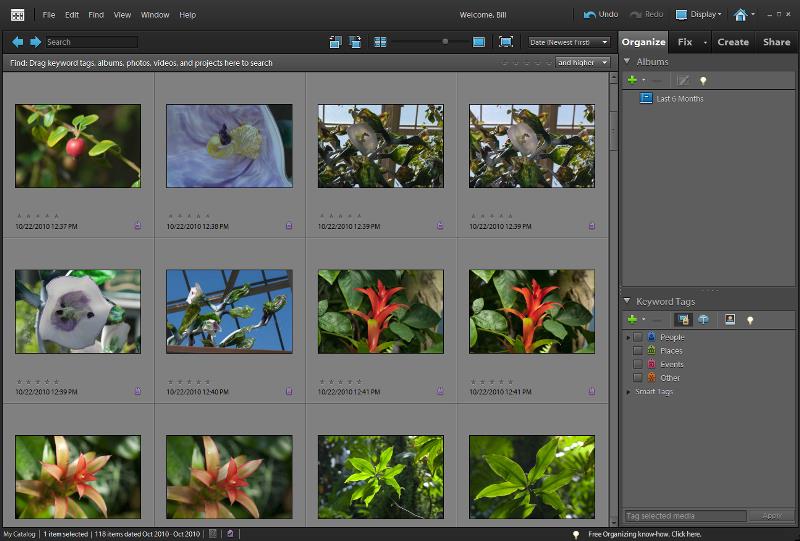 Elements has an "organizer" view that allows you to see and rate your images. You can also apply tags to images so that you can quickly find, for example, all of the photos that include your pet aardvark and are rated at least 3 stars.
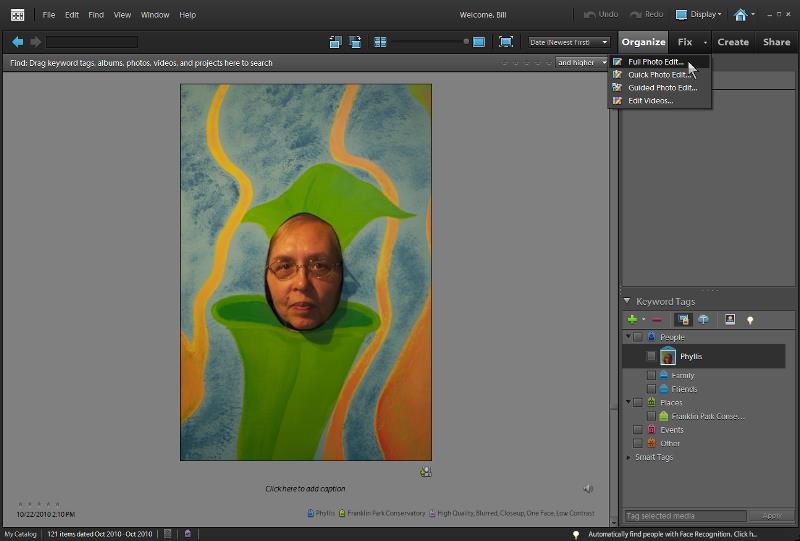 The first time Elements saw Phyllis, it asked me who this person is. When it saw another image that included Phyllis, it asked me if the person in the photo was Phyllis. I clicked "Yes" and Elements automatically tagged the image.
I decided that I wanted to edit this image ...
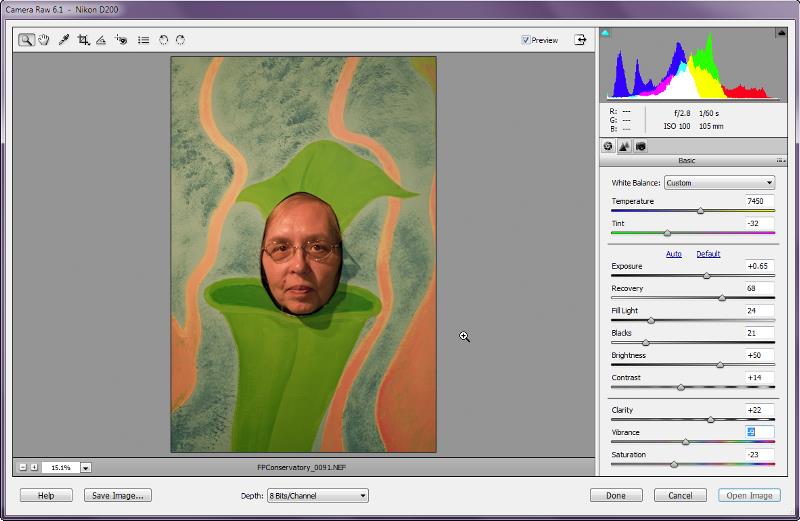 ... and Adobe Photo Raw intervened. I made a few modifications to color balance and the like, then continued to Elements.
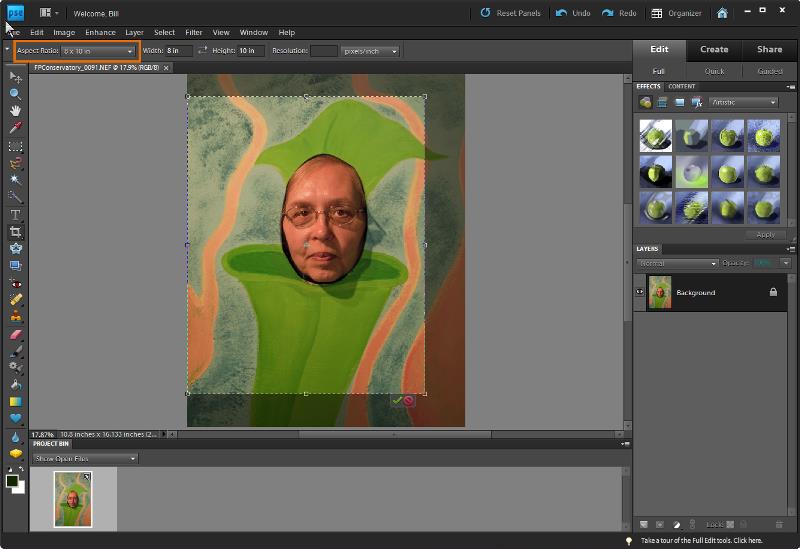 The first thing I wanted to do was to crop the image so that it was in standard 8x10 format. Note the aspect ratio in the upper left corner. When that is set, the cropping mask you draw will always have the correct proportions.
Clicking the green check mark below the photo accepts the crop.
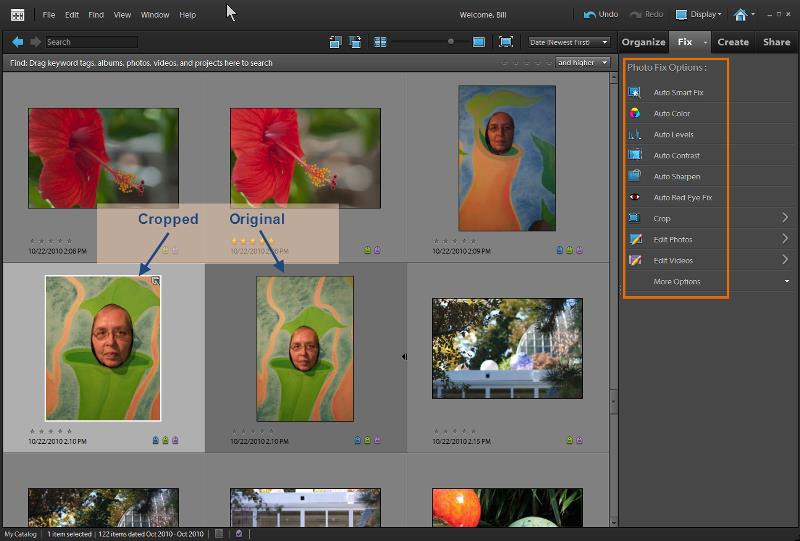 Elements then saves the cropped file as a new image and associates it with the existing image.
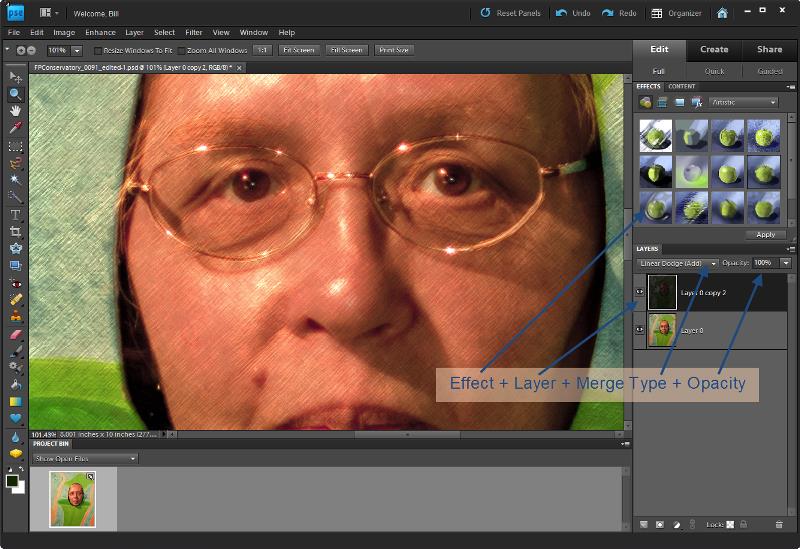 Then I decided that I would like to add a light pencil sketch effect to the image. I did that by duplicating the background layer, applying the effect to the duplicate layer, and then setting the blend mode to make the effect fairly subtle.
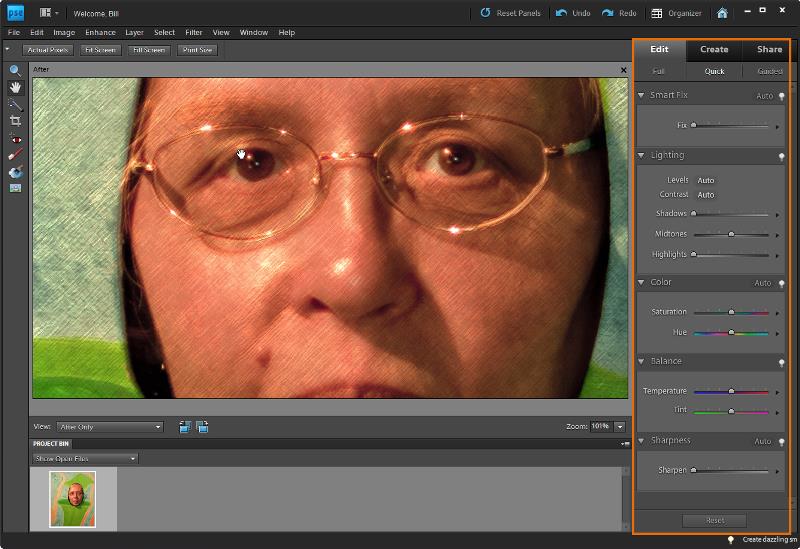 The modifications you can make inside Elements are nowhere near as robust as what you'll find in Lightroom or Photoshop and the advantage of that is clarity and ease of use. The controls that are present are the ones that most amateur photographers will need to improve their images.
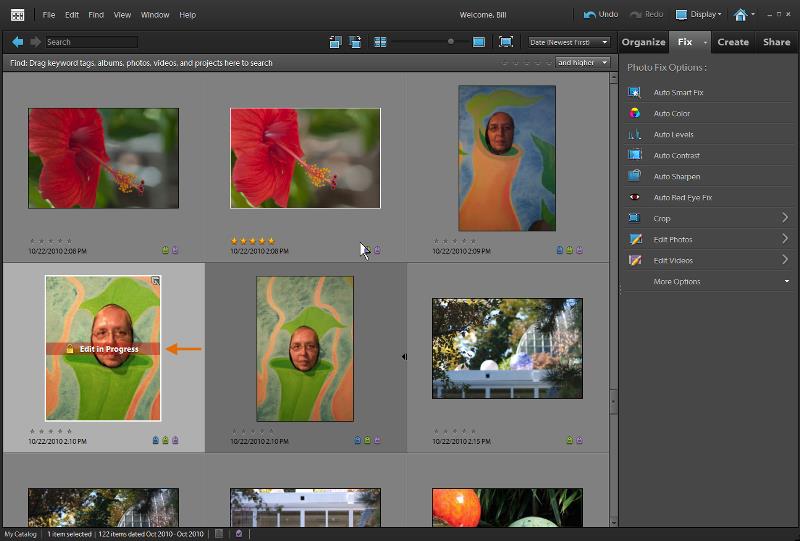 If you return to the organizer while you're editing an image, the image will be marked with a lock and "Edit in process." You can't do anything with the image in the organizer until you finalize the edit.
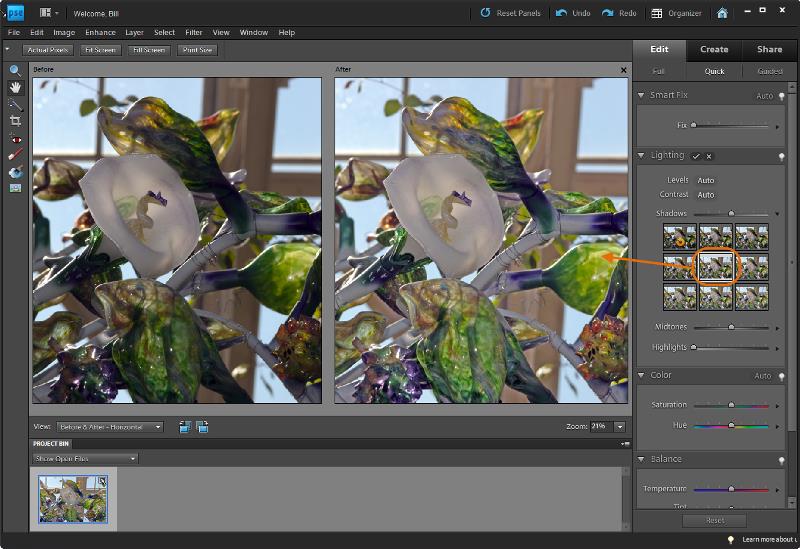 Elements offers a side-by-side view of your image as you modify it. Previously, you saw the slider control view. Here I'm using the visual selectors. Elements starts with your existing image and shows 8 other examples modifying (in this case) the shadows. I wanted to get some detail in the darker areas of the image, so I selected a setting to open up the shadows.
 The light-table view has a size control. You can, in effect, step back from the light table for an overall review ...
 ... and then move in close to see just a few images that you want to concentrate on.
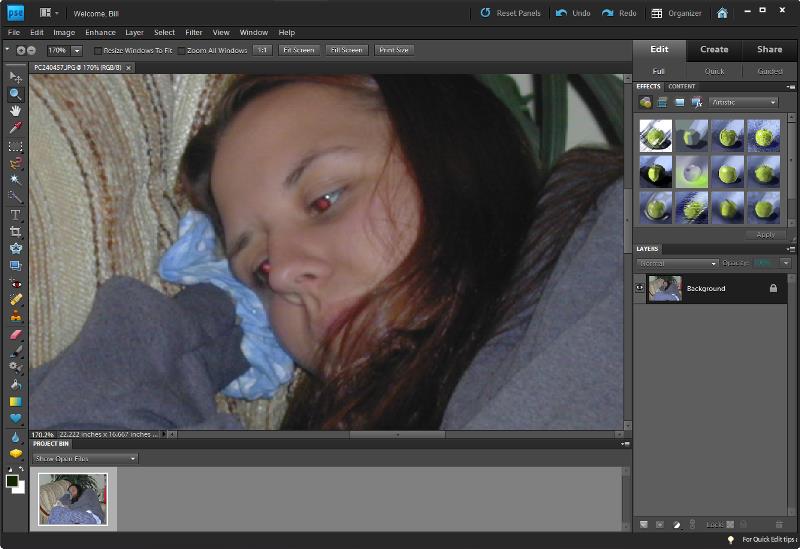 Here's a photo that was taken nearly 10 years ago with a digital camera that had a built-in flash. This kind of flash often leads to a problem called "red eye". Fixing red eye isn't a new feature, but it works exceptionally well.
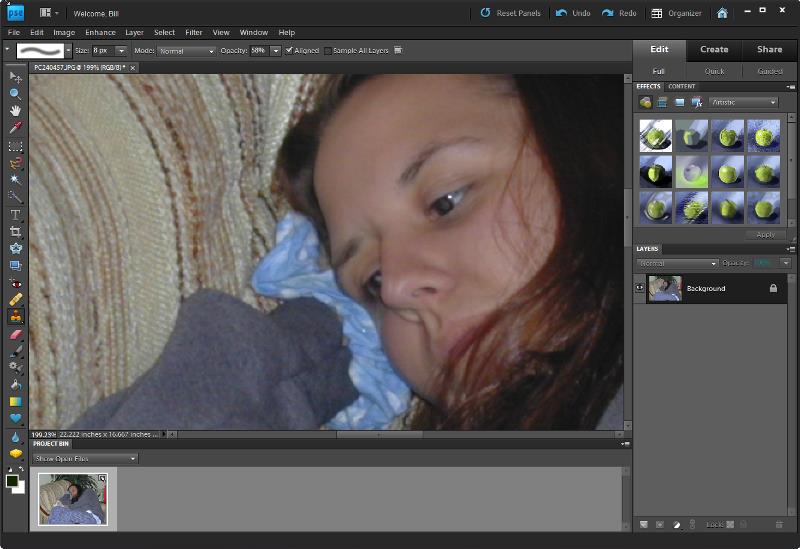
Select the red-eye correction tool and click once where the eye is red.
 Presto! But (oops) the correction in this case "corrected" a tiny bit of Elizabeth's nose when I fixed the red-eye problem in her right eye. (The error is small and I've circled it so that you can find it.)
 A bit of additional retouching (15 seconds or so) is all that was needed to fix the problem.
Beyond the Basics
You might now be convinced that Photoshop Elements is a great bargain, so now would be the time for me to utter that famous advertising phrase But wait ... there's more!
 Here's a photo from last week's visit to the Franklin Park Conservatory, where there's now a hot glass exhibit. Working the hot glass makes an interesting image, but what's with that ugly yellow sign in the background?
My preferred method for removing the sign would be to crop the image, but for the purposes of this demonstration, I'll assume that I need to keep that part of the wall. I do want to get rid of the sign, though.
Enter the content-aware spot healing brush. This is a new feature in Photoshop CS5 and it's little short of magic. This image is a particularly difficult one for content-aware healing and I chose it for that reason. The geometric shape of the bricks and the fact that the sign abuts some pipe will make this almost impossible for the process to handle correctly.
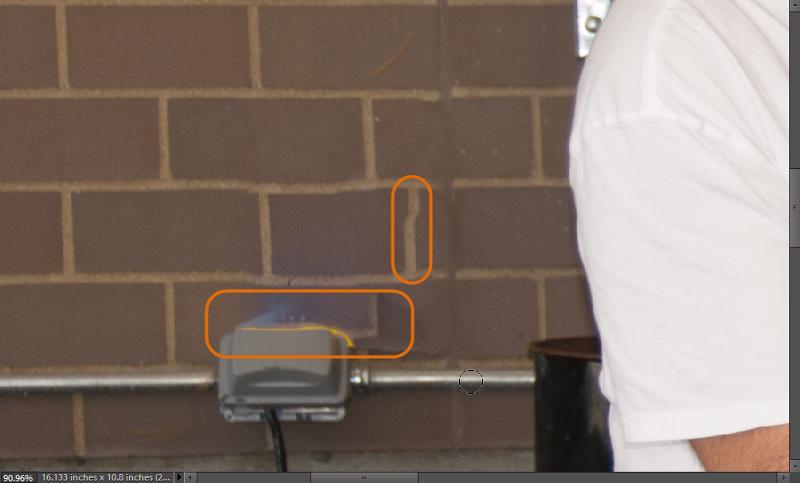 But it does a remarkably good job. One vertical line is a bit wavy and so is a horizontal line. Around the control box, some yellow remains and the process left some artifacts.
 The process was good enough, though, that completing the job manually took less than a minute.
The key to making the best use of the tools is to allow automation to take you as far as it can and then perform any needed touch-up manually.
 Here's the result. If you didn't know that an ugly yellow sign had been there, would you be able to spot the repair?
 Here's a situation that's more like what most people will encounter.
When I took this picture, I waited for a bike rider because I wanted something to give the image scale. But let's say this is a very busy bike path and you want a picture without any bikers.
 Content-aware spot healing does a perfect job here.
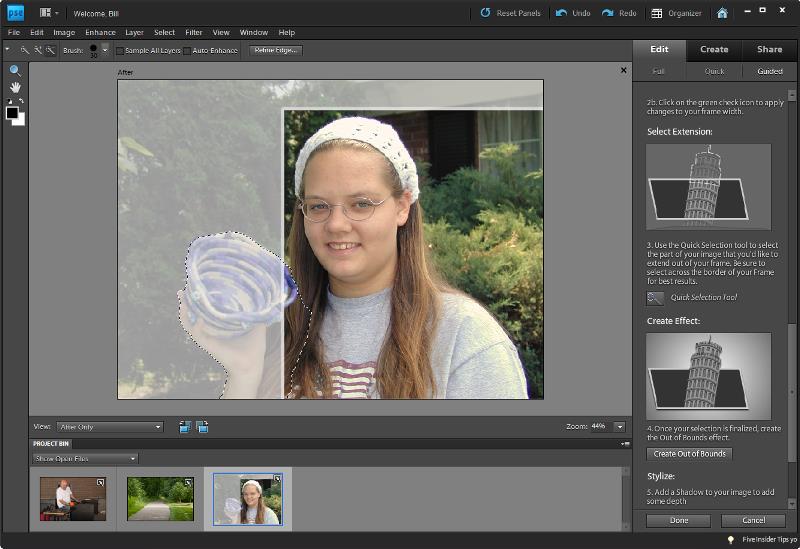
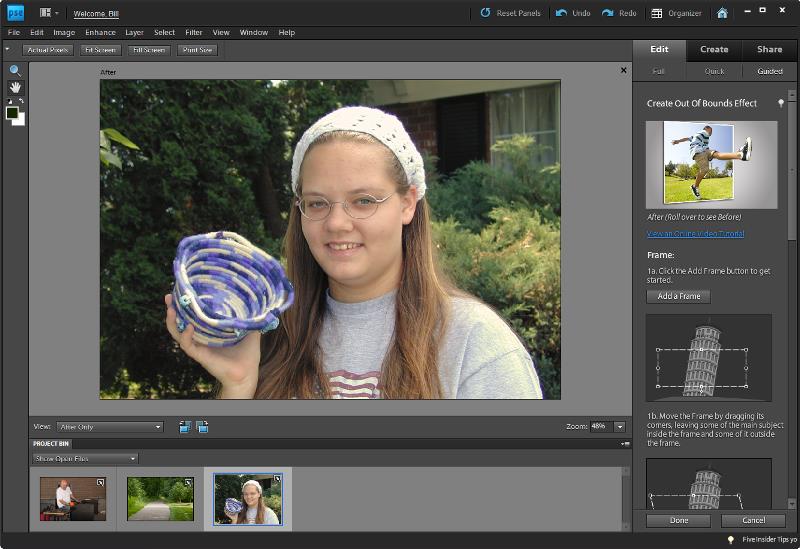 Have you ever wanted to be able to make it appear that one of your photographs exceeds the bounds of its frame? Maybe you'd like to have the object Kaydee is holding appear outside the frame. If you're a Photoshop expert, you can do this in half an hour or 45 minutes.
 I selected the image and then asked Elements to guide me. The instructions are on the right side of the screen, along with all the buttons that I need to push after making selections.
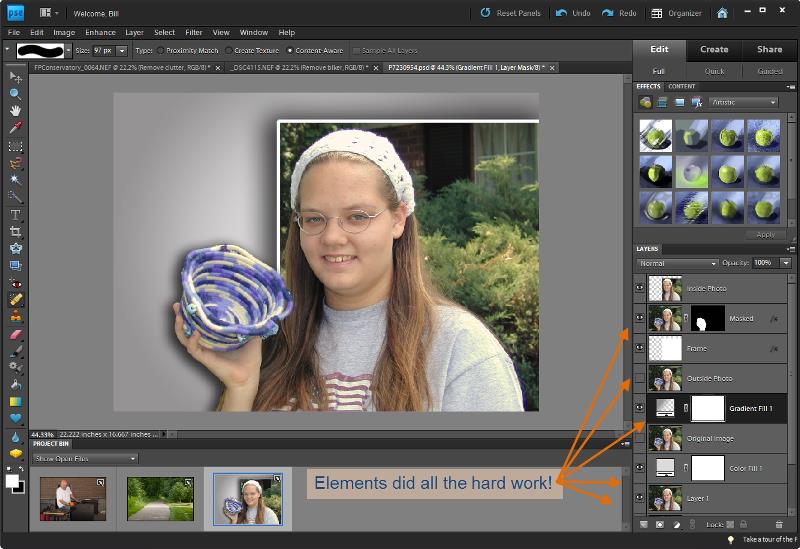 Five minutes later, I'm done.
And Elements did all the hard work. Note the multitude of layers and masks that Elements added to create the effect.
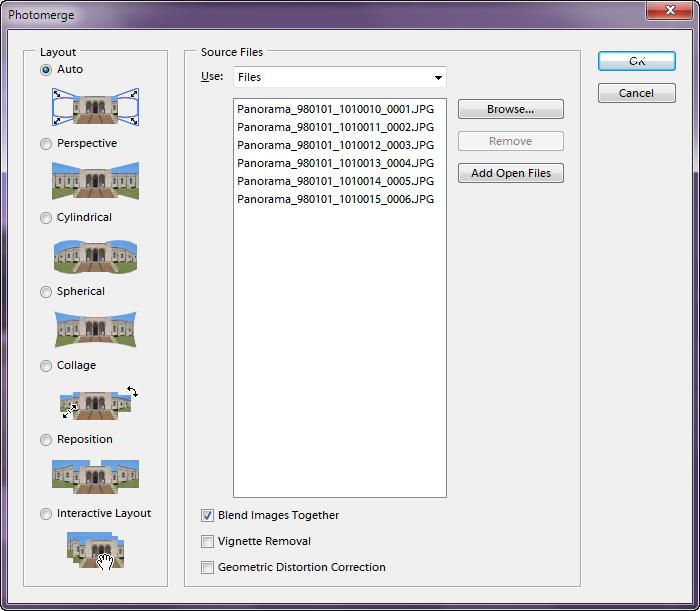 I had six images that I created at Worthington Estates Elementary School in 1998. The images were from a low-quality (by today's standards) digital camera, hand-held, with automatic exposure turned on.
I created a panorama back then by using a very expensive standalone application.
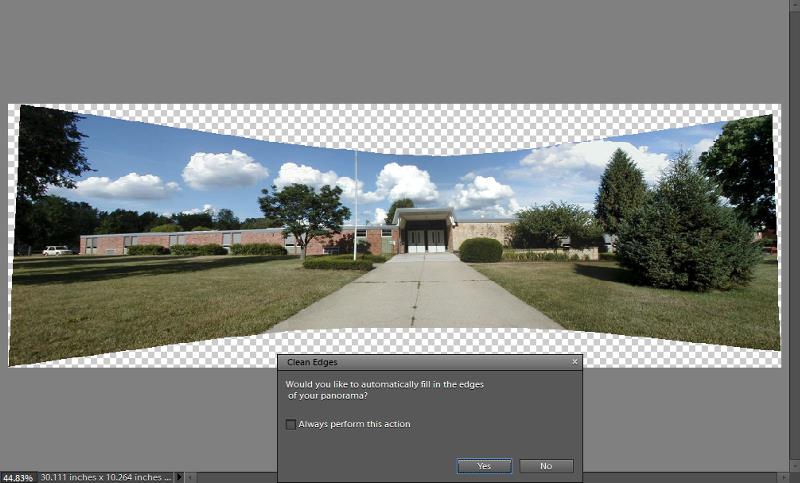 I asked Elements to merge the 6 images and it created a panorama with some large missing areas. This, by the way, is perfectly normal and expected. In the past, I would simply have cropped out the blank areas, but Elements asked if I wanted it to fill in the blank areas.
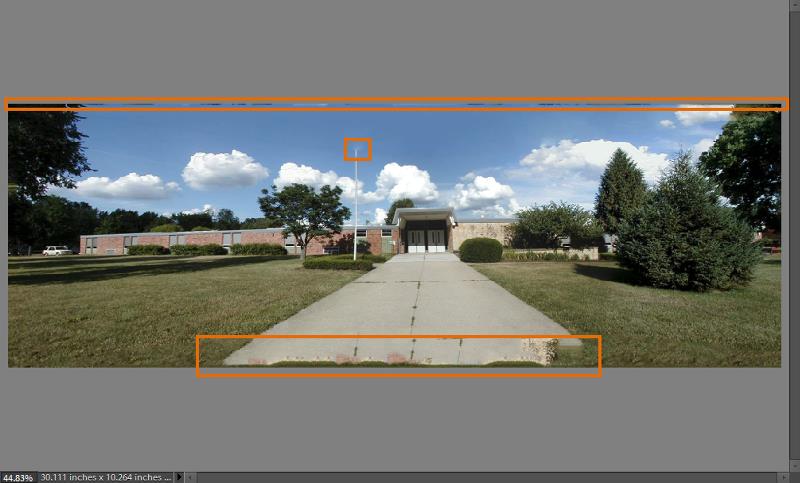 The top of the image had a tiny problem. There was a bit of funkiness around the top of the flag pole. Elements didn't know quite what to make of the sidewalk. But now a tiny bit of cropping eliminates all of the bad areas.
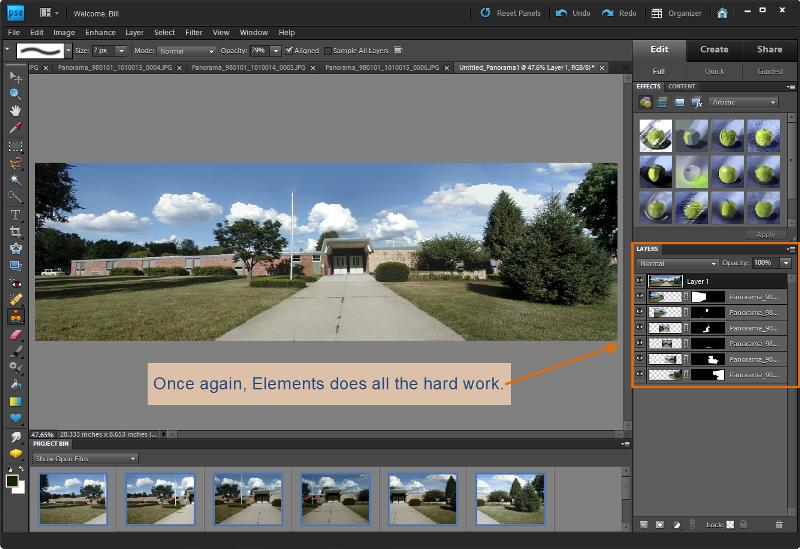 And here's my final 6-image panorama.
And That's Still Just the Beginning
I haven't even touched on using Elements to share photos, and you'll have a lot of options to do that. Nor have I mentioned some of the other creative effects you can apply to your photos, and Elements includes a lot of them. I didn't mention content-aware scaling, either, but it's also included.
Without much in the way of explanation, let me show you several other before and after examples.
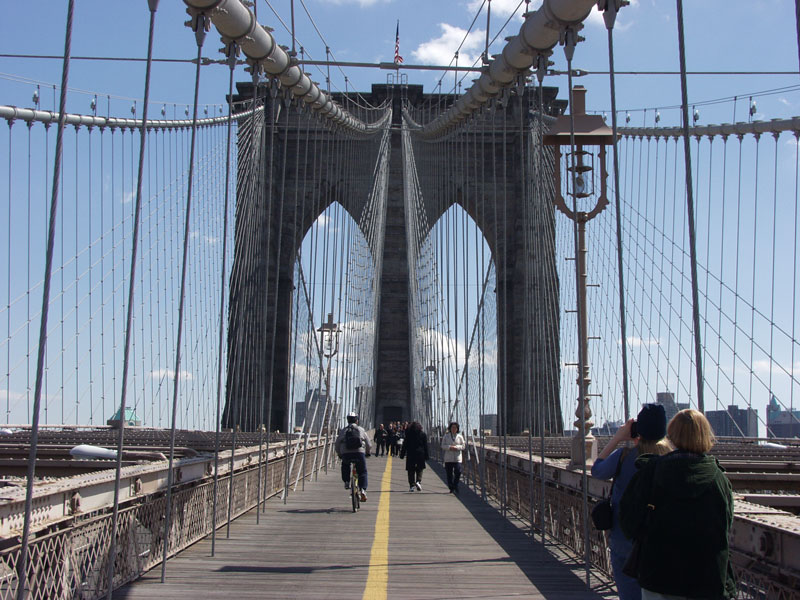 Brooklyn Bridge 2002. It's leaning to the right. The color is wrong for morning light. The camera angle created a keystone effect that makes the bridge appear to be leaning backwards.
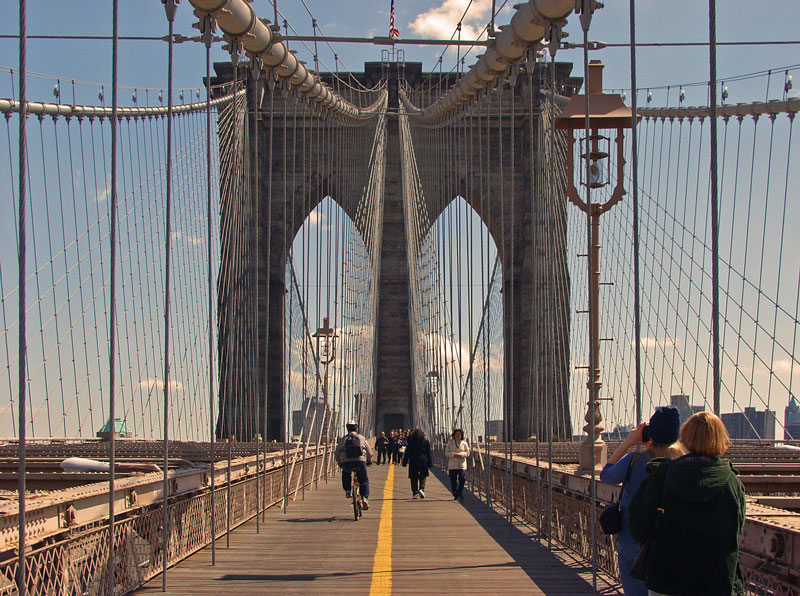 Leaning: Fixed.
Light color: Fixed.
Keystone effect: Fixed.
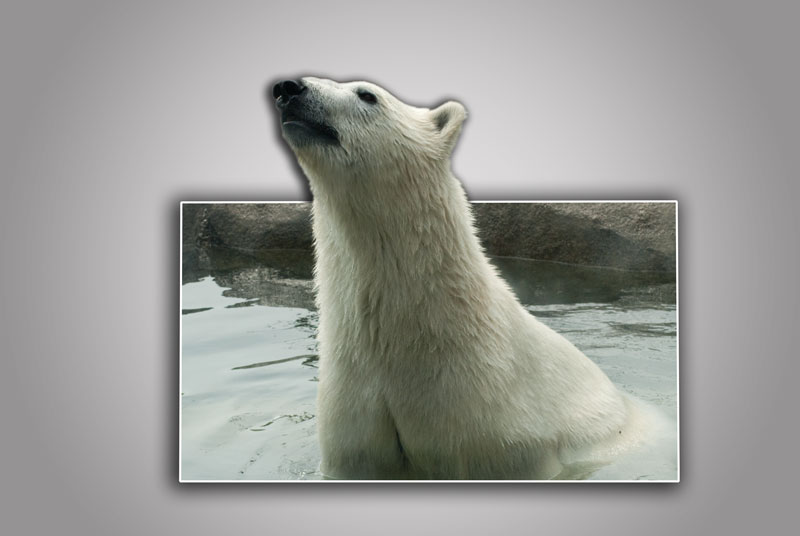
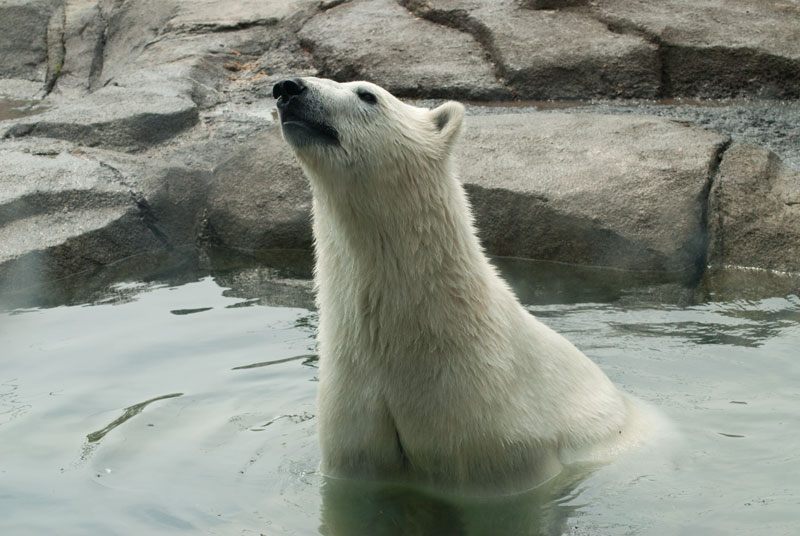 Here's a polar bear at the Columbus Zoo.
 You've seen this effect before, but it's so much fun and so easy that I have to show it to you again.
 My buddy, one of the lions at the Columbus Zoo, and a new papa, by the way.
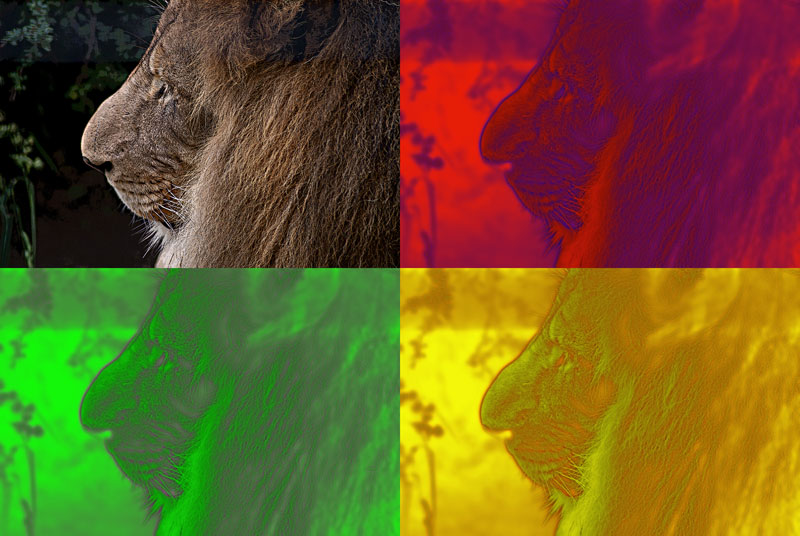 Here's an Andy-Warholesqe approach. Remember the LOVE poster?
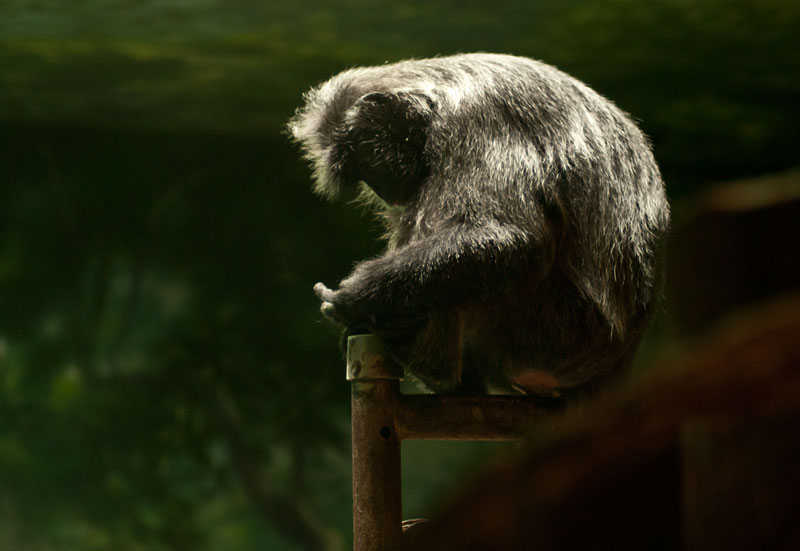 Here's a monkey sitting on a pole.
 Now the monkey is sitting on a pole that's in the water. No water was used in the making of this picture.
 Here's the Australia section of the Columbus Zoo. It's a relatively new area.
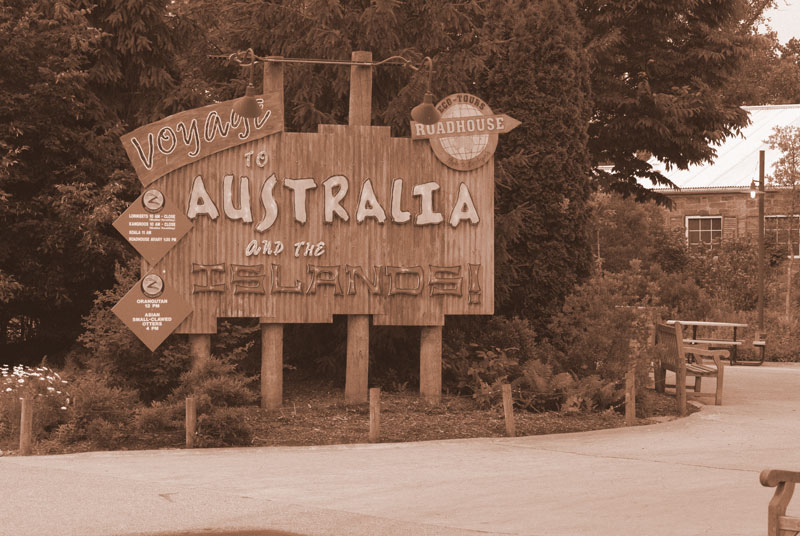 But this image might convince you that it had been around since the late 1800s.
 Here's a high-quality image from a decent digital camera, but maybe you don't want that. Maybe you want it to look like it was taken with a low-quality Chinese camera with a plastic lens, the Lomo for example.
 Here you go. It's a Lomo picture.
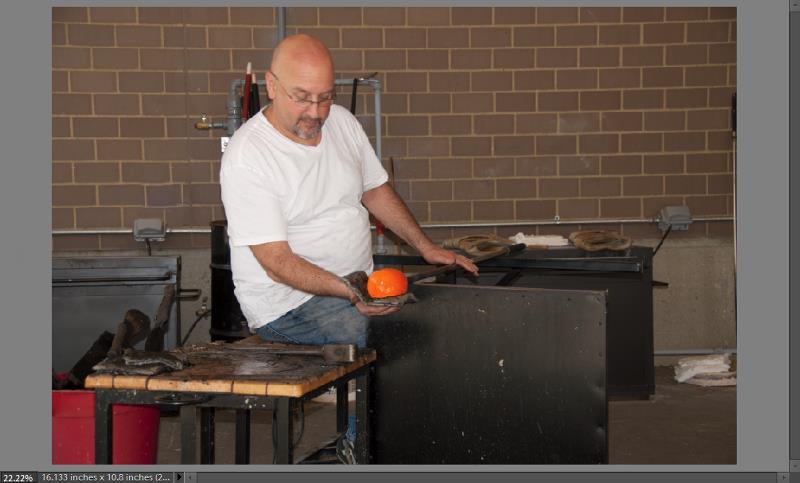
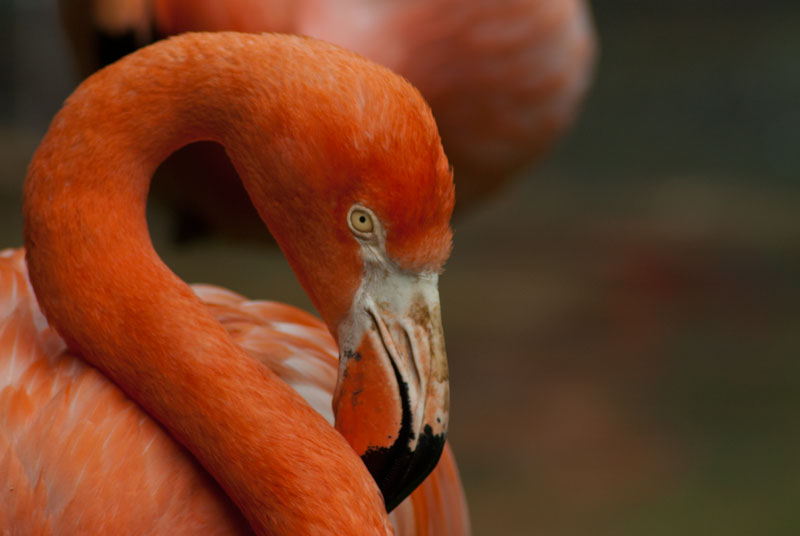
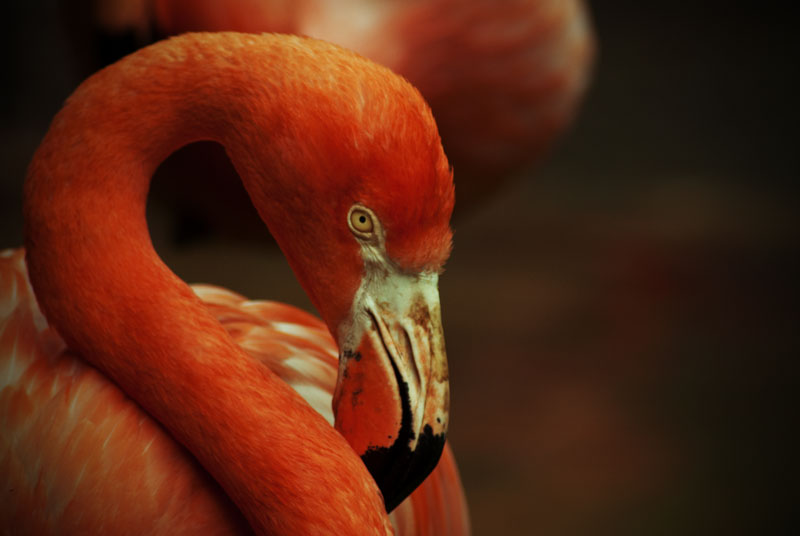
I wanted to see how well Photoshop Elements performed if I gave it a day's worth of images. A trip to the Franklin Park Conservatory provided the opportunity. Every image you'll see here was processed by Photoshop Elements.
 Bottom Line: More power; fewer dollars. Nice!
You might not expect much from an application that sells for $90 and can often be found for about $60 (after rebate), but Photoshop Elements will surprise you. Elements doesn't offer the fine granularity that Photoshop's controls provide, but you'll find more than enough to repair, enhance, and share your photos.
For more information, visit the Adobe Photoshop Elements website.
An explanation of this rating: 5 cats is TechByter's top rating. For its target audience, Elements clearly earns a 5. If you're a professional who needs professional tools, Elements would score a 2 or 3 when compared to Photoshop CS5 Extended. The two applications cannot be compared using the same scale.
You Don't Need a Weather Man
to Know Which Way the Wind Blows
This is not a political post. It's about the weather. Really. The title is from Bob Dylan's Subterranean Homesick Blues, but my commentary has nothing to do with that, either. Back in the dark ages when I was a radio deejay, one of the program managers I worked for insisted that we exit each song with the station calls, the time, and the temperature. Radio was important for that kind of information in those days. My cell phone takes care of the current time and when I need to know the temperature or forecast, I can find that easily on the Internet.
There's no shortage of sites. The National Weather Service is the authoritative source for weather information, but it might not be the best source. All of the other weather sites start with NWS data, but they add features you might find useful.
The National Weather Service
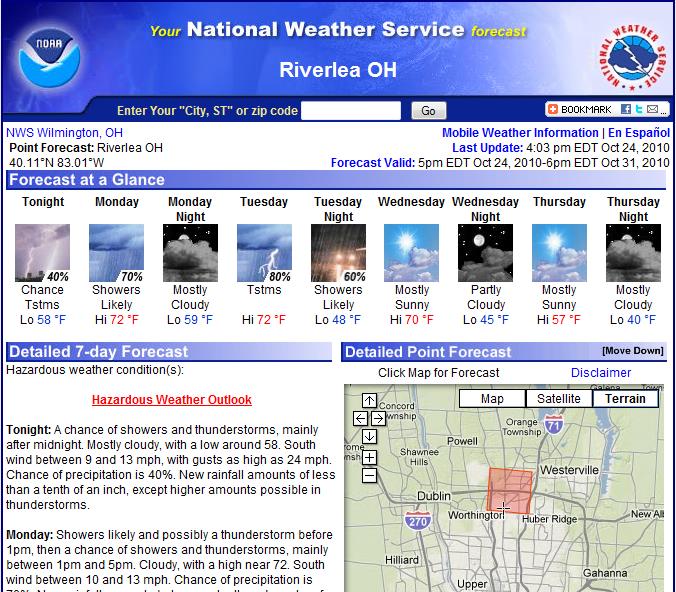
If I specify the city where I live (Worthington, Ohio), the NWS defaults to "Riverlea" a suburb of Worthington, which is a suburb of Columbus. If I provide my Worthington Zip code, the NWS suggests Columbus and shows the central part of the city, which is about 15 miles from where I live. The forecast provided goes 5 days into the future.
The Weather Channel
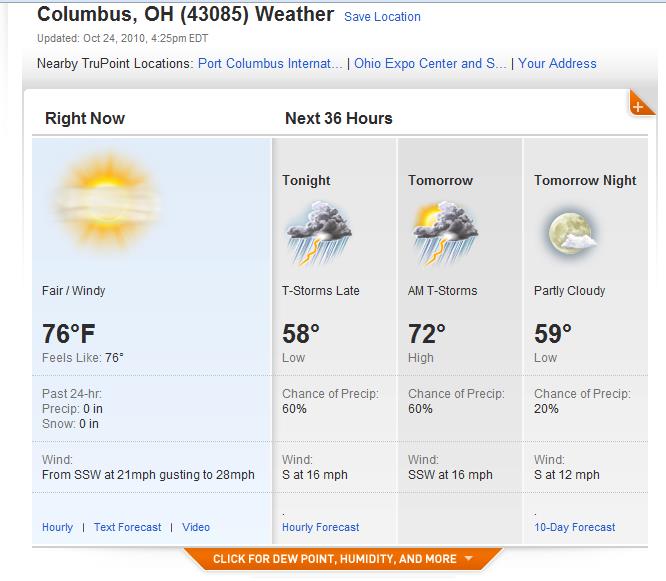
This site also says that I live in Columbus (based on the Zip code) and its forecast covers only today and tomorrow.
Weather Underground
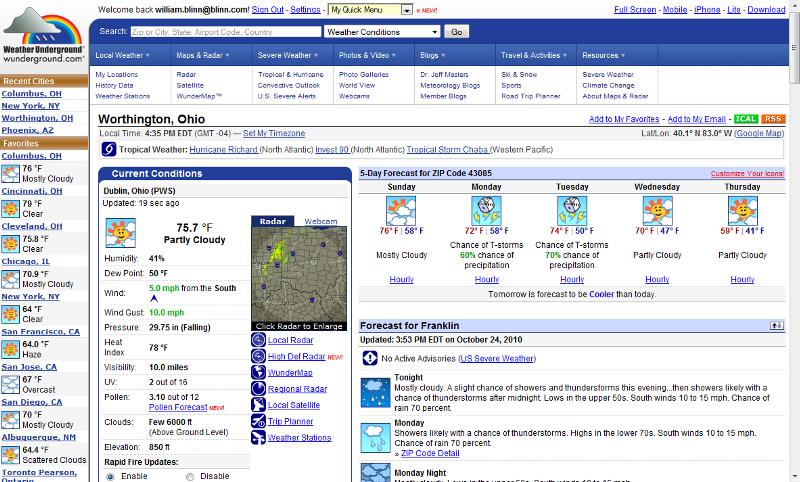
This is the site that I use. It understands suburbs such as Worthington or Hilliard But beyond that, the main page provides an exceptional range of information, including links to cities that I check occasionally, the forecast for the next 5 days, and weather radar. For $5 per year, I can suppress the ads, too.
AccuWeather
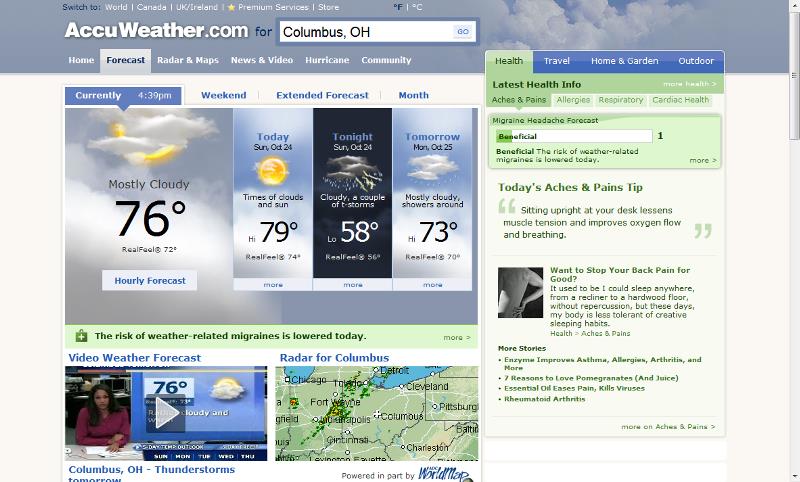
AccuWeather is the service you hear about the most on commercial broadcast stations, but it looks a lot like the Weather Channel. Worthington is considered to be Columbus and there's a huge amount of screen real estate devoted to advertising.
Yahoo
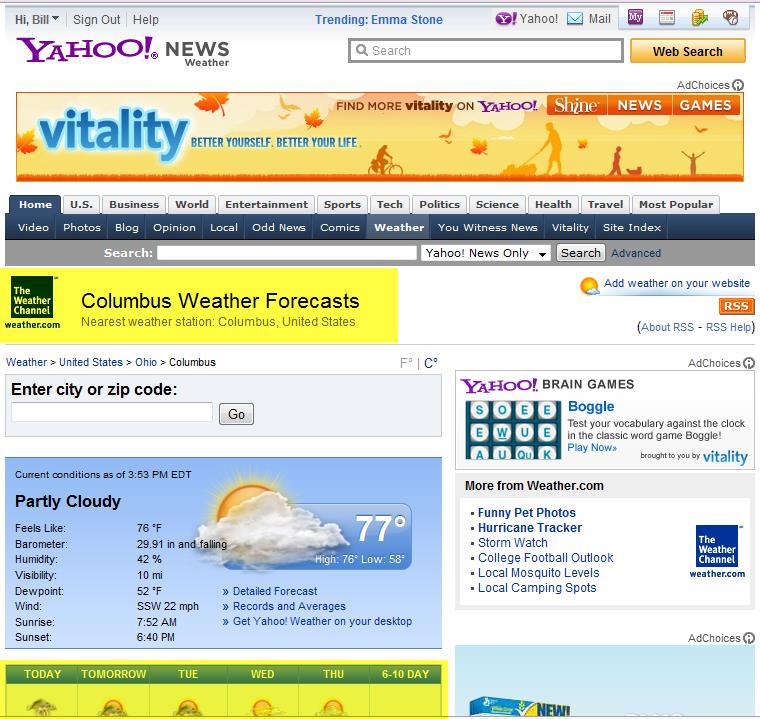
Yahoo uses The Weather Channel and fills the top half of the screen with ads. The forecast is "below the fold" even for those who have high-resolution screens. No thanks.
CNN
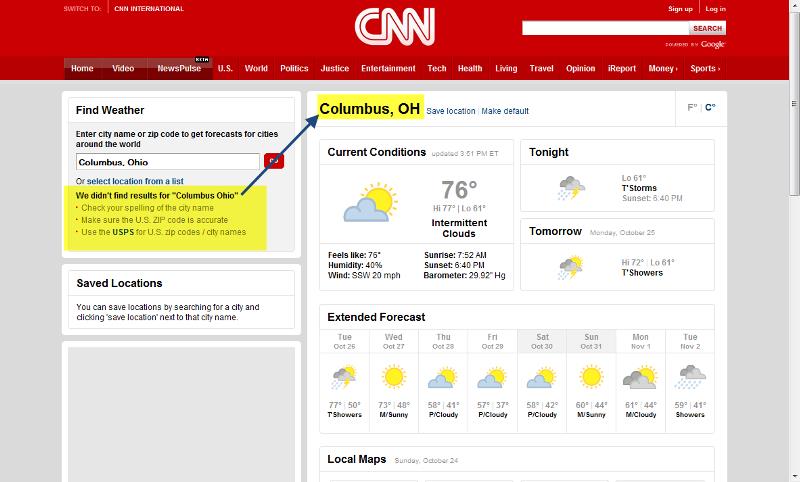
CNN doesn't recognize Zip codes or suburban cities. I had to enter "Columbus, Ohio" before CNN had a clue what I was asking about. And even then it said that it didn't know what a Columbus, Ohio, was even though it was displaying what it claimed was the weather for Columbus, Ohio. Loser.
Intellicast
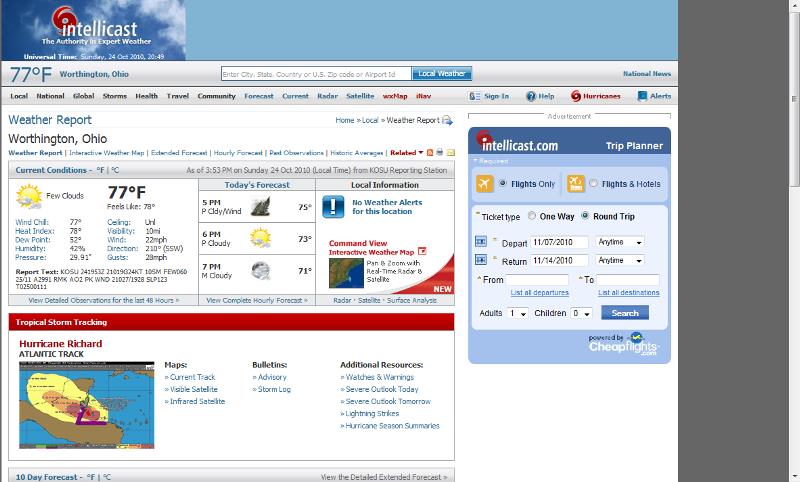
Intellicast understands that 43085 is Worthington. I like that. The main page shows only the weather forecast for today. This service might be competition for Weather Underground.
Short Circuits
At 1 Year, Windows 7 is on 240 Million Computers
We've just passed the 1-year anniversary for Windows 7 and Microsoft says the operating system has exceeded Microsoft's expectations, selling nearly a quarter billion licenses. Given the flop that was Vista, Microsoft is pleased and more than a little relieved by the past year.
Gavriella Schuster, general manager of Windows Product Management, said that overall the operating system exceeded users' expectations and, as a result, sales are about where the company thought they would be even though the economy hasn't been healthy. "We delivered what we said we were going to deliver, when we said we would deliver it."
Microsoft orchestrated the year well, starting with an event last year at the NASDAQ stock exchange. The roll-out event was nothing compared to the Windows 95 roll-out, but that was an event unlike any other in IT history. Even so, the media build-up was substantial.
In the past year, Windows 7 gained a 17% market share on computers worldwide. That amounts to about 1.2 billion computers worldwide and more than 90% of new consumer PCs have been sold with and are running Windows 7. Unlike Vista, Windows 7 is an operating system that users are willing to recommend to their friends, just as 14 months or so ago, I found myself recommending Windows 7 based on early experiences with the release-to-manufacturing code.
Business users, many of whom are still using Windows XP (or the even more antiquated Windows 2000) have begun upgrading. General Motors, for example, now has more than 20 thousand Windows 7 PCs and expects that number to reach about 80 thousand by the end of the year.
Coming to Your Windows 7 Computer: SP1
The date isn't certain yet, but Microsoft plans to release service pack 1 for Windows 7 during the first quarter of 2011. Don't expect any new features, though. The SP1 release candidate (RC1) is on the website. One thing that's unusual is that there will be no RC2 or RC3 as is usually the case. The next step will be release to manufacturing.
Beta testers who have installed the previous version of the service pack will have to remove it before installing RC1. If you want to download and install the release candidate, it's on Microsoft's Windows 7 website. The ISO that you can use to burn a DVD is about 2GB or you can download the 64-bit updater (870MB) or the 32-bit updater (515MB). The release candidate is certain to be nearly identical to what will be released in 2011, but I've decided to wait until the RTM code is ready.
The most significant change is one that most people won't need: The Remote Desktop client has been reworked to be compatible with with RemoteFX, the remote-access platform that comes with Windows Server 2008 R2 SP1.
In addition to just one RC the Windows 7 beta program was limited to a single beta that went out to testers in July. Assuming the schedule holds, you should expect the code to be available in February following a late December or January RTM date.


 The author's image: It's that photo over at the right. This explains why TechByter Worldwide was never on television, doesn't it?
